
About
with autofocus confirmation!
Tilt-shift lenses have a few specialized uses. They can alter the plane of focus by “tilting.” This can be used to create a sharp focus along something that is not perpendicular to the film/sensor, or to create an interesting depth of field (DOF) that can’t be achieved with a normal lens. Depending on the subject, this crazy DOF can make a life-size scene appear to be a small model! The other function of a tilt-shift lens is, you guessed it, “shifting.” This is most commonly used in architectural photography to prevent converging-lines distortion.
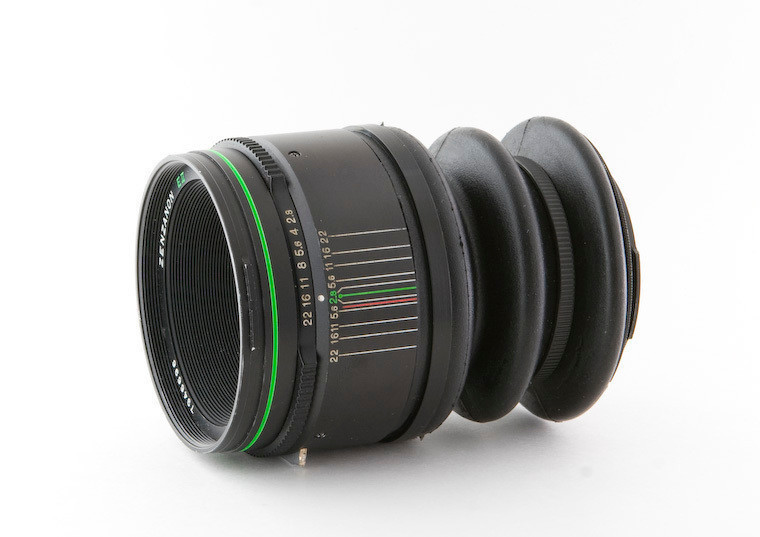
To get the most out of a tilt-shift lens, you need your lens to project a larger image circle than that of your camera. For example, to make a tilt-shift lens for a 35mm camera (APS-C, et al.), you should use a lens from a medium format camera (or larger). I chose a Bronica Zenza 75mm (purchased from ebay), which is a medium format lens. Because it projects a larger image circle than that of a 35mm lens, when tilting and shifting this lens, the effective image circle will still cover the sensor of my dSLR.
-
 Sandra M. favorited Diy Tilt Shift/Lensbaby Lens
12 Jul 02:34
Sandra M. favorited Diy Tilt Shift/Lensbaby Lens
12 Jul 02:34
-
 Nora E. added Diy Tilt Shift/Lensbaby Lens to Photography Ideas
05 Apr 16:50
Nora E. added Diy Tilt Shift/Lensbaby Lens to Photography Ideas
05 Apr 16:50
-
 Vesta favorited Diy Tilt Shift/Lensbaby Lens
26 Jan 21:02
Vesta favorited Diy Tilt Shift/Lensbaby Lens
26 Jan 21:02
-
 Falene M. favorited Diy Tilt Shift/Lensbaby Lens
13 Nov 04:55
Falene M. favorited Diy Tilt Shift/Lensbaby Lens
13 Nov 04:55
-
 Renn W. favorited Diy Tilt Shift/Lensbaby Lens
07 Jul 15:23
Renn W. favorited Diy Tilt Shift/Lensbaby Lens
07 Jul 15:23
-
J C. entered his project Diy Tilt Shift/Lensbaby Lens to Lomography
16 May 05:01
-
 Step 1
To start, I removed the focusing ring and lens mount from your larger-format lens. This will make the overall lens smaller, lighter, and it will make mounting the bellows MUCH easier. I don’t have instructions on this as each lens is different. Start by unscrewing the mount/backing plate. Then you may be able to just unscrew the focusing ring.
-
Step 2
Next, you need some kind of bellows. I used a shock boot that I got from a local 4×4 shop, which was only $5. To determine the proper length, in a “clean” environment (i.e., not in a sandstorm) hold the capless lens in front of your capless & lensless camera body. While looking through the viewfinder, move the lens in and out. Look at things near and far to find a good focus spot in the middle of the range. You want to be able to focus on things in close as well as “infinity.” Cut the shock boot so that it's a little longer than you think you'll need. If it ends up being too long once installed, it's simple to cut a little more off.
-
 Step 3
Now get your M42 extension tube ready. If you follow the pictures, it’s pretty easy to see how it’s attached. Insert your extension tube into one end of the shock boot, then 'pop' it in all the way. Secure it with a zip-tie. Once the extension tube is secure, screw on the M42 to EOS (or Nikon, etc.) adapter.
-
 Step 4
Finally, stretch the other end of the shock boot over the rear of the lens, and secure it with another zip-tie. Now your new lens will attach to your camera just like any "normal" lens.
-
 Step 5
At first, it's a little tricky to get your subject in focus, but you'll get the hang of it. Just experiment and have fun!