
About
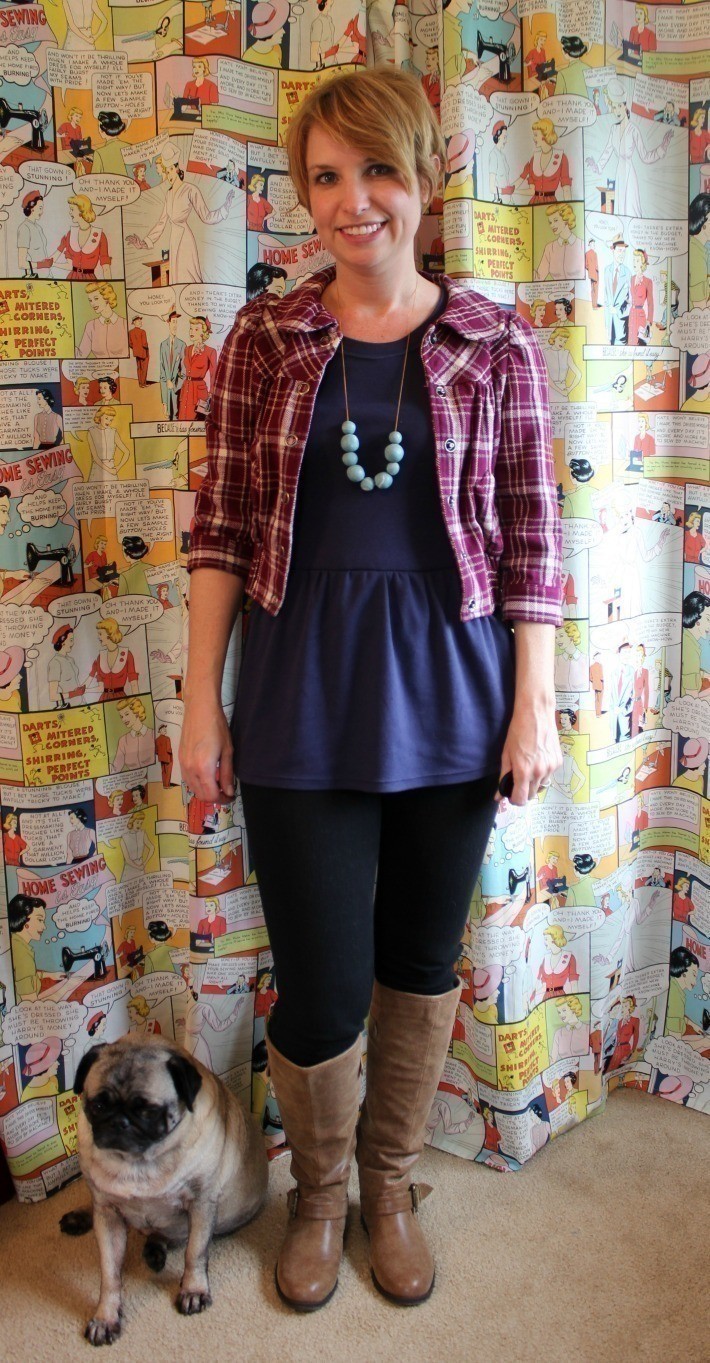
Turn a men's t-shirt into a cute peplum top!
I had made my husband a t-shirt that turned out to be too small for him. It proved comfy as a sleep shirt for me but I wanted to get more wear out of it. After searching online for inspiration I decided to turn it into a peplum tunic. Learn about my process below and turn your own oversized tees into peplums.
-
 Dannielle M. favorited DIY Refashion: From an Oversized Tee to a Peplum Tunic
11 Jul 16:10
Dannielle M. favorited DIY Refashion: From an Oversized Tee to a Peplum Tunic
11 Jul 16:10
-
Lauretta C. added DIY Refashion: From an Oversized Tee to a Peplum Tunic to sewing
22 Apr 16:36
-
Lauretta C. favorited DIY Refashion: From an Oversized Tee to a Peplum Tunic
22 Apr 16:35
-
Emma added DIY Refashion: From an Oversized Tee to a Peplum Tunic to Going to make
19 Apr 02:22
-
 Nina H. added DIY Refashion: From an Oversized Tee to a Peplum Tunic to To Do list
05 Apr 08:09
Nina H. added DIY Refashion: From an Oversized Tee to a Peplum Tunic to To Do list
05 Apr 08:09
-
Nina H. favorited DIY Refashion: From an Oversized Tee to a Peplum Tunic
05 Apr 08:09
-
C T. added DIY Refashion: From an Oversized Tee to a Peplum Tunic to Clothes! x
04 Apr 23:50
-
 Kristi P. favorited DIY Refashion: From an Oversized Tee to a Peplum Tunic
20 Feb 19:58
Kristi P. favorited DIY Refashion: From an Oversized Tee to a Peplum Tunic
20 Feb 19:58
-
Robyn A. favorited DIY Refashion: From an Oversized Tee to a Peplum Tunic
04 Feb 14:01
-
V W. favorited DIY Refashion: From an Oversized Tee to a Peplum Tunic
21 Jan 23:49
-
 Step 1
This shirt was WAY big for me. I first tried it on inside out and marked where my shoulder seam should be with a pin. I marked with chalk my new seam line for the shoulder (I added a 5/8th seam allowance) then marked where my peplum should start. I had a RTW peplum that I liked the fit of so I got that out and measured from the shoulder down to the peplum seam. I then made this marking on my shirt (15 inches from the shoulder) and cut.
-
 Step 2
Next I cut off my sleeves and put the shirt back on to figure how much I needed to take in the side seams. I pinched out about 4 inches, took the shirt off, pinned in 4 inches on each side and tried on a second time for good measure. Once I was happy with that I added my seam allowance with chalk and cut. I folded the shirt in half and cut the other side.
-
 Step 3
Using my french curve I redrafted my sleeve opening from my chalk marking.
-
 Step 4
From this point I tried to pin my sleeve back into the armhole. I had way to much sleeve cap ease so I trimmed down the sleeve cap by about 1 inch.
-
 Step 5
I pinned the sleeve to the bodice right sides together. There was still a little too much sleeve ease so I stretched the armhole until it all eased in then serged it at a 5/8th seam allowance.
-
 Step 6
Next I pinned my side seams together making sure that my arm seams matched and serged together.
-
 Step 7
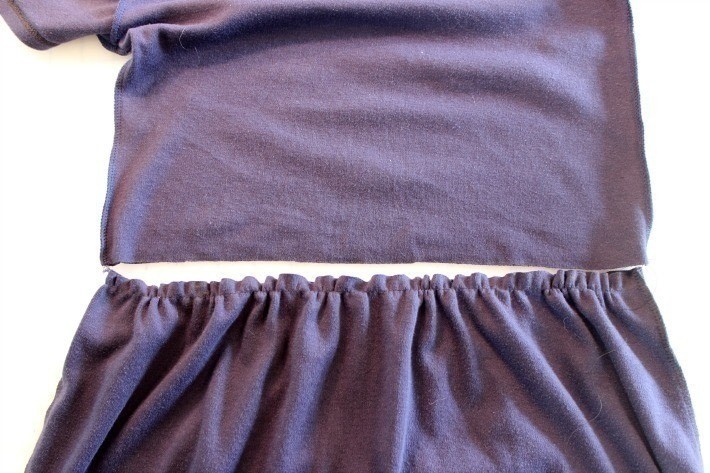
Time for the fun part of this otherwise boring tee, the peplum. I gathered the top edge of the peplum by sewing a basting stitch at 3/8th inch. I fiddled with the gathers until the peplum was the same width as the bodice edge.
-
 Step 8
I pinned the peplum to the bodice, right sides together.
-
 Step 9
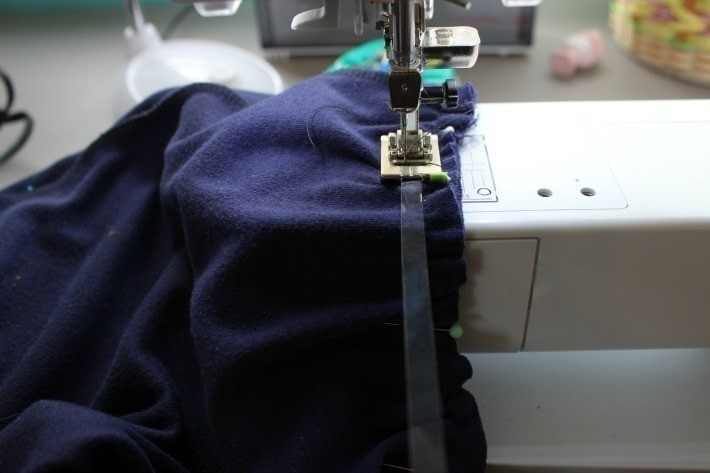
Since the waistline is now tapered and would need to stretch over my head and shoulders I used clear elastic to stabilize the seam and prevent any stretching.
I attached the elastic while sewing the peplum and bodice together. I used the zig zag stitch on my sewing machine but you could use your serger as well. -
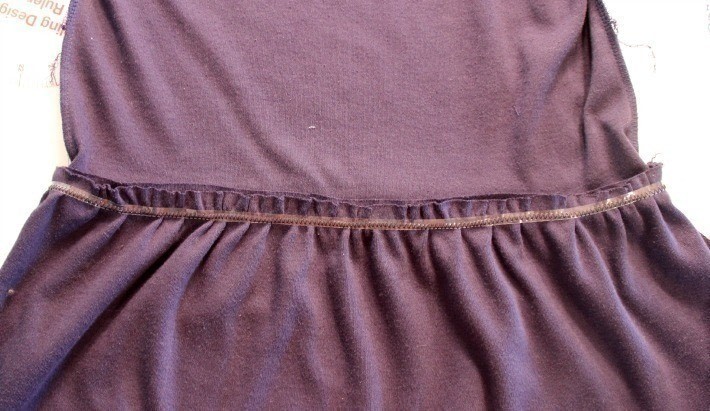
 Step 10
If you use a sewing machine for the last step trim down your seam. Press seam towards the bodice. Your finished!