


About
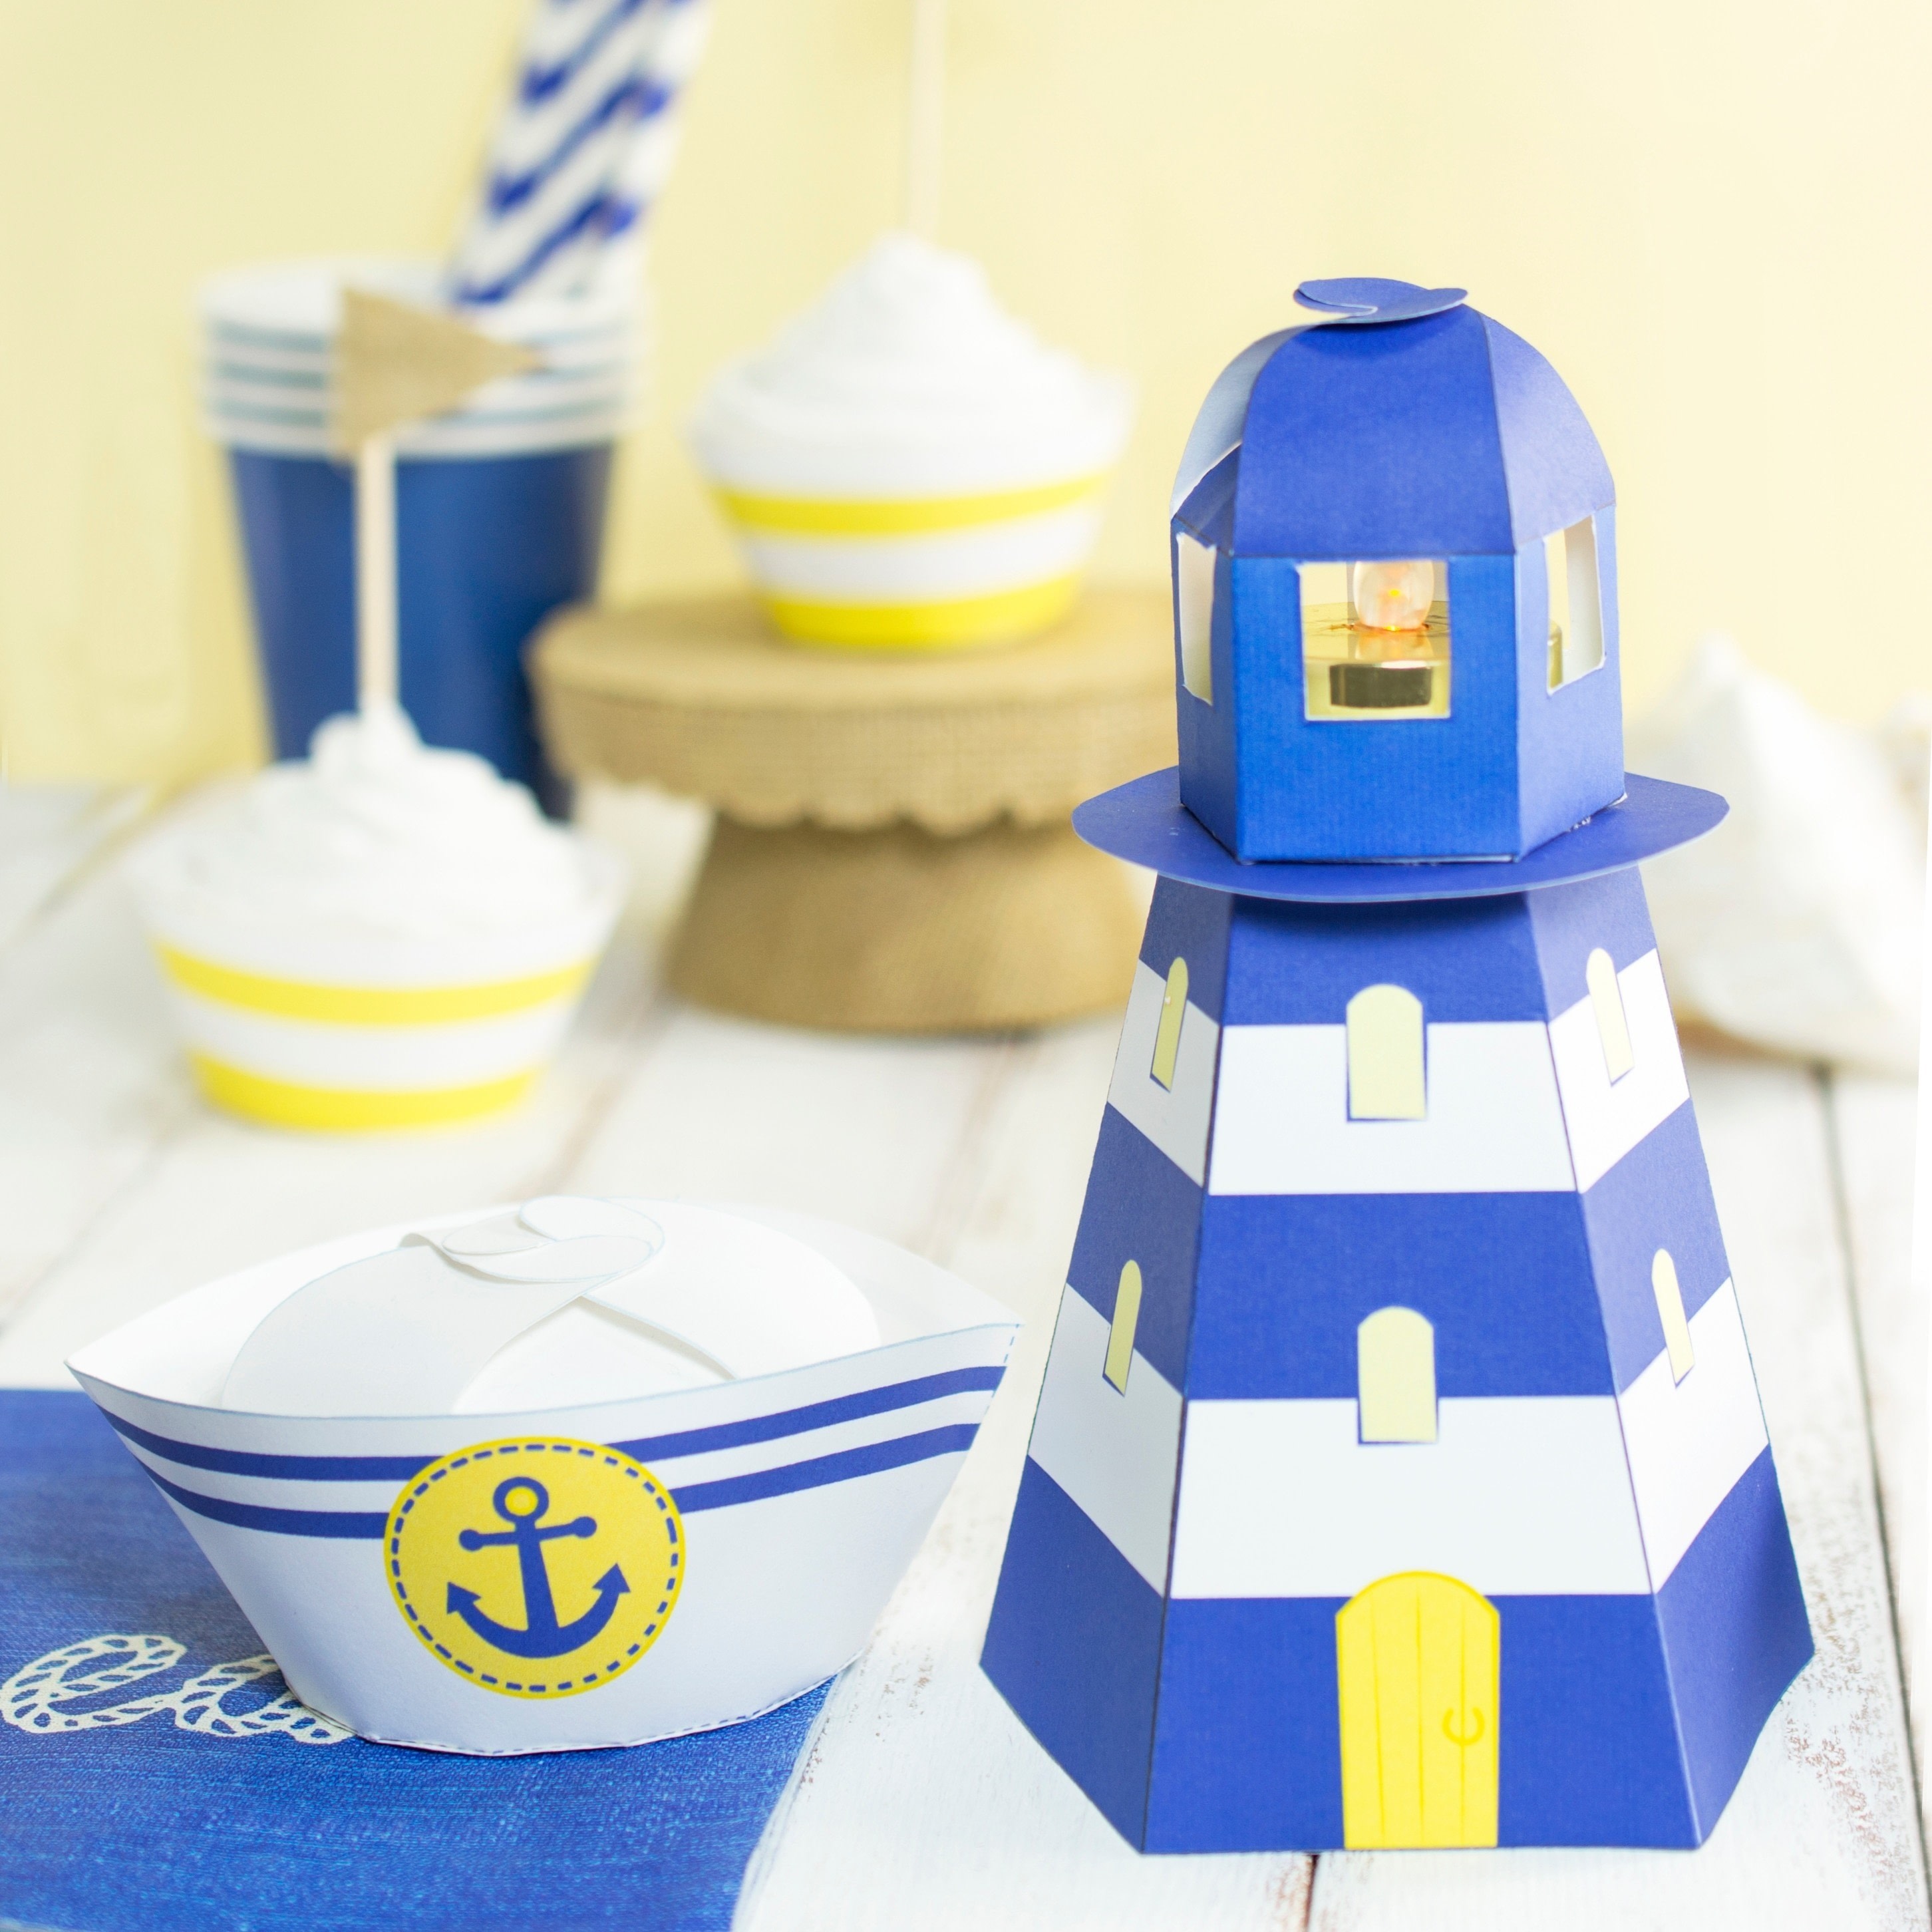
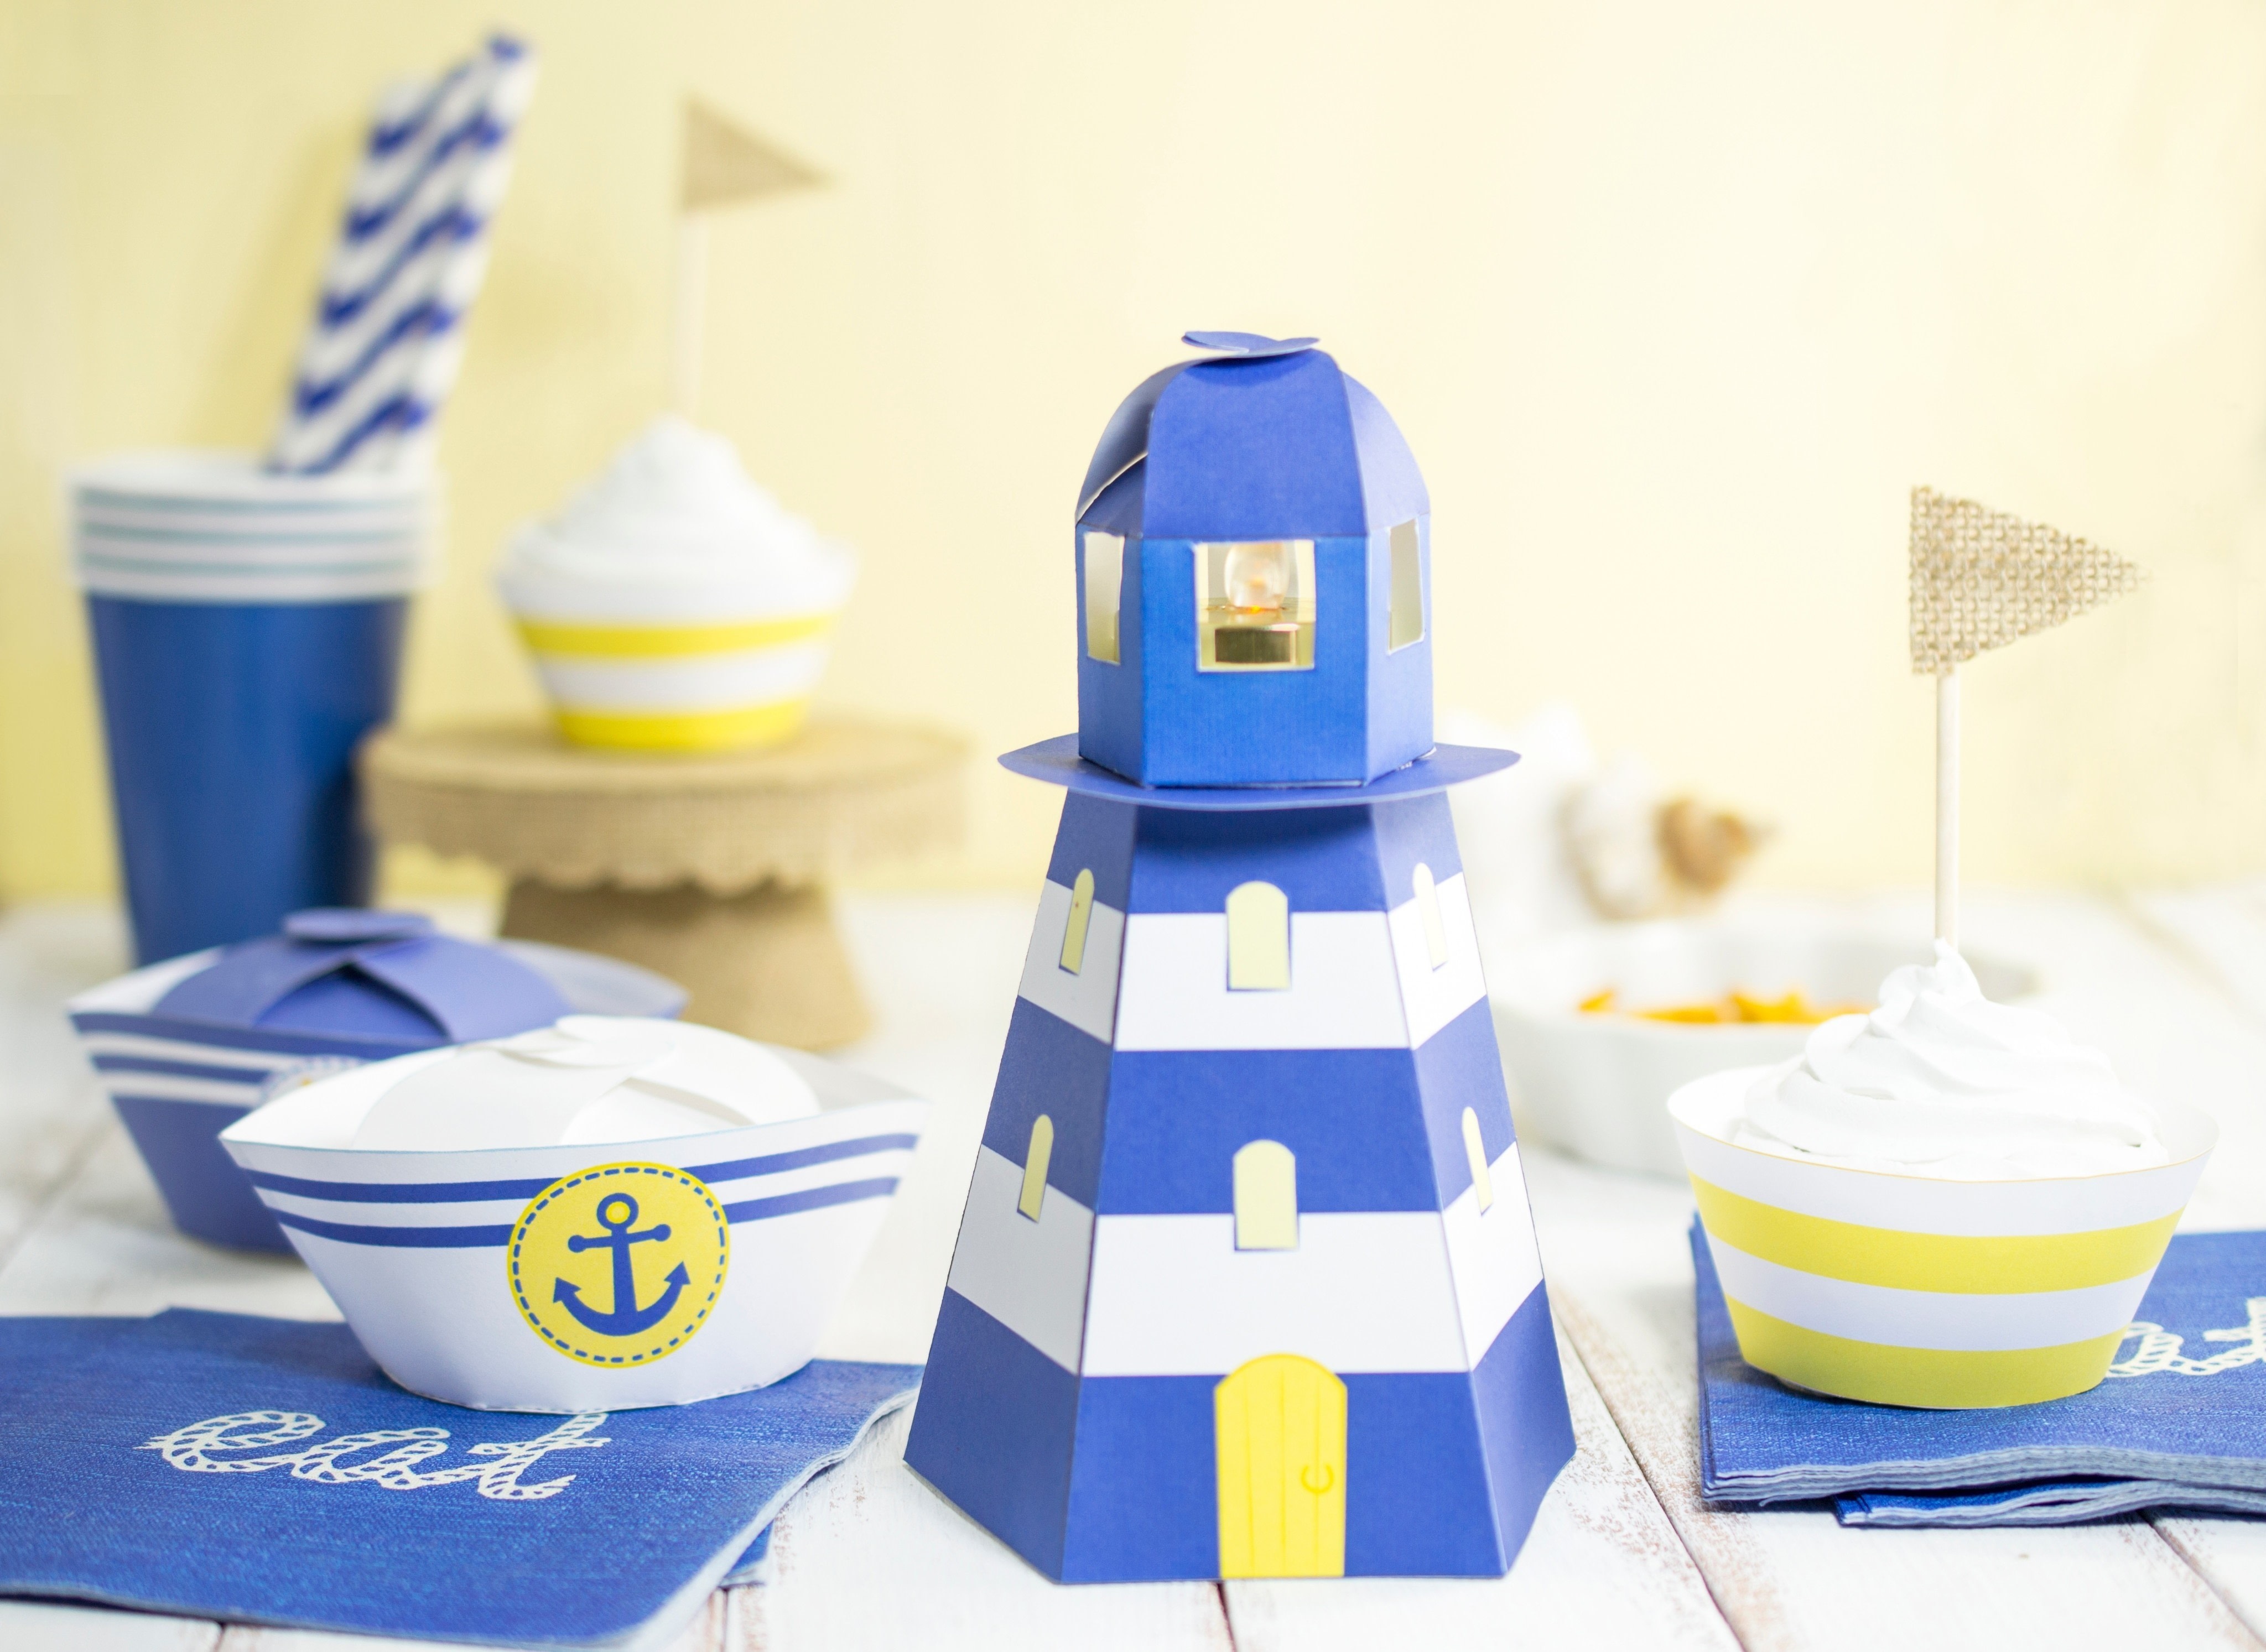
DIY Printable Lighthouse Tealight Holder
These delightful lighthouse tealight holders make perfect table decor for a nautical themed baby shower or kids nautical birthday! Simply download the printable light house templates provided, print and assemble! Please note, that this lighthouse is made out of card stock so you do need to use a battery operated tealights.
For size reference, these lighthouses measure appox. 6.5" tall by 3.75" wide at the base. You will need Adobe Acrobat Reader (it's free to download of the Adobe website) to view the print files.
Tags
Downloads
- 115499_2F2016-12-06-014452-LighthouseTealightHolder_templates_LittleLuxuriesLoft.pdf 562 KB [ Download ]
-
 Shirin L. favorited Diy Printable Lighthouse Tealight Holder
23 Jul 14:23
Shirin L. favorited Diy Printable Lighthouse Tealight Holder
23 Jul 14:23
-
 Virginia C. favorited Diy Printable Lighthouse Tealight Holder
22 Sep 12:41
Virginia C. favorited Diy Printable Lighthouse Tealight Holder
22 Sep 12:41
-
 Alex G. favorited Diy Printable Lighthouse Tealight Holder
15 Apr 13:13
Alex G. favorited Diy Printable Lighthouse Tealight Holder
15 Apr 13:13
-
Solange V. favorited Diy Printable Lighthouse Tealight Holder
03 Oct 21:45
-
 Brenda V. favorited Diy Printable Lighthouse Tealight Holder
16 Oct 01:39
Brenda V. favorited Diy Printable Lighthouse Tealight Holder
16 Oct 01:39
-
 Minna O. favorited Diy Printable Lighthouse Tealight Holder
10 May 05:56
Minna O. favorited Diy Printable Lighthouse Tealight Holder
10 May 05:56
-
Marieke D. favorited Diy Printable Lighthouse Tealight Holder
21 Jan 20:53
-
Robin M. favorited Diy Printable Lighthouse Tealight Holder
16 Jan 17:37
-
 Crafterella featured Diy Printable Lighthouse Tealight Holder
21 Dec 23:00
Crafterella featured Diy Printable Lighthouse Tealight Holder
21 Dec 23:00
-
 Nieves A. favorited Diy Printable Lighthouse Tealight Holder
19 Dec 13:06
Nieves A. favorited Diy Printable Lighthouse Tealight Holder
19 Dec 13:06
You Will Need
-
 Step 1
Once you download the lighthouse template files, choose which pages you would like to print, be sure to use a high quality print setting. Print the lighthouse templates onto white 8.5" by 11" card stock. One lighthouse fits onto a single sheet of card stock. Next cut around the template pieces.
-
 Step 2
Step 1: Using a craft knife, cut slits where the "X" appears on each window.
Step 2: To finish cutting out the windows you can either use scissors like I did here or if you're more comfortable with a craft knife finish cutting them that way :)
Step 3: Crease all the edges on the tower as well as on the lantern room. Using your fingers gently curl the dome tabs of the lantern room inwards.
Step 4: Apply double-sided tape or glue to the side tab off the lantern room.
-
 Step 3
Step 5: Match up the 2 edges of the lantern room. Hold until dry.
Step 6: Apply glue to the tab off the tower. Match up the tower edges and hold until dry.
Step 7: Fold all the tabs on the bottom of the lantern room inwards. Apply glue to all these tabs.
Step 8: Place the lantern room glue side down onto the top of the circular balcony. Hold until dry.
-
 Step 4
Step 9: Fold the tabs off the top of the tower inwards. Apply glue to all the tabs.
Step 10: Center the lantern room on top of the tower, then press and hold until dry.
Step 11: Turn on your tealight and insert it through the dome of the lantern house.
Step 12: Fit the dome tabs together at the top and volia! You're now finished your wee lighthouse. Now all those paper boats can sail safely to shore ;)


