


About
Create your own beautiful pressed flower bookmarks that will last a lifetime thanks to some handy lamination!
Easy as pie - just take some pressed flowers, arrange them artfully between two plastic sheets and then laminate away! For even more fun, add some yarn tassels to help you find your place in your book!
Tags
-
 Sarah Sylvia S. favorited Diy Pressed Flower Laminated Bookmarks
18 Jul 02:37
Sarah Sylvia S. favorited Diy Pressed Flower Laminated Bookmarks
18 Jul 02:37
-
 Kimya J. favorited Diy Pressed Flower Laminated Bookmarks
24 Jun 17:58
Kimya J. favorited Diy Pressed Flower Laminated Bookmarks
24 Jun 17:58
-
 Zornitsa A. favorited Diy Pressed Flower Laminated Bookmarks
03 Nov 06:19
Zornitsa A. favorited Diy Pressed Flower Laminated Bookmarks
03 Nov 06:19
-
 Mildred H. favorited Diy Pressed Flower Laminated Bookmarks
10 Sep 09:47
Mildred H. favorited Diy Pressed Flower Laminated Bookmarks
10 Sep 09:47
-
 Emma H. favorited Diy Pressed Flower Laminated Bookmarks
12 Aug 23:25
Emma H. favorited Diy Pressed Flower Laminated Bookmarks
12 Aug 23:25
-
 Frank W. commented on Diy Pressed Flower Laminated Bookmarks
11 Aug 14:59
Frank W. commented on Diy Pressed Flower Laminated Bookmarks
11 Aug 14:59
-
 Megan P. favorited Diy Pressed Flower Laminated Bookmarks
09 Aug 20:18
Megan P. favorited Diy Pressed Flower Laminated Bookmarks
09 Aug 20:18
-
 Reena R. favorited Diy Pressed Flower Laminated Bookmarks
09 Aug 00:50
Reena R. favorited Diy Pressed Flower Laminated Bookmarks
09 Aug 00:50
-
 Kaitlynn L. favorited Diy Pressed Flower Laminated Bookmarks
17 Jul 00:05
Kaitlynn L. favorited Diy Pressed Flower Laminated Bookmarks
17 Jul 00:05
-
 Crafterella featured Diy Pressed Flower Laminated Bookmarks
16 Jul 23:00
Crafterella featured Diy Pressed Flower Laminated Bookmarks
16 Jul 23:00
-
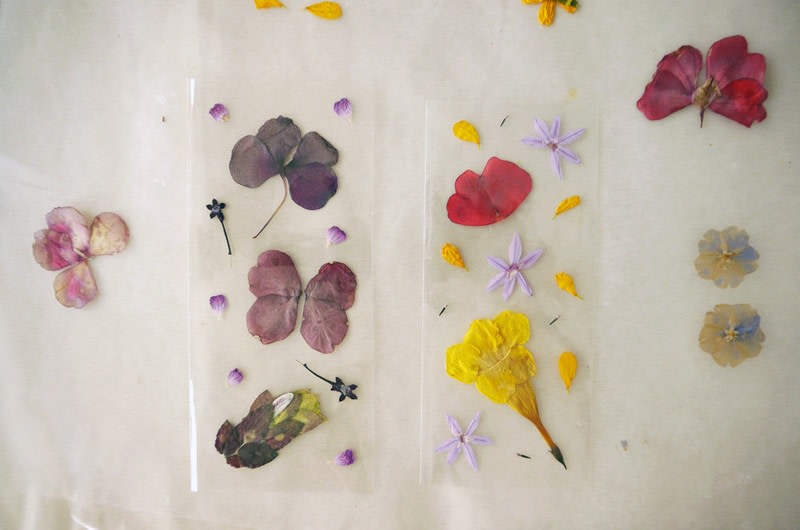
 Step 1
To start this project, you will need to first press your flowers, which means starting with fresh flowers! I tried to choose flowers that were bright and already somewhat flat in shape so that they would press well. Arrange your flowers between two sheets of absorbent paper - I used a tissue/craft type paper. I also used two pieces of wax paper to protect the boxes which I was using to press the flowers.
-
 Step 2
Once your flowers and papers are layered, press them between two flat surface (either several heavy books or boxes). I used board games! The flowers will take 5 - 14 days depending on their water content, though since I knew I was going to be laminating these between plastic, I opted for fewer days so the colors would be a little brighter.
-
 Step 3
Once you are happy with the results of your pressed flowers, you are ready to being making the bookmarks! As you can see, I experimented with several types of flowers to see which would press the best.
-
 Step 4
To make my bookmarks, I used a thin sheet of clear plastic (like the kind used to hold sheets of stickers or temporary tattoos). I cut them into the rough shape and size I wanted my bookmarks and then arranged the press flowers to my liking.
-
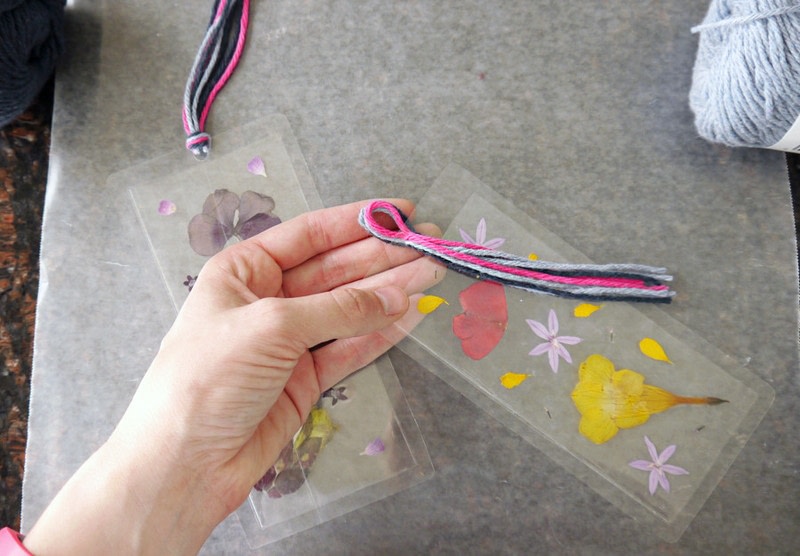
 Step 5
Now, it's time to laminate! Carefully place the plastic sheets with the pressed flowers on the receiving tray of the Xyron ezLaminator and then gently push it through as you turn the handle. When the bookmarks are through the laminator, cut the laminated sheet free.
-
 Step 6
Once you've cut out the bookmarks, you can add a hole punch to the top and then add some yarn for a fun tassel to stick out of your book!
-
 Step 7
Tada! Grab your favorite book and get ready to read in style with your handmade pressed flower laminated bookmark!!


Comments

