About
Use up those tissue paper scraps and paint-chips to make this cute bookmark !
I am a huge one direction fan, so they were the inspiration behind this. It would be so easy to personalize it in any way (:
Tags
-
 Step 1
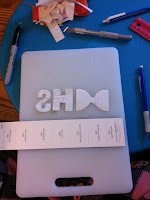
1. Draw out your design first, to plan
-
 Step 2
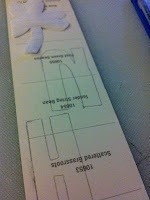
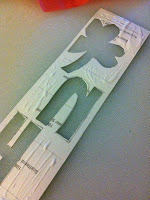
2. Cut out the designs (what you cut out will be covered by tissue paper on the bookmark)
-
 Step 3
3. Tape your cut outs onto the back of the paint chips BACKWARDS
-
Step 4
4. Trace in pencil and peel off.
-
 Step 5
5. Use exacto knife to cut out the shapes, c a r e f u l l y .
-
 Step 6
6. Spread a thin layer of glue onto the back of the paint chip and press on the tissue paper. Set aside to dry.
-
 Step 7
7. Once dry, trim around to get off excess tissue paper. You want it to be the same size as the paint chip.
-
 Step 8
8. Decorate the front using puff paints. (optional)
-
 Step 9
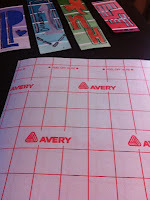
9. Use the laminating paper to seal the bookmarks.
-
Step 10
10. Cut around them, leaving at LEAST 1/4 inch boarder.
-
Step 11
11. Use a hole punch in the top, and tie on colorful stings or ribbon.