About
a fabric planter cover for your pots
create this adorable plant cover out of fabric to place over your pot in an indoor plant
-
 The Little Craft House added Diy Fabric Planters to indoor Plant Lover Party
14 Feb 02:43
The Little Craft House added Diy Fabric Planters to indoor Plant Lover Party
14 Feb 02:43
-
 Key West Witch favorited Diy Fabric Planters
06 May 02:25
Key West Witch favorited Diy Fabric Planters
06 May 02:25
-
 Tess added Diy Fabric Planters to House
22 Apr 04:26
Tess added Diy Fabric Planters to House
22 Apr 04:26
-
 Bek S. favorited Diy Fabric Planters
02 Aug 11:05
Bek S. favorited Diy Fabric Planters
02 Aug 11:05
- zombibi favorited Diy Fabric Planters 22 Feb 07:14
-
 ale_corason favorited Diy Fabric Planters
14 Nov 08:40
ale_corason favorited Diy Fabric Planters
14 Nov 08:40
-
 Harri W. published her project Diy Fabric Planters
17 Jul 21:13
Harri W. published her project Diy Fabric Planters
17 Jul 21:13
-
 Step 1
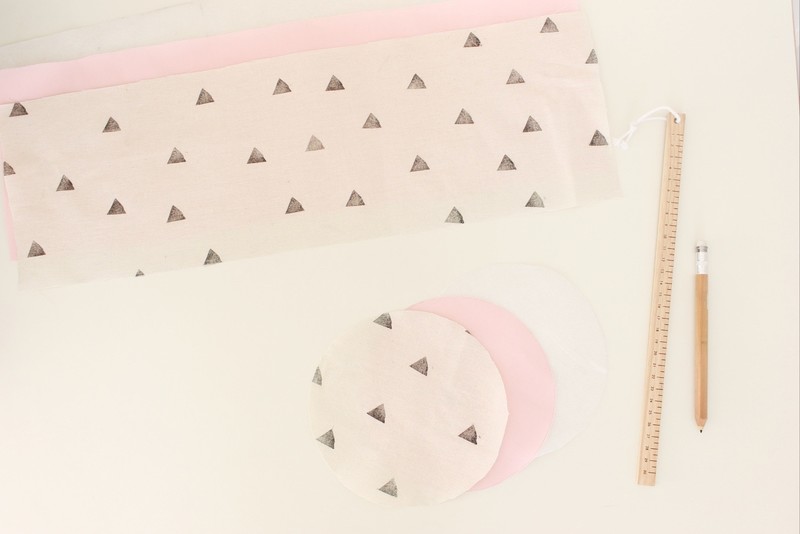
First you will want to make a stamp (or buy one) out of your eraser. Cut it out and start stamping. Lay out your calico and stamp over the right side of the fabric in the pattern that you want.
-
 Step 2
Now you want to cut out your fabrics.
you will need a circle out of each fabric including interfacing that is 16cm in diameter or adjust to your plant pot. You also need a rectangular piece of each type of fabric including the interfacing measured by 53 cm x 17 cm. If you have changed your sizing measure the circumference of your circle and add 3 cm to it to replace the 53 cm. Adjust the height by your choice.
-
 Step 3
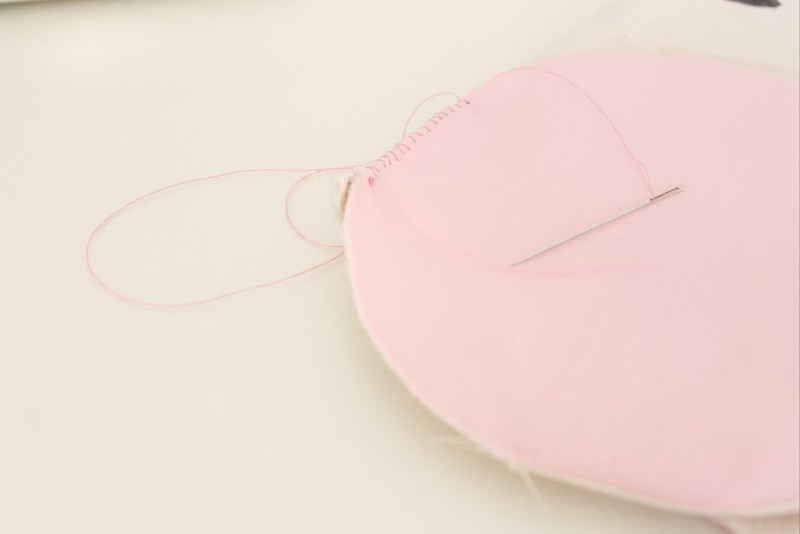
Pin each of your different shapes together in this order. Interfacing, inner fabric (colour) right side up, outer fabric right side down. Pin both the circles and rectangles in this order.
Sew around the edge of each of your shapes with a 1 1/2 cm seam allowance and a empty space to turn inside out.
-
 Step 4
Now you need to hand sew (or if you are a sewing whizz, with a machine) the base and sides together.
Do this by moving the sides around the base and sewing a blanket stitch on the inside. This is a slow process as you have to continually line up the fabrics and it is also going through 6 layers of fabric.
-
 Step 5
Now sew the two ends together and you are done!!