About
DIY Fabric Covered Phone Case
Make a fabric covered phone case in a few easy steps. This method works with paper too.
-
 Becky favorited Diy Fabric Covered Phone Case
16 May 00:25
Becky favorited Diy Fabric Covered Phone Case
16 May 00:25
-
Vicky published their project Diy Fabric Covered Phone Case
22 May 06:00
-
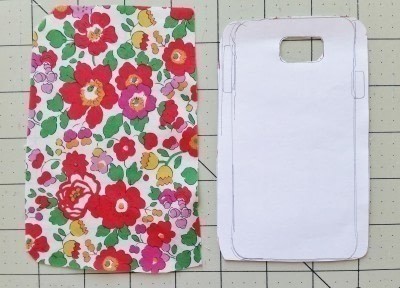
 Step 1
I first traced my phone case on a piece of paper to use as a template to cut out my fabric. I added 1/4 inches more on each side when I cut the fabric to make sure I could cover the entire case. I double checked the hole for the camera didn’t remove part of the flower in the print before cutting.
-
 Step 2
I used the shiny side of the freezer paper to protect the surface area I was working on so the decoupage wouldn’t dry on it. Then I applied decoupage to the back of my fabric and the back of my phone case.
-
 Step 3
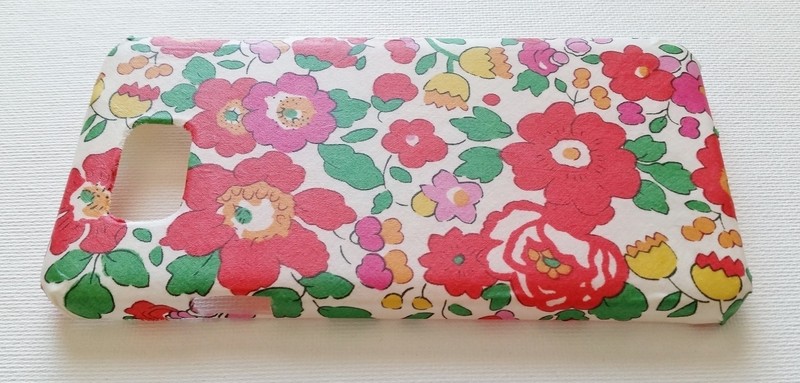
After the first layer of decoupage dried, I cut the excess fabric around the edges of the case and cut out the fabric around the holes for the buttons and the camera.
I applied 3 layers total on my fabric after letting each layer dry for about 1.5 hours. Here are 2 pictures of what the fabric texture looks like after the decoupage dries on the case. The fabric is not tacky and no longer feels like fabric.