


About
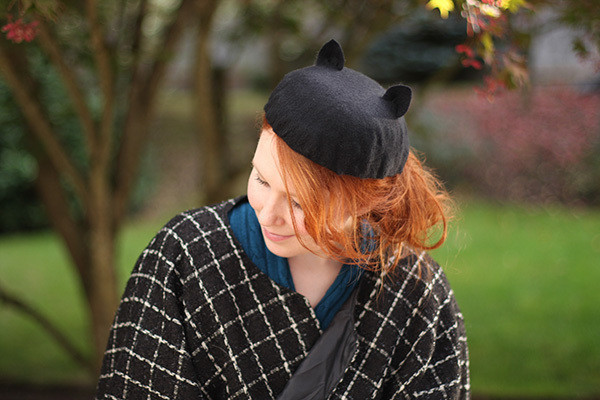
a beret-style cloche hat made from the crown of a pirate hat, with a pair of ears added for cuteness
Inspired by the kitty hats I've been seeing in the latest issues of Vivi Magazine, I decided to make my own! And it couldn't be easier than building off what you might already have - in my case, an old pirate hat!
Tags
-
 Key West Witch favorited Diy Cute Kitty Beret
07 Aug 22:56
Key West Witch favorited Diy Cute Kitty Beret
07 Aug 22:56
-
 Tierra T. favorited Diy Cute Kitty Beret
14 Oct 17:05
Tierra T. favorited Diy Cute Kitty Beret
14 Oct 17:05
-
 Bearty_Page added Diy Cute Kitty Beret to Bears
28 Jan 10:23
Bearty_Page added Diy Cute Kitty Beret to Bears
28 Jan 10:23
-
 Linkin Logs added Diy Cute Kitty Beret to My Style
14 Jan 04:39
Linkin Logs added Diy Cute Kitty Beret to My Style
14 Jan 04:39
-
 gabriella.richbourg added Diy Cute Kitty Beret to headgear
11 Dec 08:06
gabriella.richbourg added Diy Cute Kitty Beret to headgear
11 Dec 08:06
-
 DocDoolittle favorited Diy Cute Kitty Beret
04 Oct 11:17
DocDoolittle favorited Diy Cute Kitty Beret
04 Oct 11:17
-
 Kendell V. favorited Diy Cute Kitty Beret
26 Aug 03:24
Kendell V. favorited Diy Cute Kitty Beret
26 Aug 03:24
-
 Emma H. favorited Diy Cute Kitty Beret
11 Aug 23:25
Emma H. favorited Diy Cute Kitty Beret
11 Aug 23:25
-
 stephanie k. favorited Diy Cute Kitty Beret
19 May 21:47
stephanie k. favorited Diy Cute Kitty Beret
19 May 21:47
-
gabriella.richbourg favorited Diy Cute Kitty Beret
06 Apr 05:16
-
 Step 1
You Need these materials
-
 Step 2
Use the craft knife to cut around the crown of the hat.
-
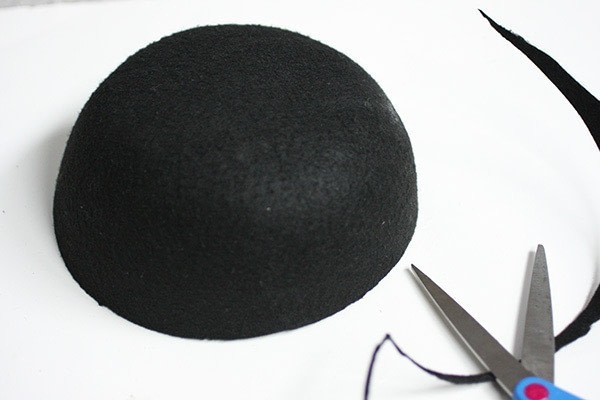
 Step 3
Separate the crown from the brim.
-
 Step 4
Use scissors to refine the edge and smooth it.
-
 Step 5
Now, you can build your kitty ears on the crown of the pirate hat as-is, but I wanted a more finished, rounded-edge beret look to my hat. The next steps are optional. You can skip to Step 14 if you like your hat the way it is.
Cut a piece of felt large enough to cover the hat completely.
-
 Step 6
Cover your hat with felt glue. Do not put glue on the sides of the hat yet, just the top.
-
 Step 7
Press the felt on firmly to bond. It helps to do this over a curved surface, like your knee. Use clothespins to pin the edges to the hat edges, tucking the extra felt to the inside.
-
 Step 8
Heat some water to boiling in a teakettle. Wearing gloves to protect your hands, place the hat edges in the steam for a few seconds, and pull away. This will heat and soften the felt, and make it pliable.
-
 Step 9
Firmly press and pull the felt over the edges of your hat to mold the new layer onto it.
-
 Step 10
Allow to cool and dry with the clothespins still on the edges.
-
 Step 11
Once dry, tuck the excess felt under itself at the outer sides. This will create the "poof" of the beret-shape. (You may have to hit it again with the steam to smooth out excess felt and prevent a lot of wrinkling and folding.)
-
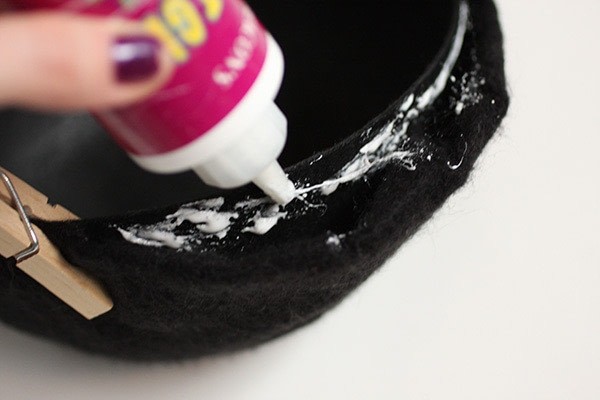
 Step 12
Now spread glue at the edges to secure the tucks.
-
 Step 13
Pin again to secure the edges until the glue dries.
-
 Step 14
Cut two triangles out of felt for your ears.
-
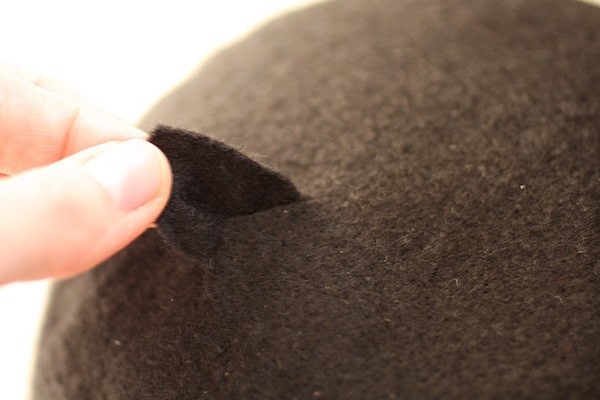
 Step 15
Use the cutter to slice a small V on the top of the hat, to one side.
-
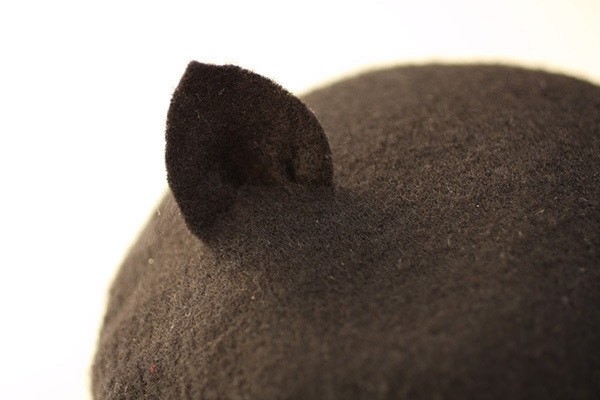
 Step 16
Closeup of the V; the tip points to the back of the hat.
-
 Step 17
Push a triangle of felt into the cut from the inside of the hat.
-
 Step 18
Pull the tip through to the outside.
-
 Step 19
Pull it through to your desired height.
-
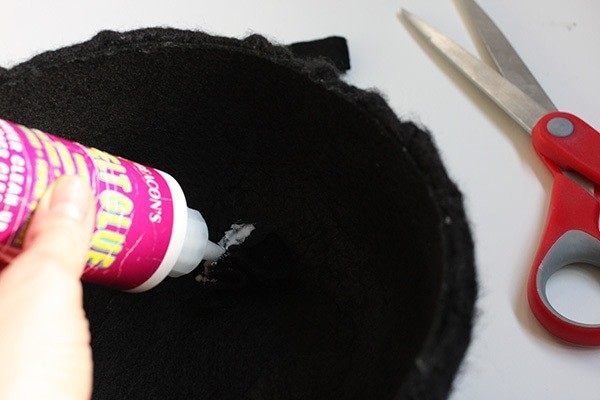
 Step 20
Trim the felt on the inside of the hat, and add some glue to it.
-
 Step 21
Tape the excess felt onto the glue until it dries.
-
 Step 22
You're done! I hope you enjoy your new Cute Kitty Hat!


Comments

