
About
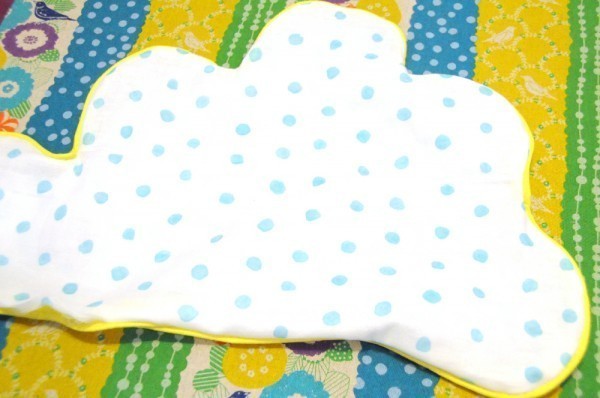
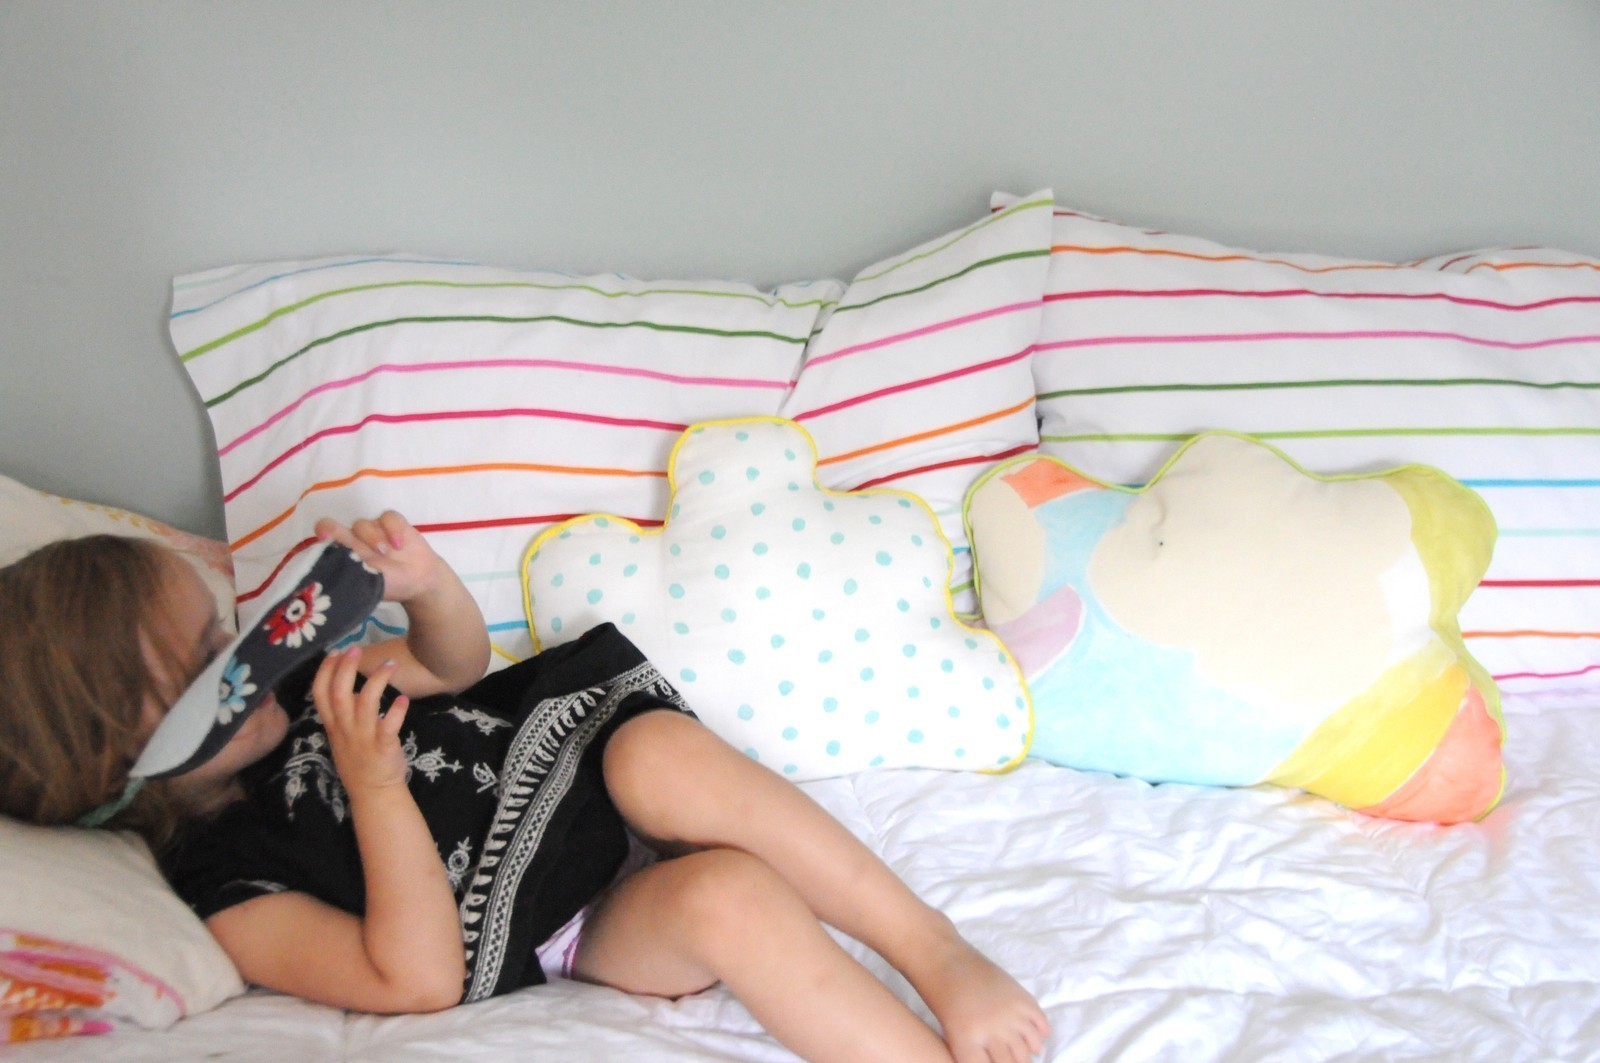
This au courant DIY cloud pillow features a tiny pocket and tooth sac to store little lost teeth overnight.
As the 13th issue of Uppercase Magazine tells it clouds are very in right now. So is the Tooth Fairy, she never goes out of style! With a nod to all that I’ve whipped up a super simple on trend DIY project hopefully sure to please both your inner modernist decorating self with the mother that knows every lost tooth needs a safe place to be stashed. And if by some strange measure the Tooth Fairy forgets to deliver, save face and read this series of posts at Inchmark Journal, one of the posts features several reader examples of making good for an over-scheduled tooth fairy that never shows.
My cloud shaped pillows feature Nani Iro fabric in double gauze and a lightweight canvas, a bright piping border (wish I had thought to find silver, every cloud could use a silver lining), a sewn pocket for ransom deposits and a teeny tiny drawstring bag to store the tooth and ensure that it does not slip out of that pillow pocket but will yank out easily for when the little fairy needs to wield it out of that place without moving one hair on the child above it.
-
 james w. favorited Diy Cloud Pillow: Featuring A Hideaway For Lost Teeth
06 Aug 04:48
james w. favorited Diy Cloud Pillow: Featuring A Hideaway For Lost Teeth
06 Aug 04:48
-
 Cris Figue favorited Diy Cloud Pillow: Featuring A Hideaway For Lost Teeth
27 Jan 21:42
Cris Figue favorited Diy Cloud Pillow: Featuring A Hideaway For Lost Teeth
27 Jan 21:42
-
 zoegirl221 favorited Diy Cloud Pillow: Featuring A Hideaway For Lost Teeth
20 Jan 05:16
zoegirl221 favorited Diy Cloud Pillow: Featuring A Hideaway For Lost Teeth
20 Jan 05:16
-
 Ashlay H. favorited Diy Cloud Pillow: Featuring A Hideaway For Lost Teeth
18 Nov 21:59
Ashlay H. favorited Diy Cloud Pillow: Featuring A Hideaway For Lost Teeth
18 Nov 21:59
-
 Nankita favorited Diy Cloud Pillow: Featuring A Hideaway For Lost Teeth
20 Oct 01:49
Nankita favorited Diy Cloud Pillow: Featuring A Hideaway For Lost Teeth
20 Oct 01:49
-
 Chris L. favorited Diy Cloud Pillow: Featuring A Hideaway For Lost Teeth
26 Sep 22:10
Chris L. favorited Diy Cloud Pillow: Featuring A Hideaway For Lost Teeth
26 Sep 22:10
-
Laura H. favorited Diy Cloud Pillow: Featuring A Hideaway For Lost Teeth
15 Sep 08:26
-
zoegirl221 added Diy Cloud Pillow: Featuring A Hideaway For Lost Teeth to sewing
15 Sep 04:52
-
 Romana S. favorited Diy Cloud Pillow: Featuring A Hideaway For Lost Teeth
07 Sep 03:10
Romana S. favorited Diy Cloud Pillow: Featuring A Hideaway For Lost Teeth
07 Sep 03:10
-
 PuddyTat favorited Diy Cloud Pillow: Featuring A Hideaway For Lost Teeth
06 Sep 23:39
PuddyTat favorited Diy Cloud Pillow: Featuring A Hideaway For Lost Teeth
06 Sep 23:39
-
 Step 1
On the tracing paper (or newspaper), free-form draw a cloud. My cloud was 12.5″ high at the tallest point and 19″ wide, mind the points, if you make very narrow angles you will need to sew and place piping on very narrow angles.
-
Step 2
Cut pattern and place on top of fabric which should be folded in half to cut two mirror-image pieces.
Cut cloud.
-
Step 3
Cut scraps to 6.5″ x 3 1/4″ (tooth satchel) and 3 3/8″ x 3 3/8″ (pocket)
-
 Step 4
Create pocket by folding top edge over 1/4″ to wrong side, fold down again 3/8″ and zig zag or straight stitch the fold down.
-
 Step 5
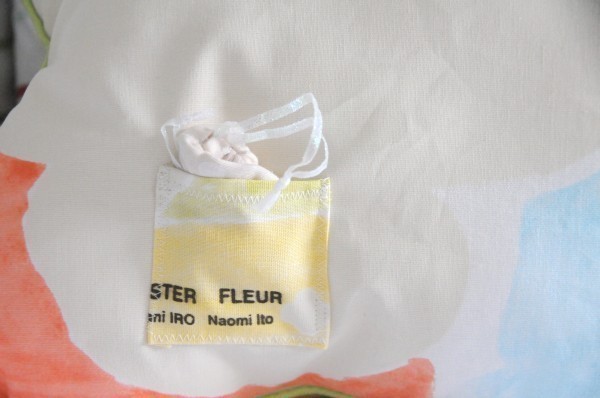
Now fold and press the other three sides in about 3/8″ inch. Place pocket on the right side of the back of the pillow. Sew around the un-sewn three edges back-stitching at the top edge of the pocket, pin in place and sew to cloud back (both right sides facing up).
-
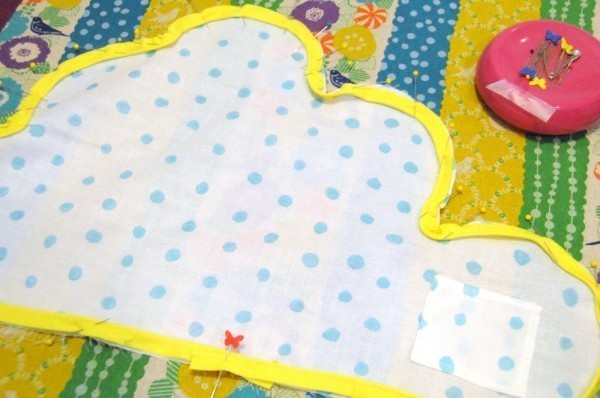
 Step 6
Pin piping to the front of one of the cloud pieces – clip piping at the extreme angles in order to make the turns. The raw edge of the piping should align with the raw edge of the pillow piece, the ends should overlap and taper down toward the raw edges of the fabric (as pictured). Sew in place, my sewing machine had an interesting all-metal attachment just for piping and invisible zippers. It made this so easy!
-
Step 7
Now place the other cloud piece on top of the piped piece (right sides together). Sew the pieces together minding the piping. Leave an un-sewn area wide enough to insert your hand and stuff the cloud – back-stitch at either end of the opening.
-
 Step 8
Turn the cloud right side out, press any major wrinkles and stuff the cloud full – but not too full.
-
 Step 9
Hand sew the opening shut with a blind stitch.
-
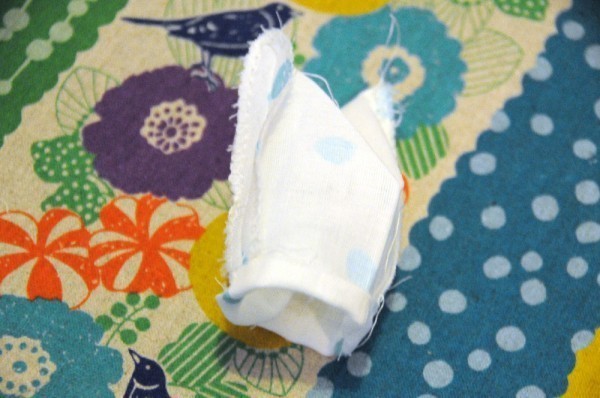
 Step 10
Take the 6.5″ x 3 1/4″ fabric scrap and zig zag or overlock stitch the two long edges of the pocket (this helps avoid excess fraying inside the bag).
-
 Step 11
Fold pocket in half, right sides together. Sew along each of the folded long sides, back-stitching at either end.
Press side seams open. -
 Step 12
Fold the upper opening toward the wrong side 1/4″, fold again 1/2″ to the wrong side.
-
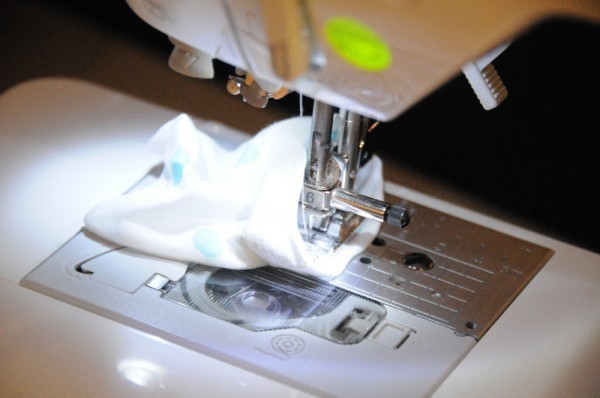
 Step 13
Sew along the lower folded edge of this sac (working with it right side out and sewing inside the bag, as pictured). Back-stitch two or three times at both seam lines.
-
 Step 14
Pick open the two seams at the top of the bag and above where you backstitched.
-
 Step 15
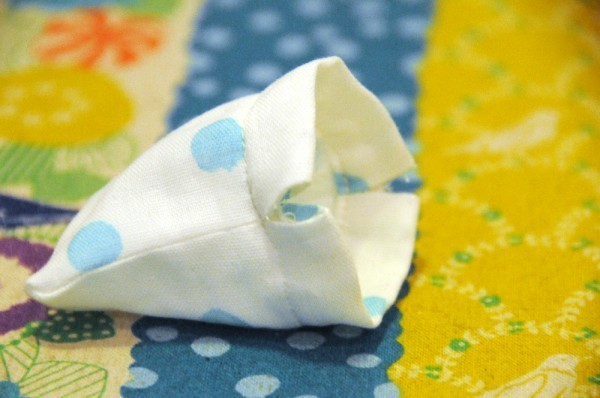
Insert ribbon through one side and then through the other section of the bag. Tie ends in a knot.
Repeat to the other side of the sac by inserting the ribbon in the oposite side so there will be knotted ends at both sides.
-
 Step 16
Press bag and insert lost teeth from your dearest people.
-
 Step 17
Wait for Tooth Fairy.