
About
be warm and cute the whole winter!
Let's be honest. Most Christmas-related outfit is hella ugly. and you can only wear in certain times, while winter goes on for months. that sucks. so why not make a Christmasy item that can be worn the whole winter? ;)
This tutorial basically will help you to reuse some fabric leftovers and an old hairband into a warm earmuff. I design this baby Santa to get the Christmas feeling but can be worn the whole winter! :) if you like you can add the Santa hat but I prefer it just like this.
if you don't like santa or don't have fabric leftovers, no worries! I added an alternative way to make it from a fluffy sock too :)
PS. templates are not included. let me know in the comment box if anyone wants them then I will upload it (cause I need to go to copyshop since I have no scanner)
I'm giving away the baby Santa earmuff! follow my instagram @judithchenartworks and or my fb (see pinned post) https://www.facebook.com/judith.chen.art
Ends December 15th. Good luck! <3
Tags
-
 judithchen entered her project Diy Baby Santa Earmuff (+Bonus Teddy Earmuff Tutorial) to Secret Santa
10 Dec 17:41
judithchen entered her project Diy Baby Santa Earmuff (+Bonus Teddy Earmuff Tutorial) to Secret Santa
10 Dec 17:41
-
 BelleandStuff favorited Diy Baby Santa Earmuff (+Bonus Teddy Earmuff Tutorial)
05 May 18:27
BelleandStuff favorited Diy Baby Santa Earmuff (+Bonus Teddy Earmuff Tutorial)
05 May 18:27
-
 Alice N. added Diy Baby Santa Earmuff (+Bonus Teddy Earmuff Tutorial) to Accessories
07 Mar 12:59
Alice N. added Diy Baby Santa Earmuff (+Bonus Teddy Earmuff Tutorial) to Accessories
07 Mar 12:59
-
judithchen entered her project Diy Baby Santa Earmuff (+Bonus Teddy Earmuff Tutorial) to Bug Bingo & DIY Board Games
22 Dec 20:41
-
 nona.lopez.90 favorited Diy Baby Santa Earmuff (+Bonus Teddy Earmuff Tutorial)
14 Dec 20:13
nona.lopez.90 favorited Diy Baby Santa Earmuff (+Bonus Teddy Earmuff Tutorial)
14 Dec 20:13
-
 BlackCherry favorited Diy Baby Santa Earmuff (+Bonus Teddy Earmuff Tutorial)
13 Dec 00:12
BlackCherry favorited Diy Baby Santa Earmuff (+Bonus Teddy Earmuff Tutorial)
13 Dec 00:12
- kkit12 favorited Diy Baby Santa Earmuff (+Bonus Teddy Earmuff Tutorial) 09 Dec 02:38
-
 Annika G. favorited Diy Baby Santa Earmuff (+Bonus Teddy Earmuff Tutorial)
08 Dec 00:52
Annika G. favorited Diy Baby Santa Earmuff (+Bonus Teddy Earmuff Tutorial)
08 Dec 00:52
-
judithchen entered her project Diy Baby Santa Earmuff (+Bonus Teddy Earmuff Tutorial) to Secret Santa
07 Dec 08:53
-
 Crafterella featured Diy Baby Santa Earmuff (+Bonus Teddy Earmuff Tutorial)
01 Dec 12:29
Crafterella featured Diy Baby Santa Earmuff (+Bonus Teddy Earmuff Tutorial)
01 Dec 12:29
-
 Step 1
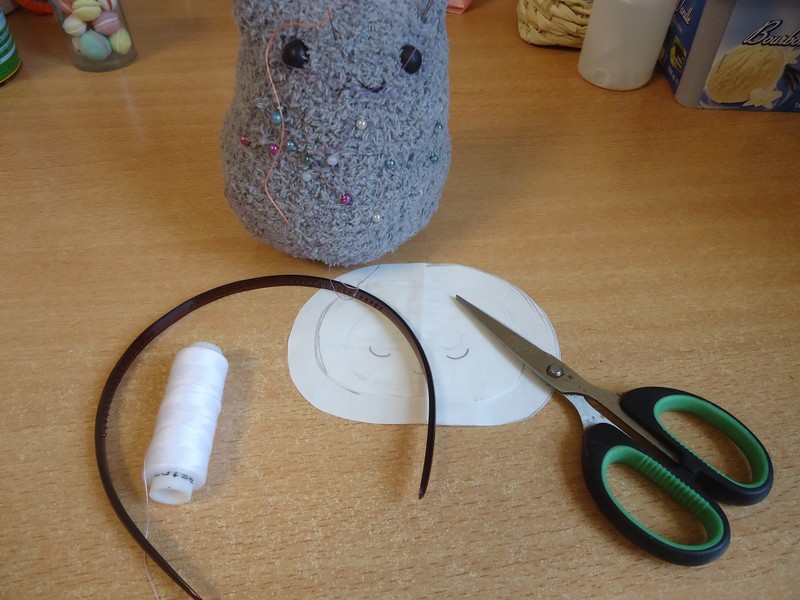
Prep all your stuff. Be sure all you need is on the table or within reach. Remember you can make ANY designs, it really depends on your creativity. So what I'm gonna do is letting you know the process plus the tips.
First, regarding the fabric. depending on the design you want, you don't have to use minky shaggy, just make sure the fabric is thick enough so its warm (and of course comfortable). you can even use old knitted sweaters. fluffy socks is also possible if you don't have thick fabric scraps, scroll deep down in this page to see how.
fluffier fabric makes a snugglier and warmer one, but the one from socks has its own cuteness. chose wisely ;)
Second, make sure you chose a headband that snugs your head well, not too loose or too tight.
-
 Step 2
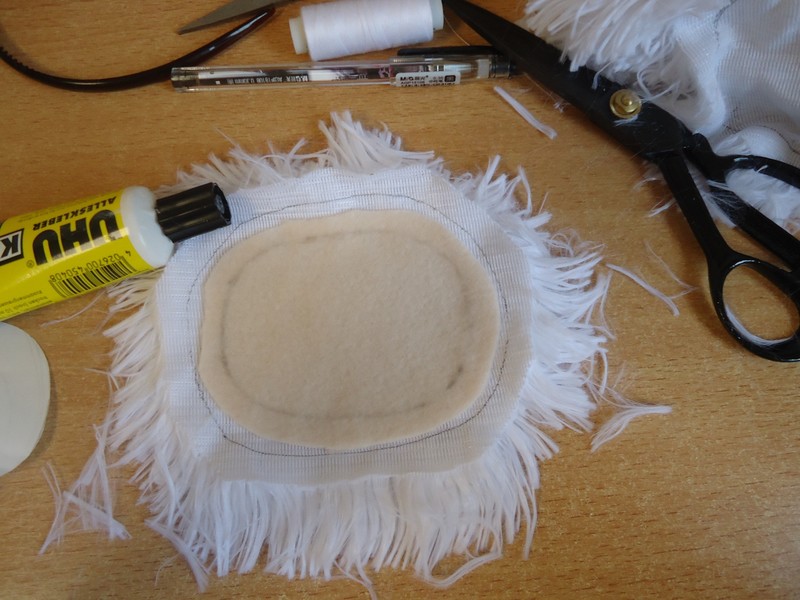
cut out the templates or your desired shape. for the baby santa you are basically making two oval face-like shapes, one large and one smaller. cut the white fabric with the bigger template, and trace the middle part with the smaller template. cut out the middle part. glue the flesh colored fleece from the wrong side to cover the cut part. make two of these.
-
 Step 3
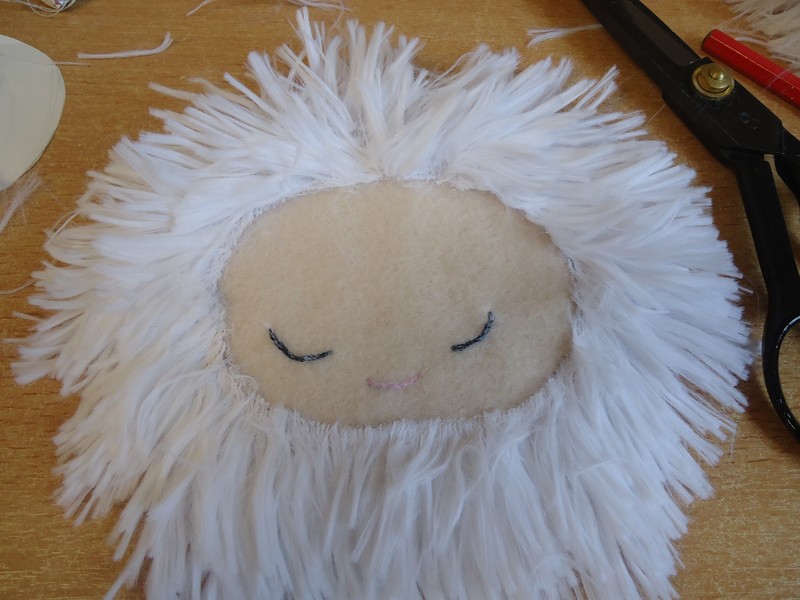
it should look like this from the front. do the same with the other because we need two santa heads. I make mine with one open eyes and one sleeping eyes.
now you can embroider the eyes, or simply glue some craft eyes if you'd like it open.
embroider the mouth as well.
-
 Step 4
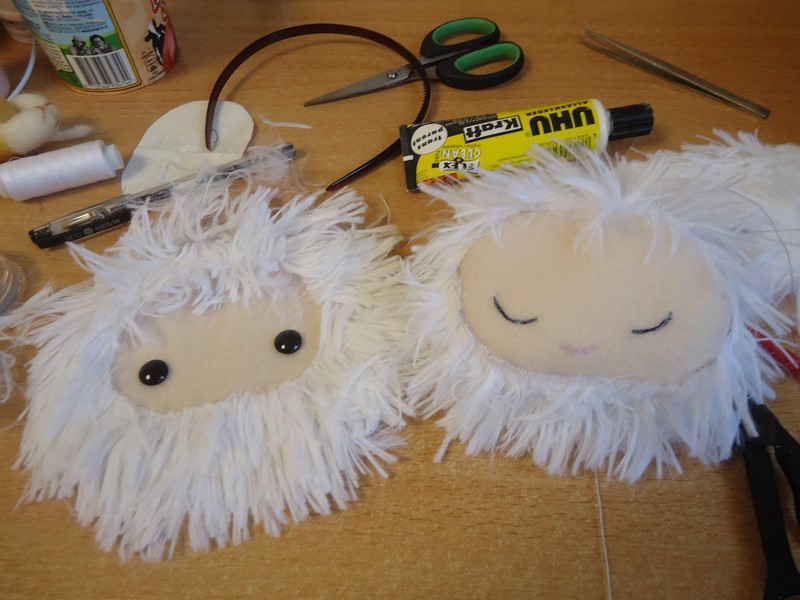
They should look like this.
Sew from the wrong side, and remember to leave the middle part of the middle of the head open to insert the head band later.
turn inside out and stuff firmly. DO NOT close the opening left in the middle of the head.
-
 Step 5
It should look like this. they're ready! set them aside for now. Add some rosy cheeks with make up brush and blush on if you like.
aww, we're getting close to done!
-
 Step 6
This step is optional but I really would suggest you to do it. Its totally ok to use the headband as it is but wrapping it would make the ear pieces secure better and overall more comfortable to wear. Plus it looks nicer, too!
Cut some matching fabric into strips. I have these from the other earmuff so I just use the same one. its a sock leftover I got from when I teach my friend making sock toys. the fabric frays so I sew them but otherwise feel free to just glue it to the headband.
-
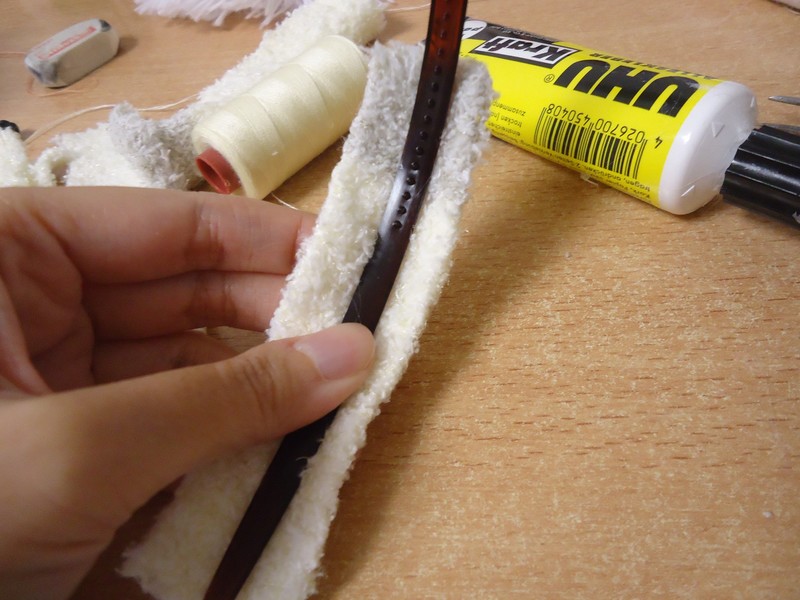
 Step 7
I only have scraps so I have to glue it one by one and attach the strips in between. but if you have a longer fabric just cut it in one strip and wrap it. the edges of each tip does not need to be very neat because it will be inserted to the ear pieces.
if you're using scraps like me, simply glue the middle part of the strip and wrap it to cover the band from showing.
-
 Step 8
sew carefully or just glue it if your fabric isn't fraying like mine. when attaching another strip, fold a little bit of the tip then continue gluing and sewing.
-
 Step 9
Keep going...until all covered. don't forget to sew in between strips.
-
 Step 10
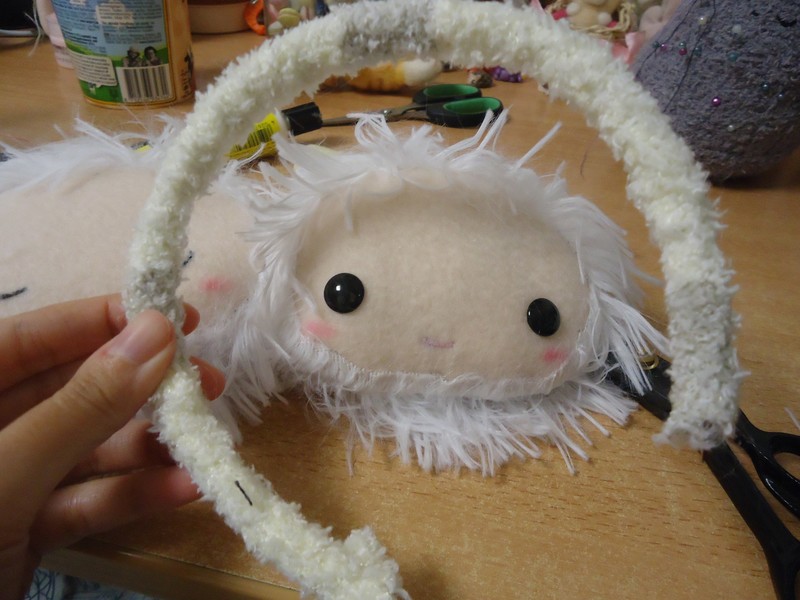
done! now attaching. try putting the band, holding the earpieces to estimate how deep should you insert the band.
glue the part you're suppose to insert, let a few minutes until the glue dries then sew close the opening.
-
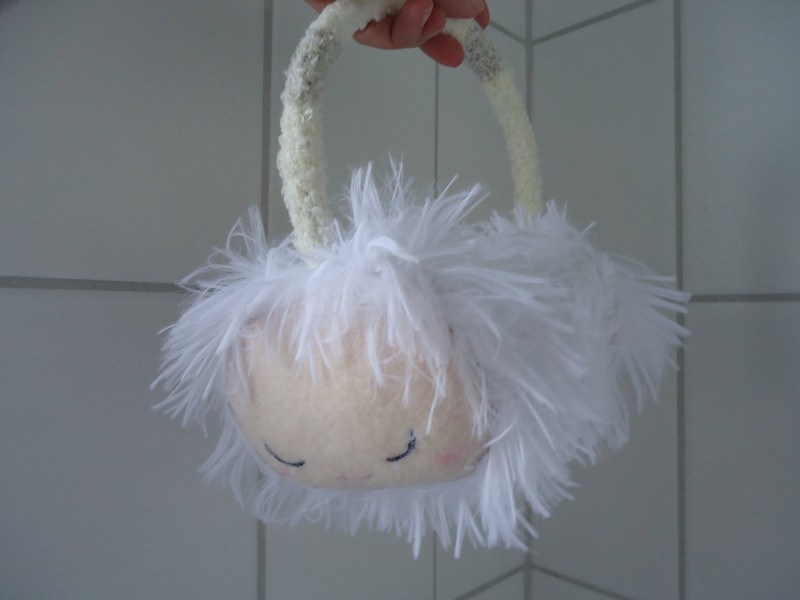
 Step 11
YAY you're done!
-
 Step 12
BONUS TUTORIAL: BEAR VERSION
Read this tutorial only if you are going to make your earmuff from fluffy socks. I won't suggest regular sock because they won't be so snuggly. the fluffier the better! :)
The trick here is the stuffing. take one huge ball of polyester fiberfill , roll into a ball then stuff using your fingers bit by bit. make sure its not too bulky but rather evenly distributed like a long onigiri.
You can also just cut a template and use it as a guidance but I like this method better cause you can estimate the finished shape better. Pinch it like this to see the estimated shape better. if the stuffing is not even simply press to distribute it evenly.
-
 Step 13
Cut the excess. Fold the ugly edges while shaping, and sew all opening.
-
 Step 14
it should look like this
-
 Step 15
this is optional, so if you don't want to put a muzzle on your bear simply skip this and go to embroidery or add a felt to replace this step :)
take a piece of white scrap fabric and fold the edges inside, while shaping the muzzle. use pins to hold the fabric once folded.
-
 Step 16
keep going
-
 Step 17
When you're done folding use ladder stitch to sew it to the head.
-
 Step 18
Add craft eyes and embroider the nose and mouth. The eyes are just glass beads I painted black in the back with acrylic paint.
-
 Step 19
Make a template for the ears, and sew with backstitch for security. turn inside out, stuff and attach to the heads.
-
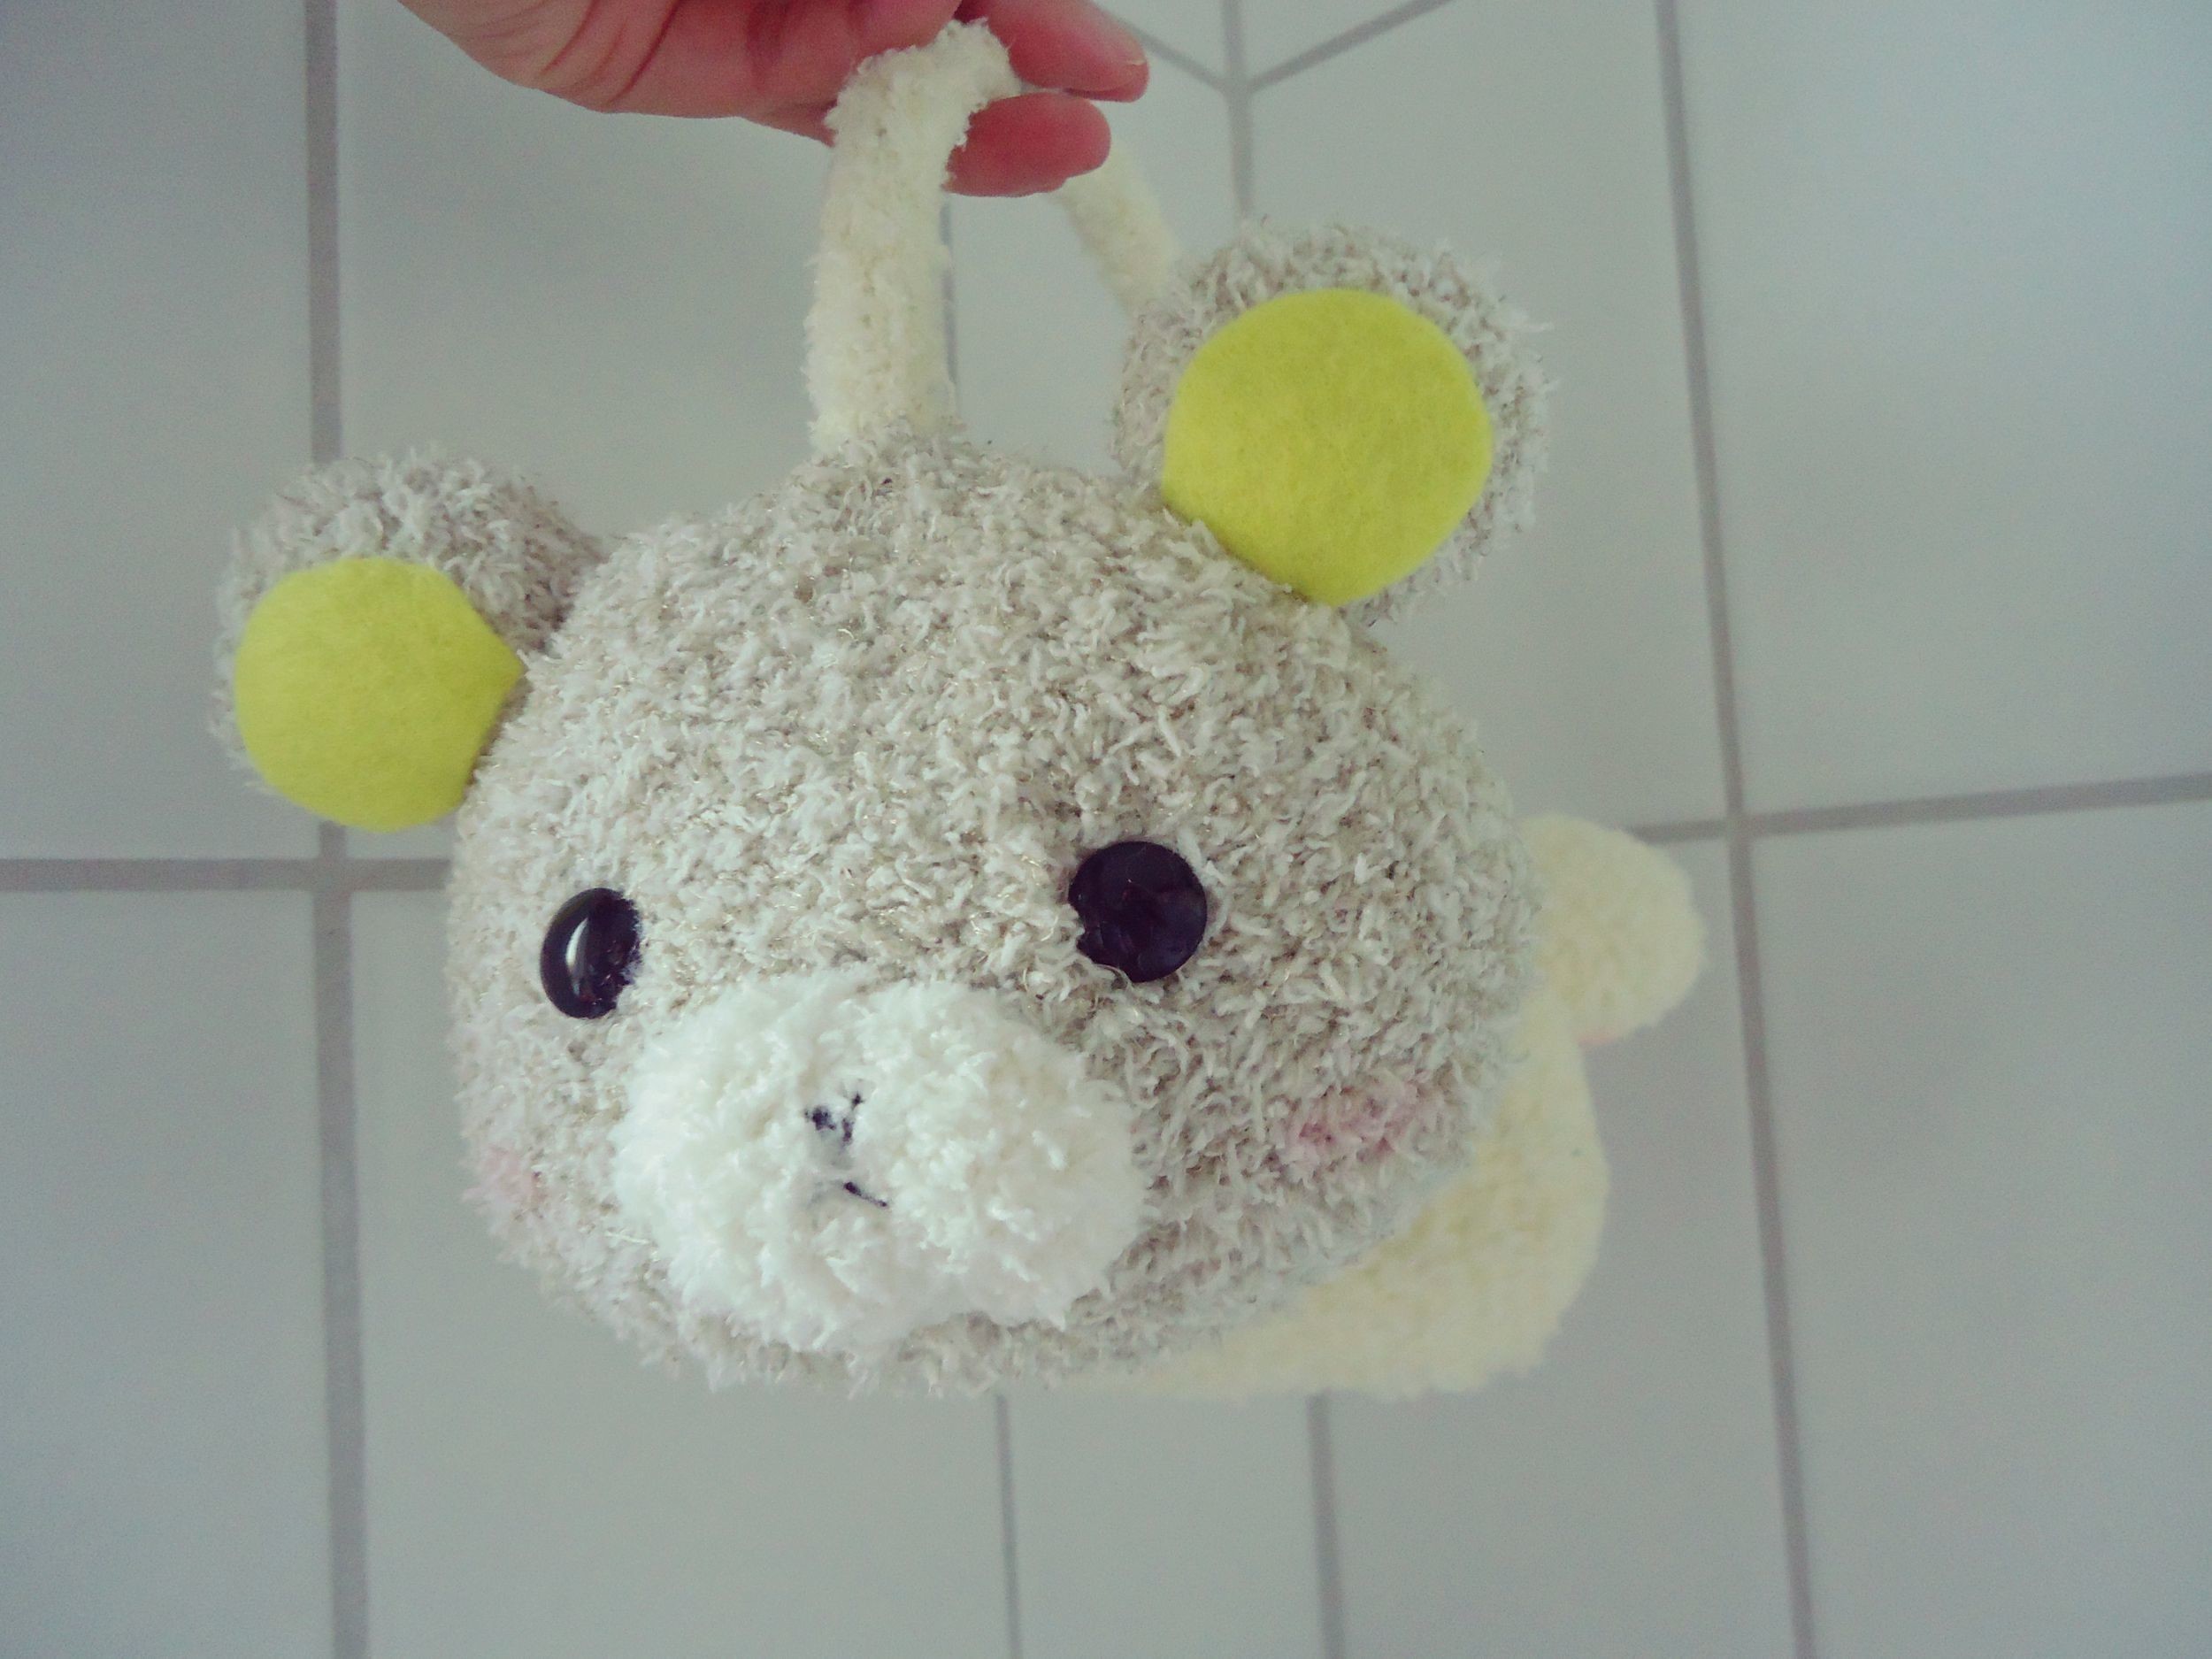
 Step 20
Bear heads are done! Add the blush on cheeks with blush on and make up brush if you like. Go back to step 6 to see the steps for the headband, or just simply insert and secure the headband.
You will need to slit open a hole in the middle of the head to insert the headband, so be careful. make sure you use a sharp fabric scissor and don't cut too much.
I made mine with different color. if you notice, its Rilakkuma and Korilakkuma inspired. couldn't find a brown fabric so this is it. :)
-
 Step 21
done done done!! :)