
About
Distressed Frame Tutorial from diedododa
-
 Len favorited Distressed Frame
12 Feb 22:01
Len favorited Distressed Frame
12 Feb 22:01
-
 Shop Showcase published her project Distressed Frame
07 Oct 10:17
Shop Showcase published her project Distressed Frame
07 Oct 10:17
You Will Need
-
 Step 1
Here are a couple of discarded frames I found…mostly discarded because the glass and back of the frame were missing. Obviously depending on what’s to go in a frame I actually think that glass is a bit overrated a lot of times and a backing is easy to make from strong cardboard - so yay, here we go!
First and very important step: give your item a good clean and make sure it is dry and free from grease….it’s amazing how much of the latter can accumulate on frames over the years! Sugar soap or a 50/50 water vinegar solution all work well to do the job. -
 Step 2
For the first coat I picked 3 very similar colours in shades of light turquoise and or greeny blues. This is just the first coat and the colour(s) used here will only peek through in places. I like using colours in similar shades for the contrast because sublet differences in shade make it come alive without being too full on.
-
 Step 3
Get painting! Use the different tones randomly, don’t blend them and just make sure you cover the whole frame well….don’t worry about it being streaky or a bit uneven at this stage (it might even work in your favour. DO pay attention to not letting paint pool in the corners though! Some chalk paints can be notoriously thick and seem to have a tendency to do that. I always water mine down to a nice flowing consistency.
-
 Step 4
First coat done: better double check you got all around the sides of the frame too ;)…looks like this covered well and I will only need one coat - win!
-
 Step 5
Choose your main/top colour. I am going for a dark grey chalk paint here because the overall effect I would like to achieve is that of an old metal frame that has acquired a bit of a verdigris patina (to match a piece of wallpaper that will go in it)
-
 Step 6
As with the first coat make sure you cover the whole frame and get no pooling of paint
-
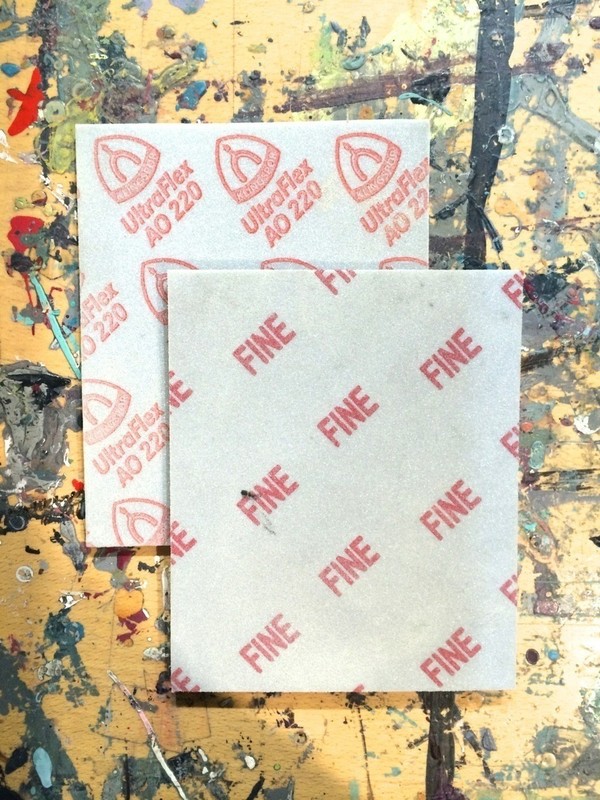
 Step 7
Get your sandpaper ready - make sure it’s a very fine grit. I’m looking to achieve a super smooth finish with delicately distressed parts not a full-on chipped off distressed shabby-chic piece.
-
 Step 8
Start sanding: the magic words here are: very little pressure.
-
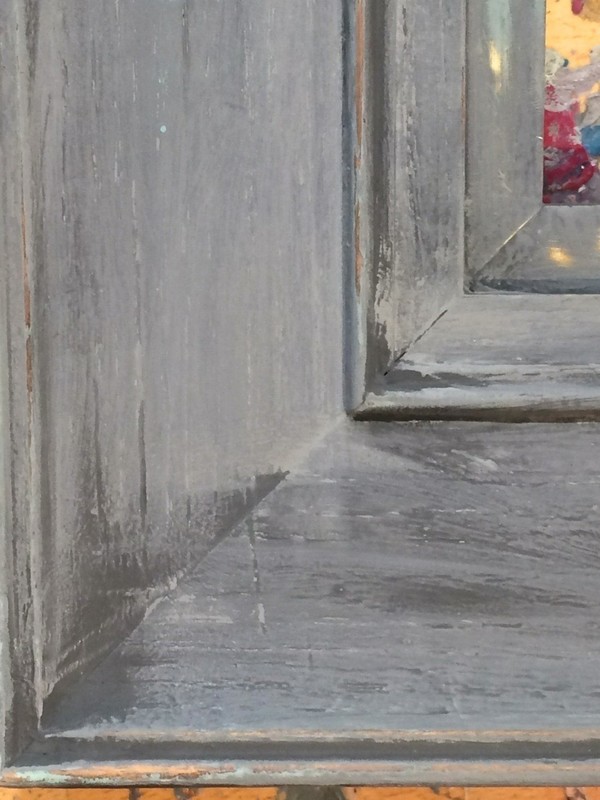
 Step 9
Gently move the sandpaper over the grey and watch the colour underneath slowly come through in parts.
-
 Step 10
To achieve a really clean look pay attention to sand carefully in all the corners as well! Sanding always makes the paint seem to go several shades lighter. Don’t worry - the wax will fix that.
-
 Step 11
Carefully clean off all the colour dust from sanding, check that you are happy with the amount of distressing and if so - get the wax ready!
-
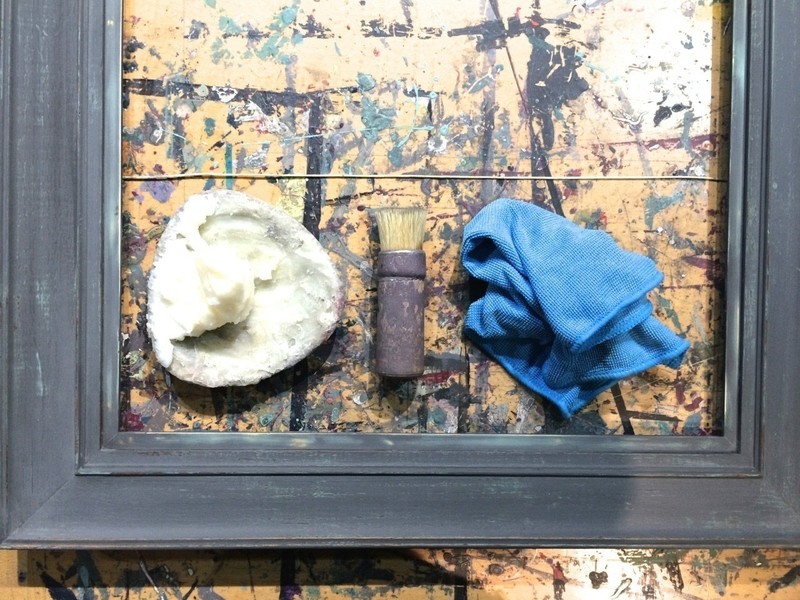
 Step 12
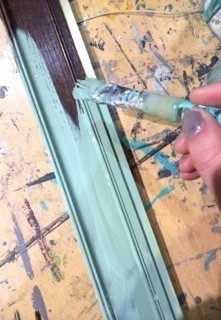
Waxing the piece: always use a disposable or designated separate plate for the wax and keep a lint free cloth handy to wipe off excess wax.The wax I use is a soft clear furniture wax. For this frame I like to use a small wax brush (this is actually a stencil brush which I decided worked better as a wax brush for small pieces), as it allows me to get into all the corners and detailed bits very easily. You can just as easily apply wax with a lint free cloth though - it just takes a little more attention to detail getting into all the corners.
-
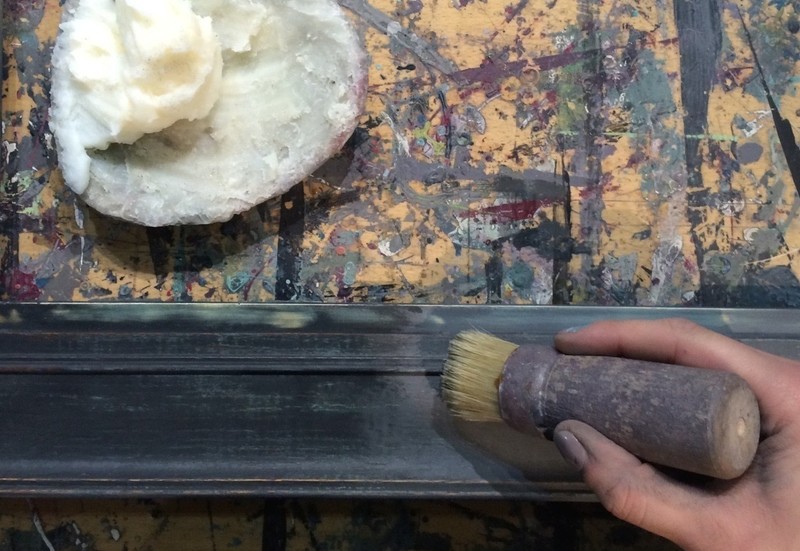
 Step 13
Start with “loading” your wax brush with about a hazelnut size dollop of wax and move it all along the frame in circular motions. Wax goes a pretty long way and you generally don’t need too much. You’ll notice the waxed ares turning back to a nice dark grey. Work in small areas and make sure to gently wipe off any excess wax.
-
 Step 14
After having waxed the entire piece ideally leave the wax to dry and harden 24 hours…as this is a small decorative piece leaving it overnight should be enough. Wax dries to a very smooth matte finish
-
 Step 15
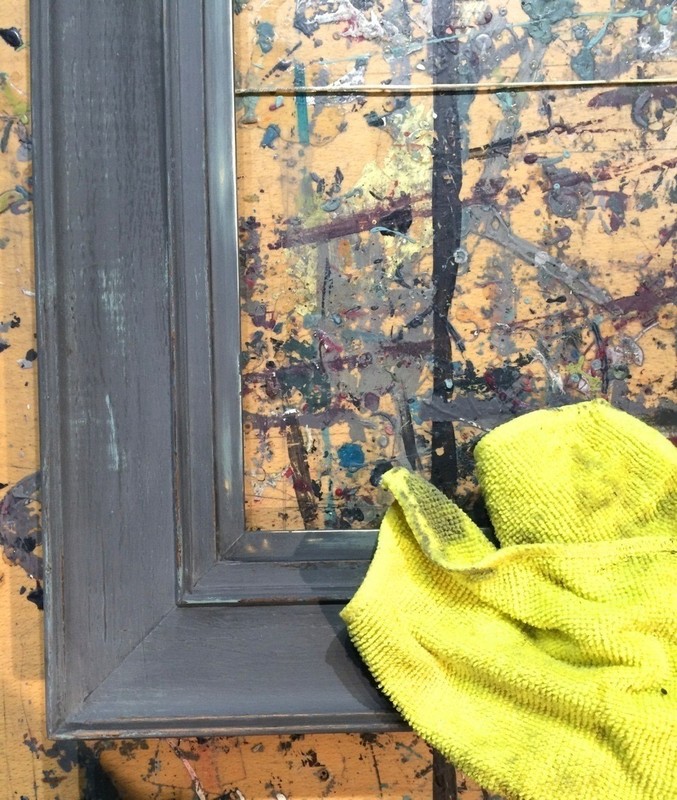
The wax will dry with a very smooth matte finish. I like thinks a bit shiny, so went back over the piece the next day with a clean lint free cloth to give it a bit of a polish.
-
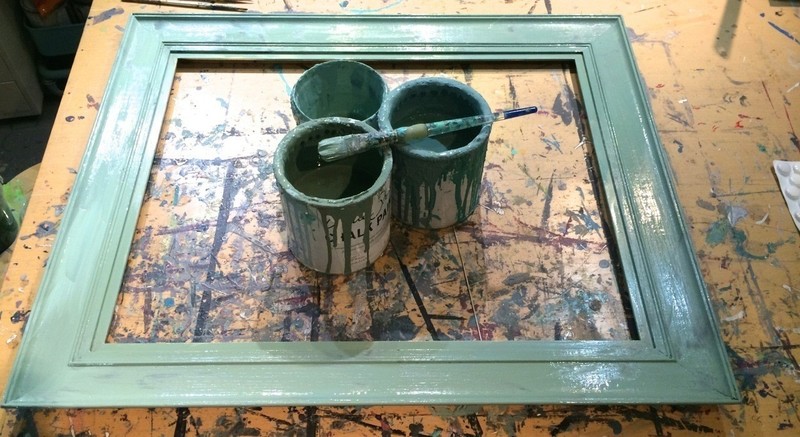
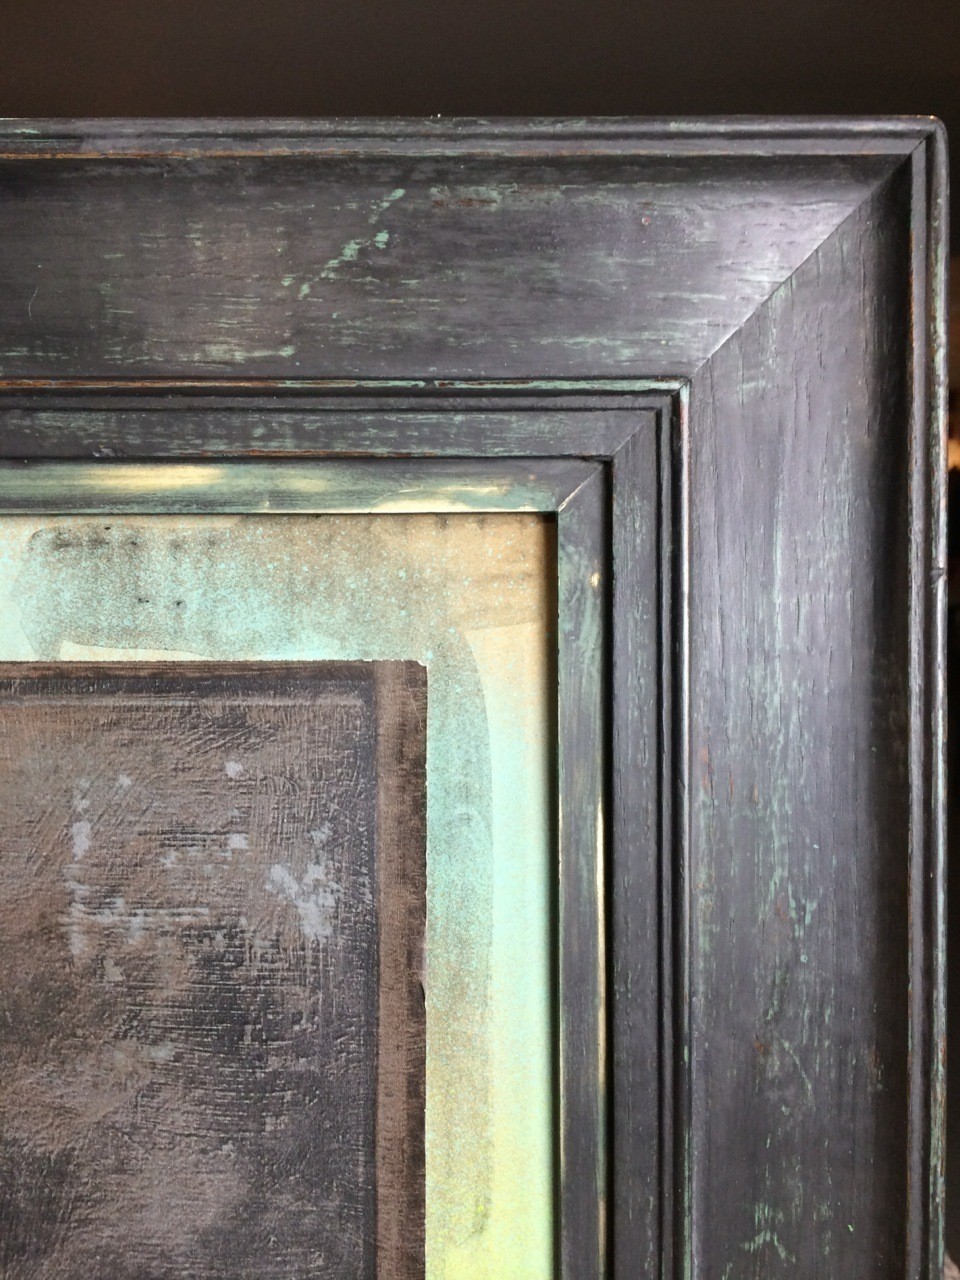
 Step 16
The finished piece featuring an ordinary painted cardboard backing and a scrap piece of industrial drawer wallpaper. You could use this as a pin board or go for a different tack and instead of cardboard add chicken wire to hang your jewellery