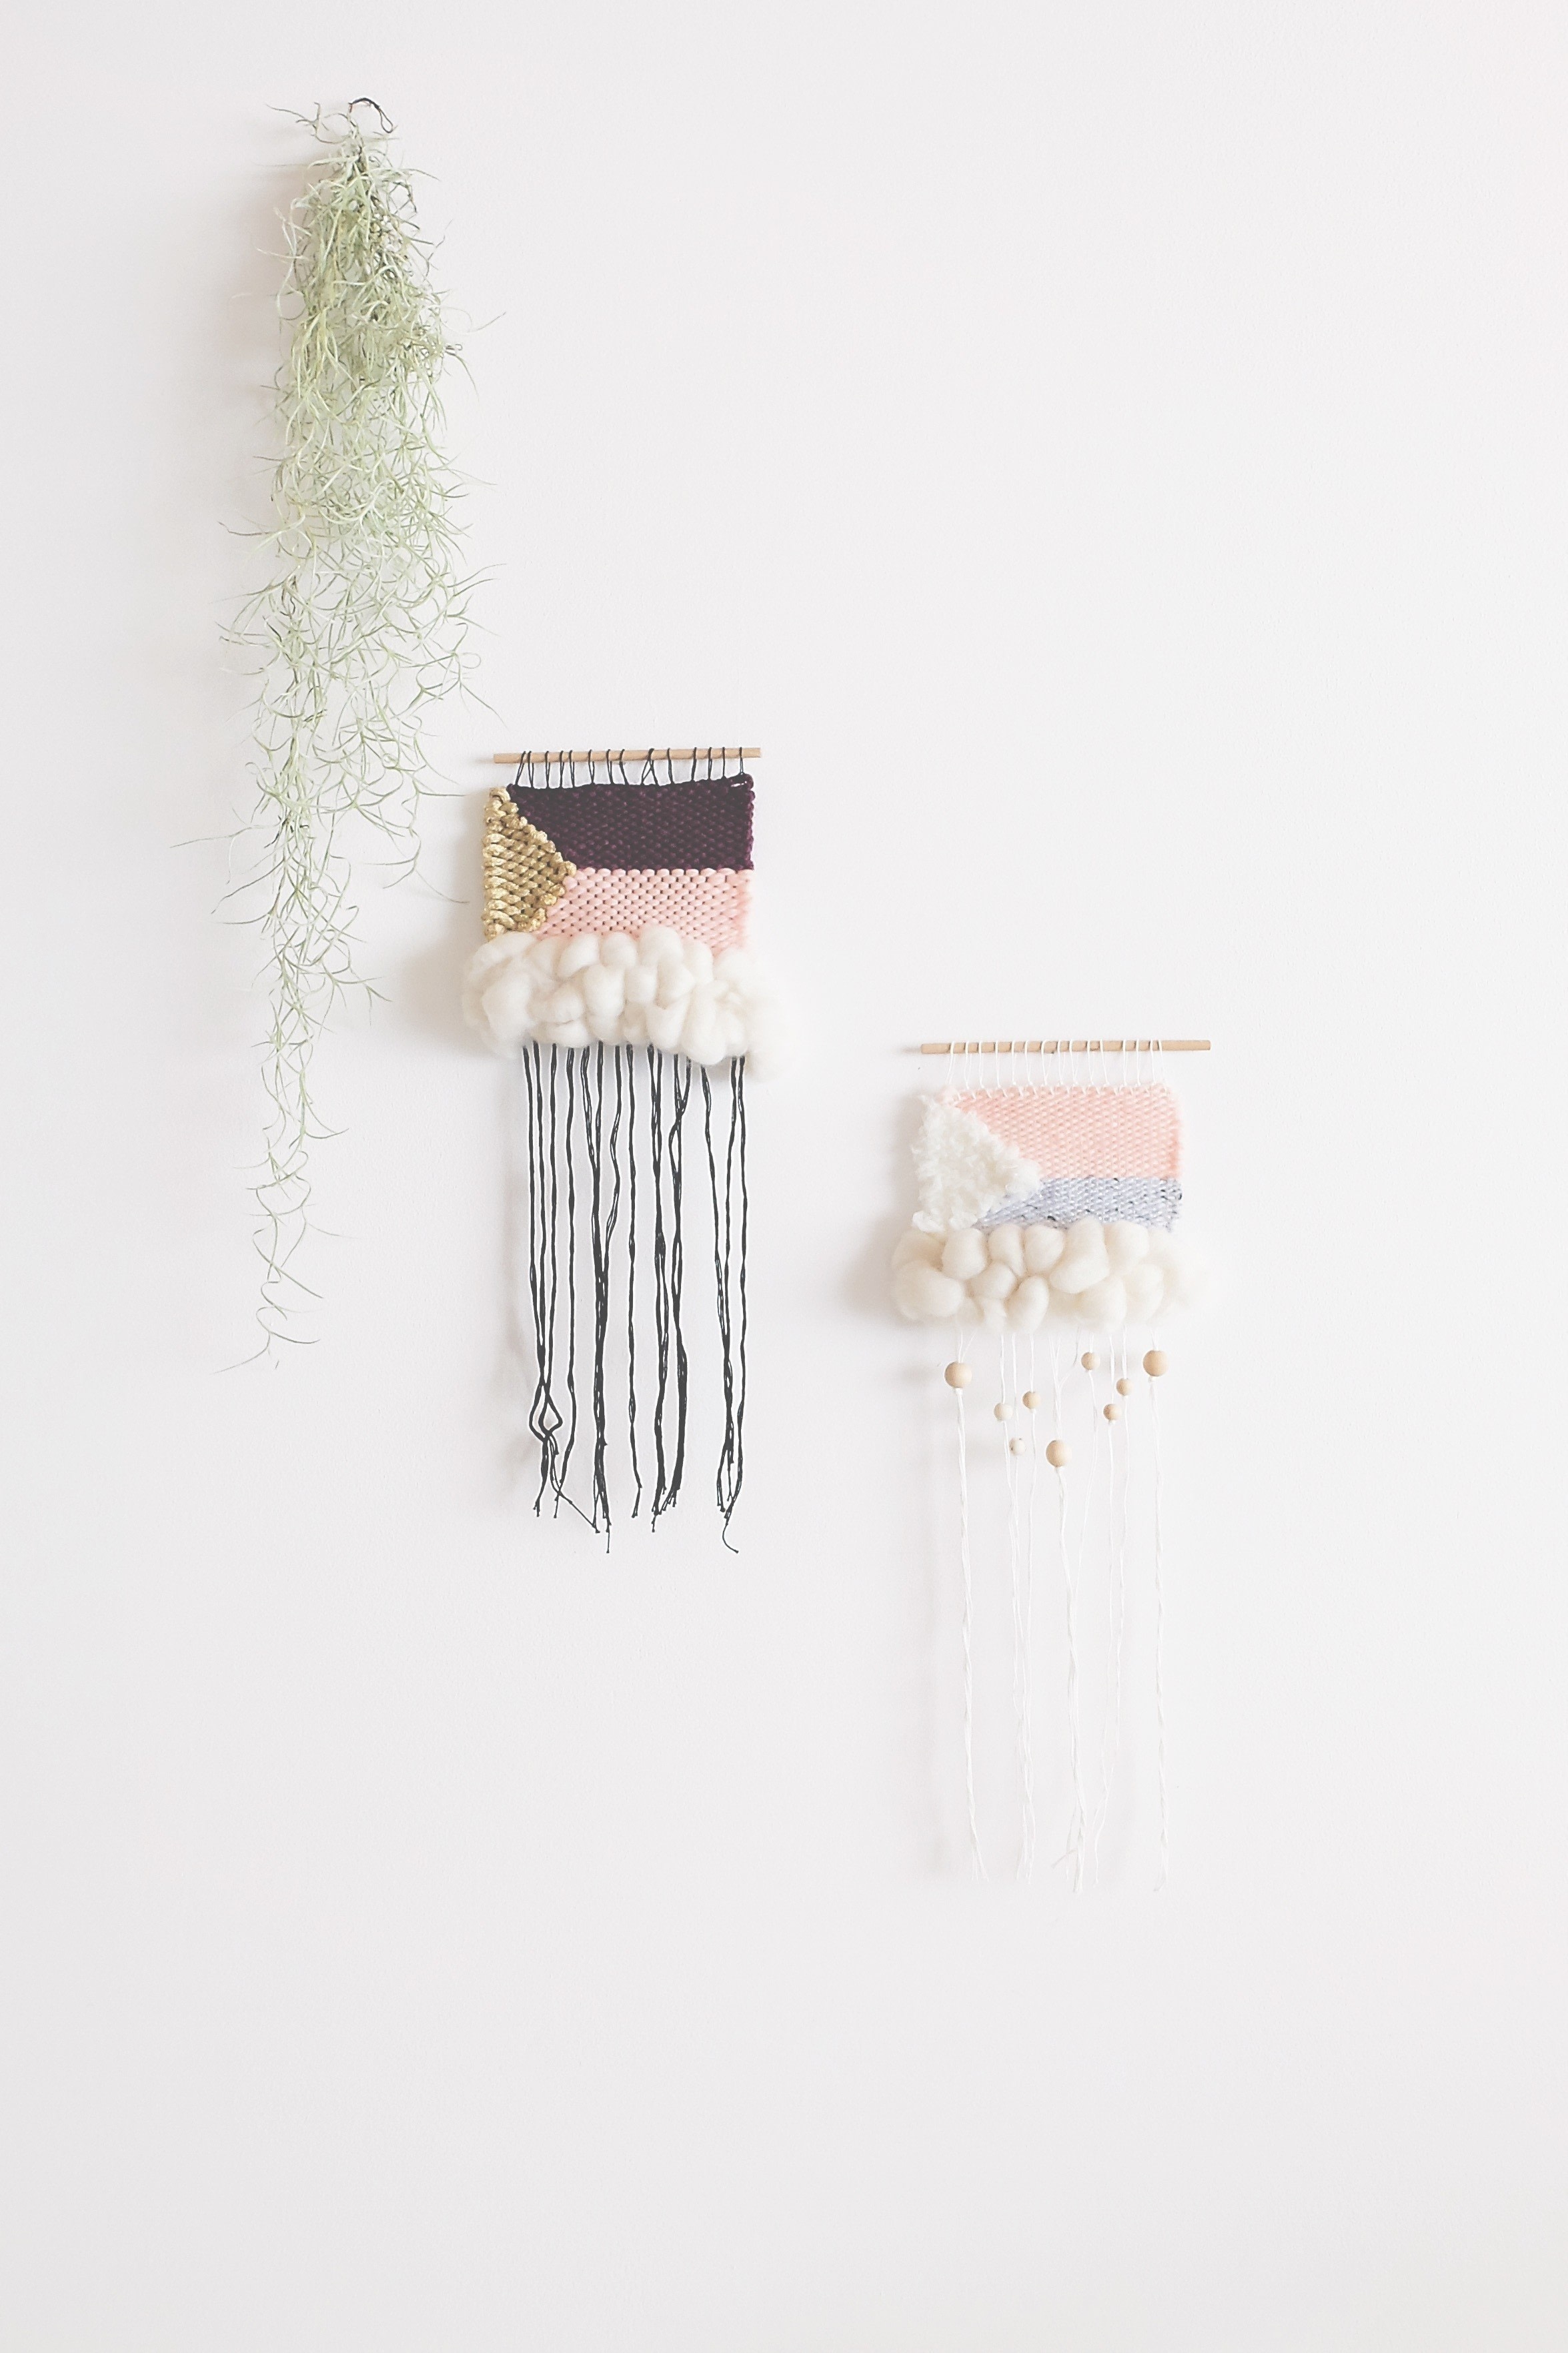

About
Woven Art
As in knitting or crochet, it is possible to make rows shorter or longer in a weave. Known as increasing or decreasing, this technique is very easy to master and will enable you to form lots of different shapes of varying complexity. This project also gives you the opportunity to learn another kind of rya knot and a way of creating a cloud-like texture with your woven yarn.
Stitches Used
basic stitch
decreasing and increasing
‘knotted’ rya knot
cloud texture effect
hem stitch
-
 Kimya J. favorited Diagonal Cloud Weave
27 May 16:05
Kimya J. favorited Diagonal Cloud Weave
27 May 16:05
-
 John E. favorited Diagonal Cloud Weave
20 May 12:48
John E. favorited Diagonal Cloud Weave
20 May 12:48
-
 Search Press published her project Diagonal Cloud Weave
20 May 09:00
Search Press published her project Diagonal Cloud Weave
20 May 09:00
-
 Step 1
Leaving a tail of 5cm (2in) and starting the weave from the right-hand side, pass the purple wool over and under the warp threads to the other side. Take it back again, under and over the warp threads, to create the second row.
-
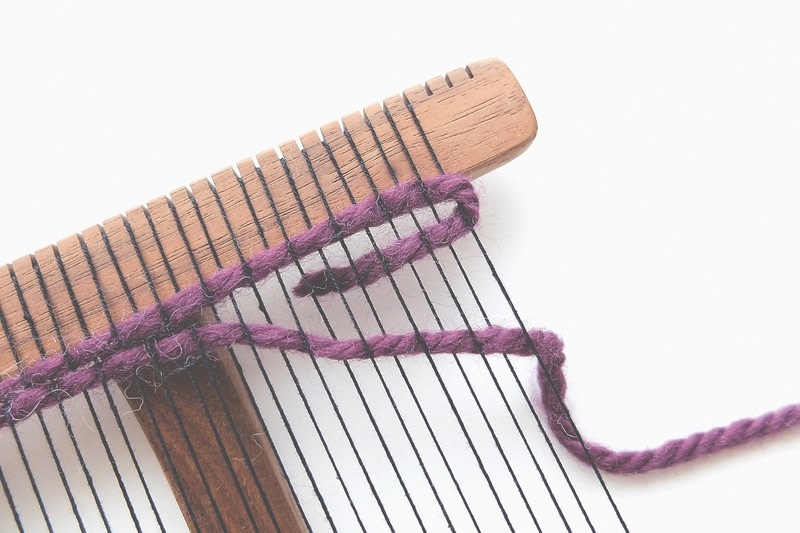
 Step 2
Achieving a perfect weave
It can be satisfying to create a tidy weave, with no tails hanging from the sides to be worked in later.
To do this, weave a little of the 5cm (2in) beginning tail of wool between two woven rows (see top-left image) and leave the remaining end hanging at the back. Push the rows together tightly using your fingers or a comb (see bottom-left image). Snip off the remaining wool at the back so it sits flush with the back of the weave.
-
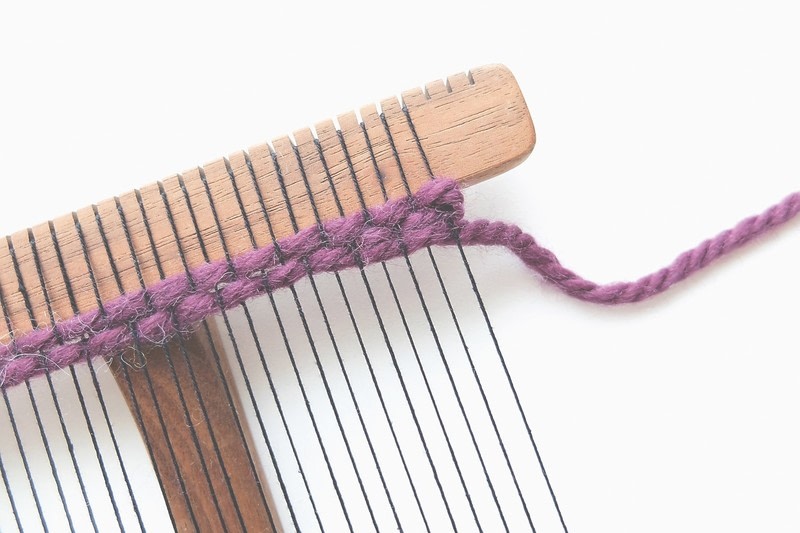
 Step 3
If you are using very flexible or fine yarn, the woven-in tail will be barely visible. However, with thicker fibres, such as T-shirt yarn or cord, it will show through slightly; this is not necessarily a bad thing.
We are going to use this method on this project. On future projects you can decide what suits you the best. -
 Step 4
In the third row work a basic stitch almost to the very end; when you reach the last warp thread, ignore it and weave back in the opposite direction to form the fourth row. Ensure that you weave in a pattern contrary to the previous row.
-
 Step 5
Push the rows together carefully with your fingers or a comb. You have just completed your first decrease.
-
 Step 6
Continue to reduce the rows in this way, omitting an additional warp thread with each row. You will gradually see a diagonal shape emerge.
-
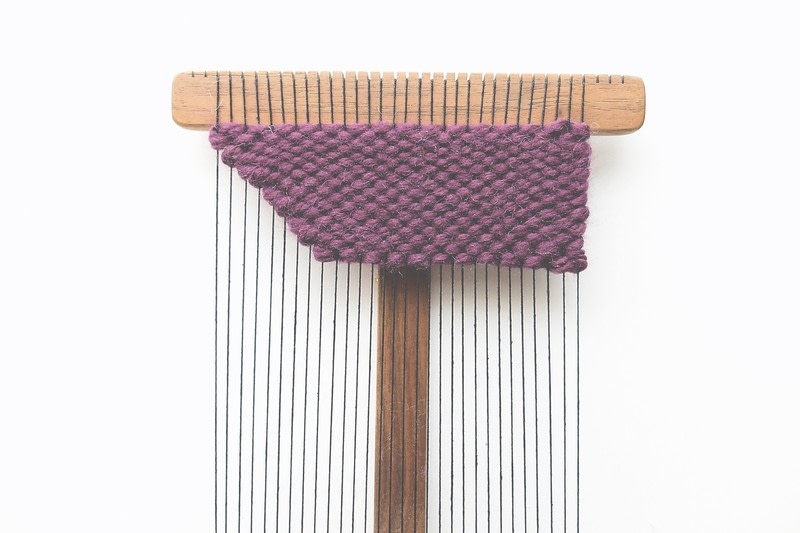
 Step 7
You will gradually see a diagonal shape emerge.
-
 Step 8
When you reach the end of your band of colour, leave a 5cm (2in) tail of wool. This time, work it in immediately by weaving it between the two last rows and leaving the remaining length of wool hanging at the back. Carefully push the rows together to conceal the woven-in tail. Turn the frame around and cut off the end of the yarn so that it sits flush against the back of the weave.
-
 Step 9
Finished purple diagonal.
-
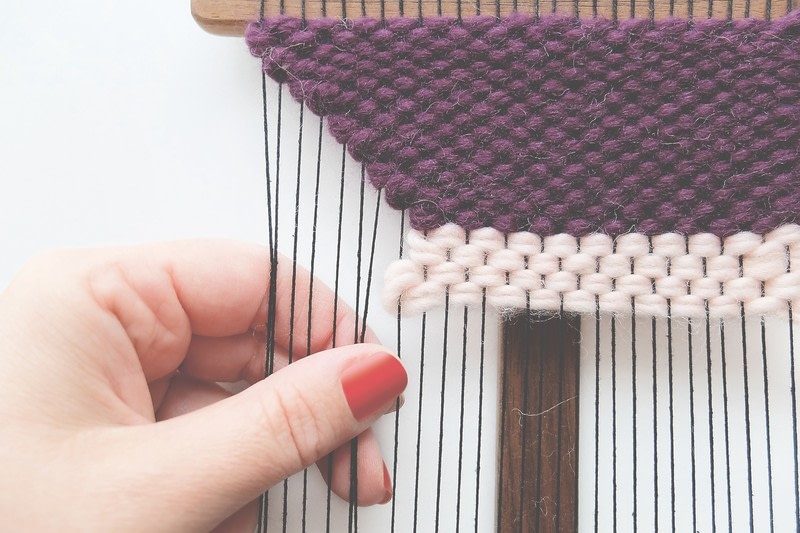
 Step 10
Change to the pale pink wool and start weaving from the right-hand side of the loom once again, up to the end of the purple line of wool.
-
 Step 11
Tip
If you are using a finer yarn, you can double it to even out the thickness.
-
 Step 12
To increase the band of pink wool, forming a diagonal shape in the opposite direction, increase the width of the weave by gradually
weaving in an additional warp thread with each new row. -
Step 13
Once you have completed the diagonal, work in the tail end of the wool between the last two rows and then push the rows snugly together with a comb to ensure that it cannot be seen. You should now have an empty triangle shape that you are going to fill with the gold wool.
Leaving an empty space
You may choose not to fill in the empty space on the left; with certain weaves, this can create a very attractive effect. -
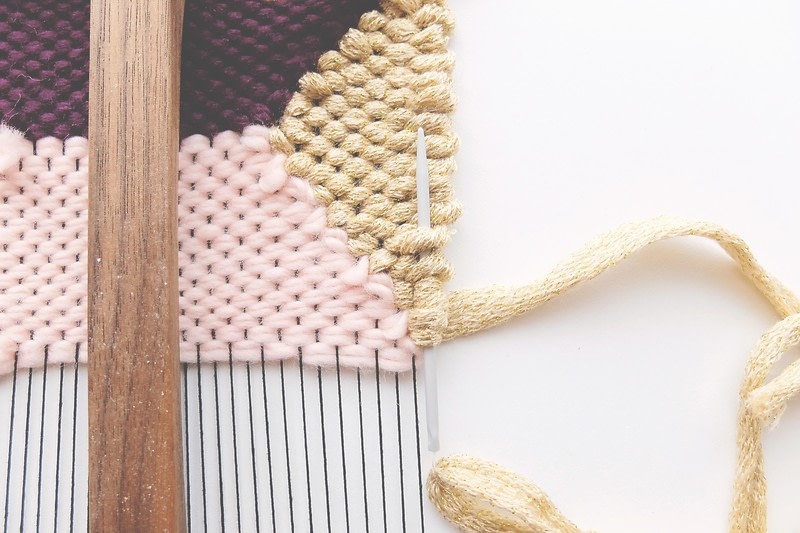
 Step 14
To fill in the shape, thread a darning needle with a length of gold wool. Start by going twice round the first warp thread, to work the necessary stitches for the first and second rows, then continue to weave as normal, following the basic stitch pattern. With each row, work as far as you can until you meet the purple yarn woven earlier, and then turn around and go back in the opposite direction to form the subsequent row. You will need to gradually increase the rows and then decrease them once again, when you meet the pink band of colour, to complete your gold triangle.
-
 Step 15
As you work, make sure you don't pull the wool too tight; this gives it a bit of body.
-
 Step 16
Turn the loom over and work the ends of the gold wool into the back of the weave by pulling the tails up through the rows vertically with a darning needle.
-
 Step 17
Cut off the excess wool flush against the weave. You have now finished the final triangle.
-
 Step 18
To create the cloud effect, take a relatively long length of ecru merino roving and weave it through using the basic stitch. As roving wool is very thick, go over and under two warp threads at a time. To create the ‘clouds’, pinch the loop of super chunky wool between your thumb and forefinger – avoiding the warp threads – and pull gently.
-
 Step 19
Fluff out the wool between your fingers to create random uneven puffs of stitches. Continue for several rows to achieve your ‘cloud’ of super chunky wool. Weave in the beginning and end tails of roving between the ‘clouds’.
-
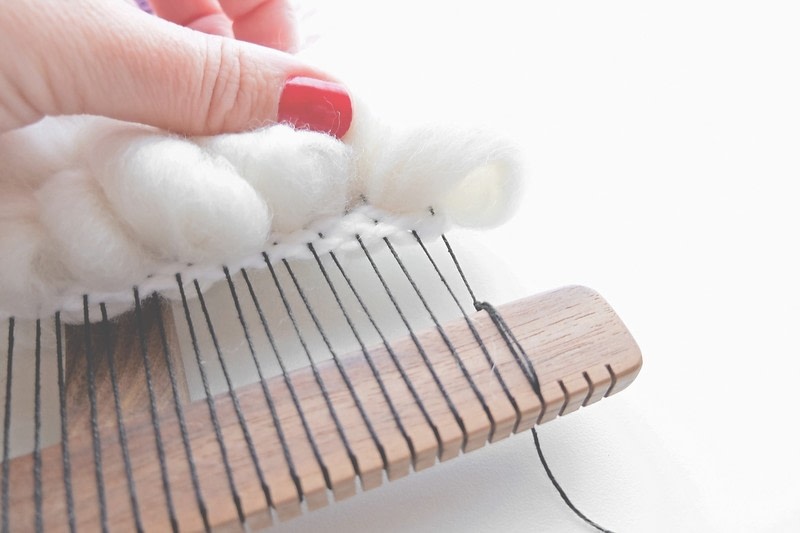
 Step 20
Weave three rows of basic stitches with white wool below the super chunky wool to hold the ‘clouds’ firmly in place.
-
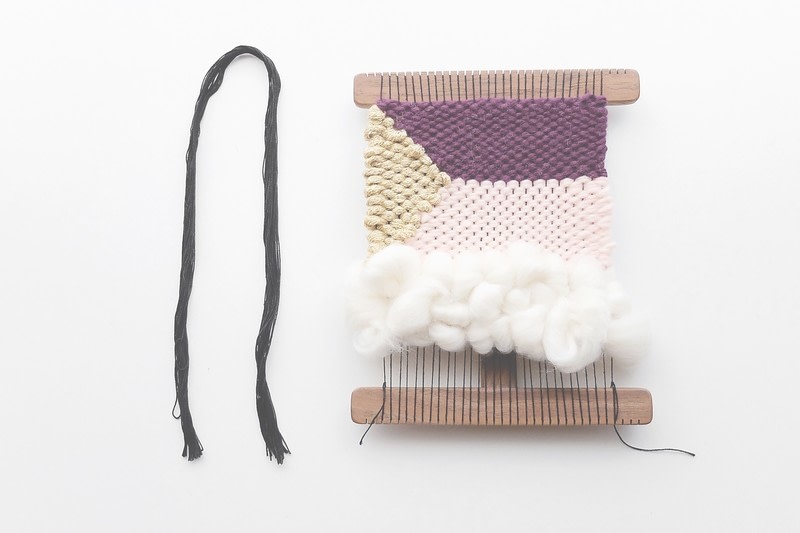
 Step 21
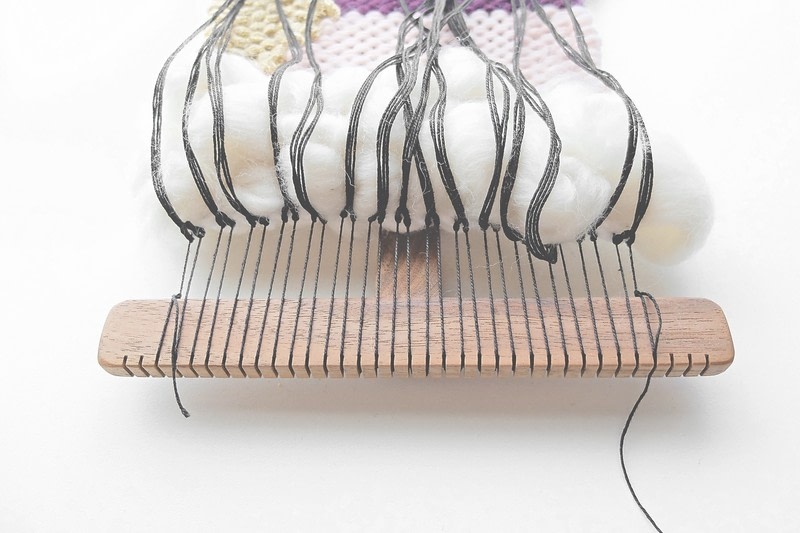
Cut and double up several lengths of black cotton twine, the same fibre used earlier to make the warp threads. I have cut sixty pieces of twine about twice the length of the loom, to account for folding. You are going to use these to make the fringe at the bottom of the weave. By using the same twine used for the warp, these fringes will give the impression of very long warp threads.
-
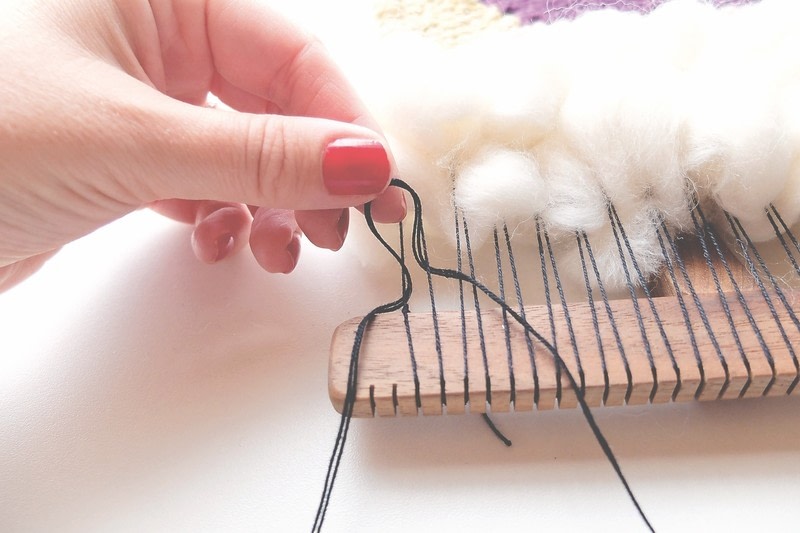
 Step 22
Combine two lengths of cut twine and then fold them in half. Pass the ends of the doubled strand under two warp threads and, with your fingers, pull the folded centre up between the two warp threads. This creates a loop of yarn above and between the warp threads.
-
 Step 23
Take the ends of the doubled strand and bring them through the loop, from top to bottom. Pull gently on the two ends to tighten the loop. Your ‘knotted’ rya knot is complete.
-
 Step 24
Continue in the same way across the full width of the weave. You might want to fold over and lay the fringes up towards the top of the frame to keep them out of your way.
Advantage of ‘knotted’ rya knots
This top-down rya knot is perfect if you want very fine fringing without the body: you do not need to weave any additional rows below to secure them in place (which would be visible behind the fringing) as these ‘knotted’ rya knots stay firmly where they are. -
 Step 25
Cut the warp threads at the bottom of the frame and tie them together in pairs using a double knot. Knot them flat against the back of the weave
to secure them. -
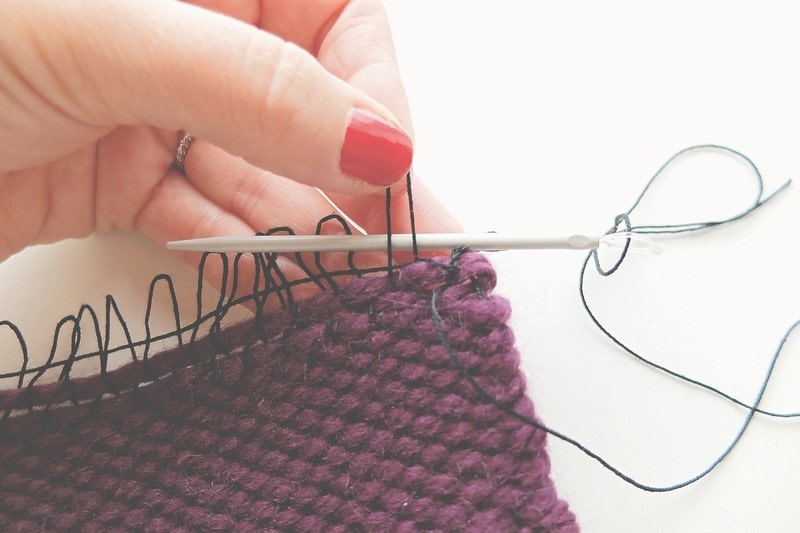
 Step 26
Work the ends of the threads into the back of the weave by threading them on to a darning needle and taking them vertically through the rows above. Cut off the excess flush against the back.
-
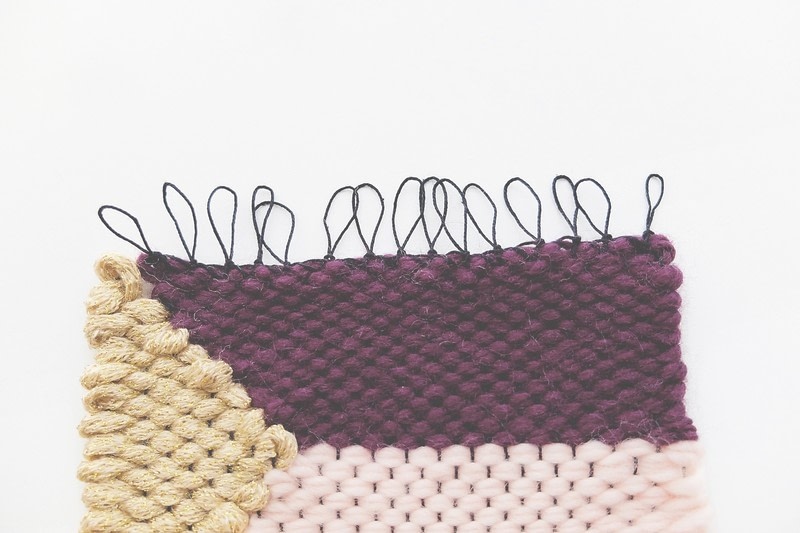
 Step 27
Now, you simply need to remove the weave from the loom and pass a wooden support rod through the loops. Weave it through the top loops in a pattern opposite to the stitches in the top row.
If you do not put a support rod through the top of the weave, it will start to unravel.
-
 Step 28
Hem Stitch
A useful technique for securing the top or bottom of a weave is hem stitch.This leaves the warp threads visible at the top because you do not have to push the rows tightly together, or finish the weave with a support rod. It is easiest if you leave the weave on the loom; I have deliberately taken it off here to show you how the rows can unravel at the top of a weave if they have not been hemmed.
1 Take a length of twine approximately six times the width of the weave. Thread it on to your darning needle and, from the left-hand side, weave the twine all the way across the first row using the basic stitch, working opposite to the weave pattern in the row below.
-
 Step 29
2. When you have reached the final loop on the right-hand side of the weave, take the needle back behind it and wind the twine around the base of the loop, close to the weave, a few times in an anticlockwise direction. Pass the needle through the loop and pull tight. Bring it from the back of the weave to the front in between the first and second rows of the weave. Repeat the process on the next loop, as shown.
-
 Step 30
3. Continue in the same way across the full width of the weave and then finish by tying off with a knot. Weave this knot into the back of the weave a
-
 Step 31
Your weave is now hemmed so that the first rows do not unravel. This is a good method if you do not want to use a support rod and if you would like to see the top of the warp threads.