


About
Update plain wooden storage into something much more appealing with pretty papers
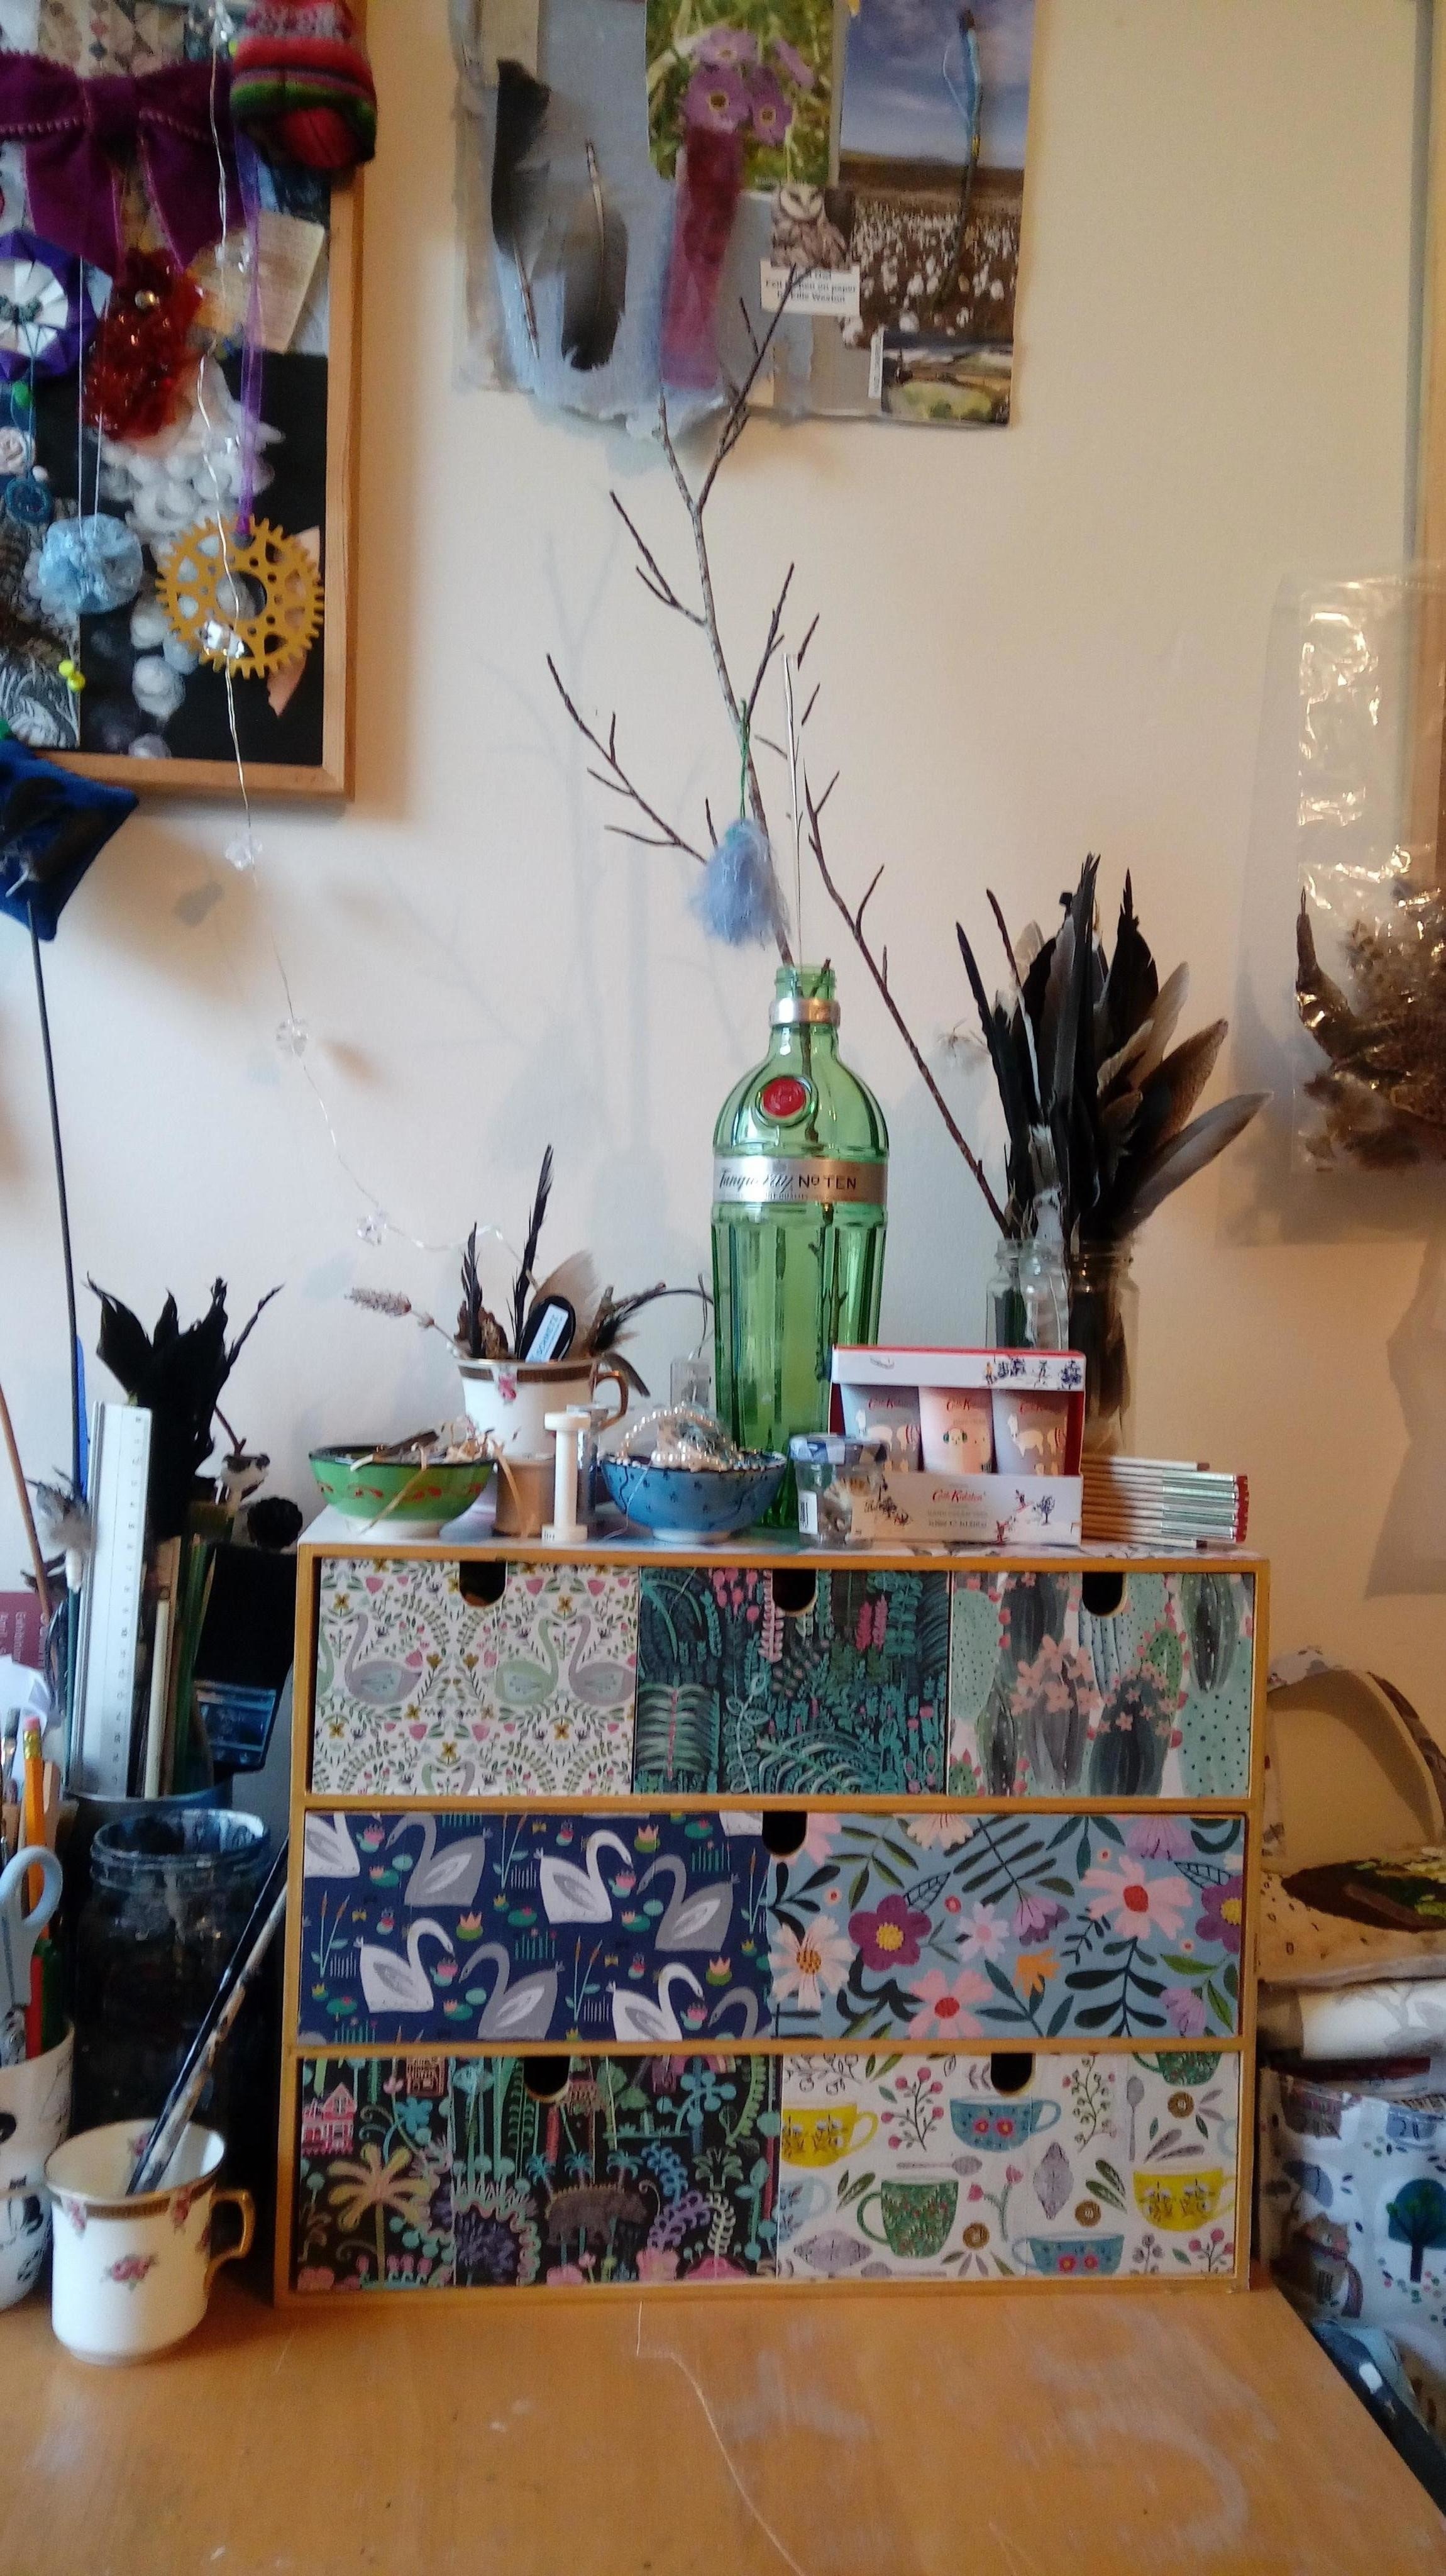
I've been meaning to decorate my wooden Ikea desk drawers since I bought them several years ago but until now I've never quite got round to it. However, I had a spare couple of hours so I got out all my pretty papers (collected from magazines mostly) and had fun cutting and sticking. You could also use fabric for this, just stick to something quite light weight.
-
 Kimya J. favorited Desk Drawer Re Vamp!
22 May 00:01
Kimya J. favorited Desk Drawer Re Vamp!
22 May 00:01
-
 C.J. M. added Desk Drawer Re Vamp! to Paper
20 May 19:53
C.J. M. added Desk Drawer Re Vamp! to Paper
20 May 19:53
-
C.J. M. favorited Desk Drawer Re Vamp!
20 May 19:52
-
 Amara D. favorited Desk Drawer Re Vamp!
04 May 00:05
Amara D. favorited Desk Drawer Re Vamp!
04 May 00:05
-
 Crafterella featured Desk Drawer Re Vamp!
27 Apr 23:00
Crafterella featured Desk Drawer Re Vamp!
27 Apr 23:00
-
 Second Hand Susie favorited Desk Drawer Re Vamp!
26 Apr 22:51
Second Hand Susie favorited Desk Drawer Re Vamp!
26 Apr 22:51
-
 Kinhime Dragon favorited Desk Drawer Re Vamp!
25 Apr 19:35
Kinhime Dragon favorited Desk Drawer Re Vamp!
25 Apr 19:35
-
 Helen W. published her project Desk Drawer Re Vamp!
25 Apr 08:10
Helen W. published her project Desk Drawer Re Vamp!
25 Apr 08:10
-
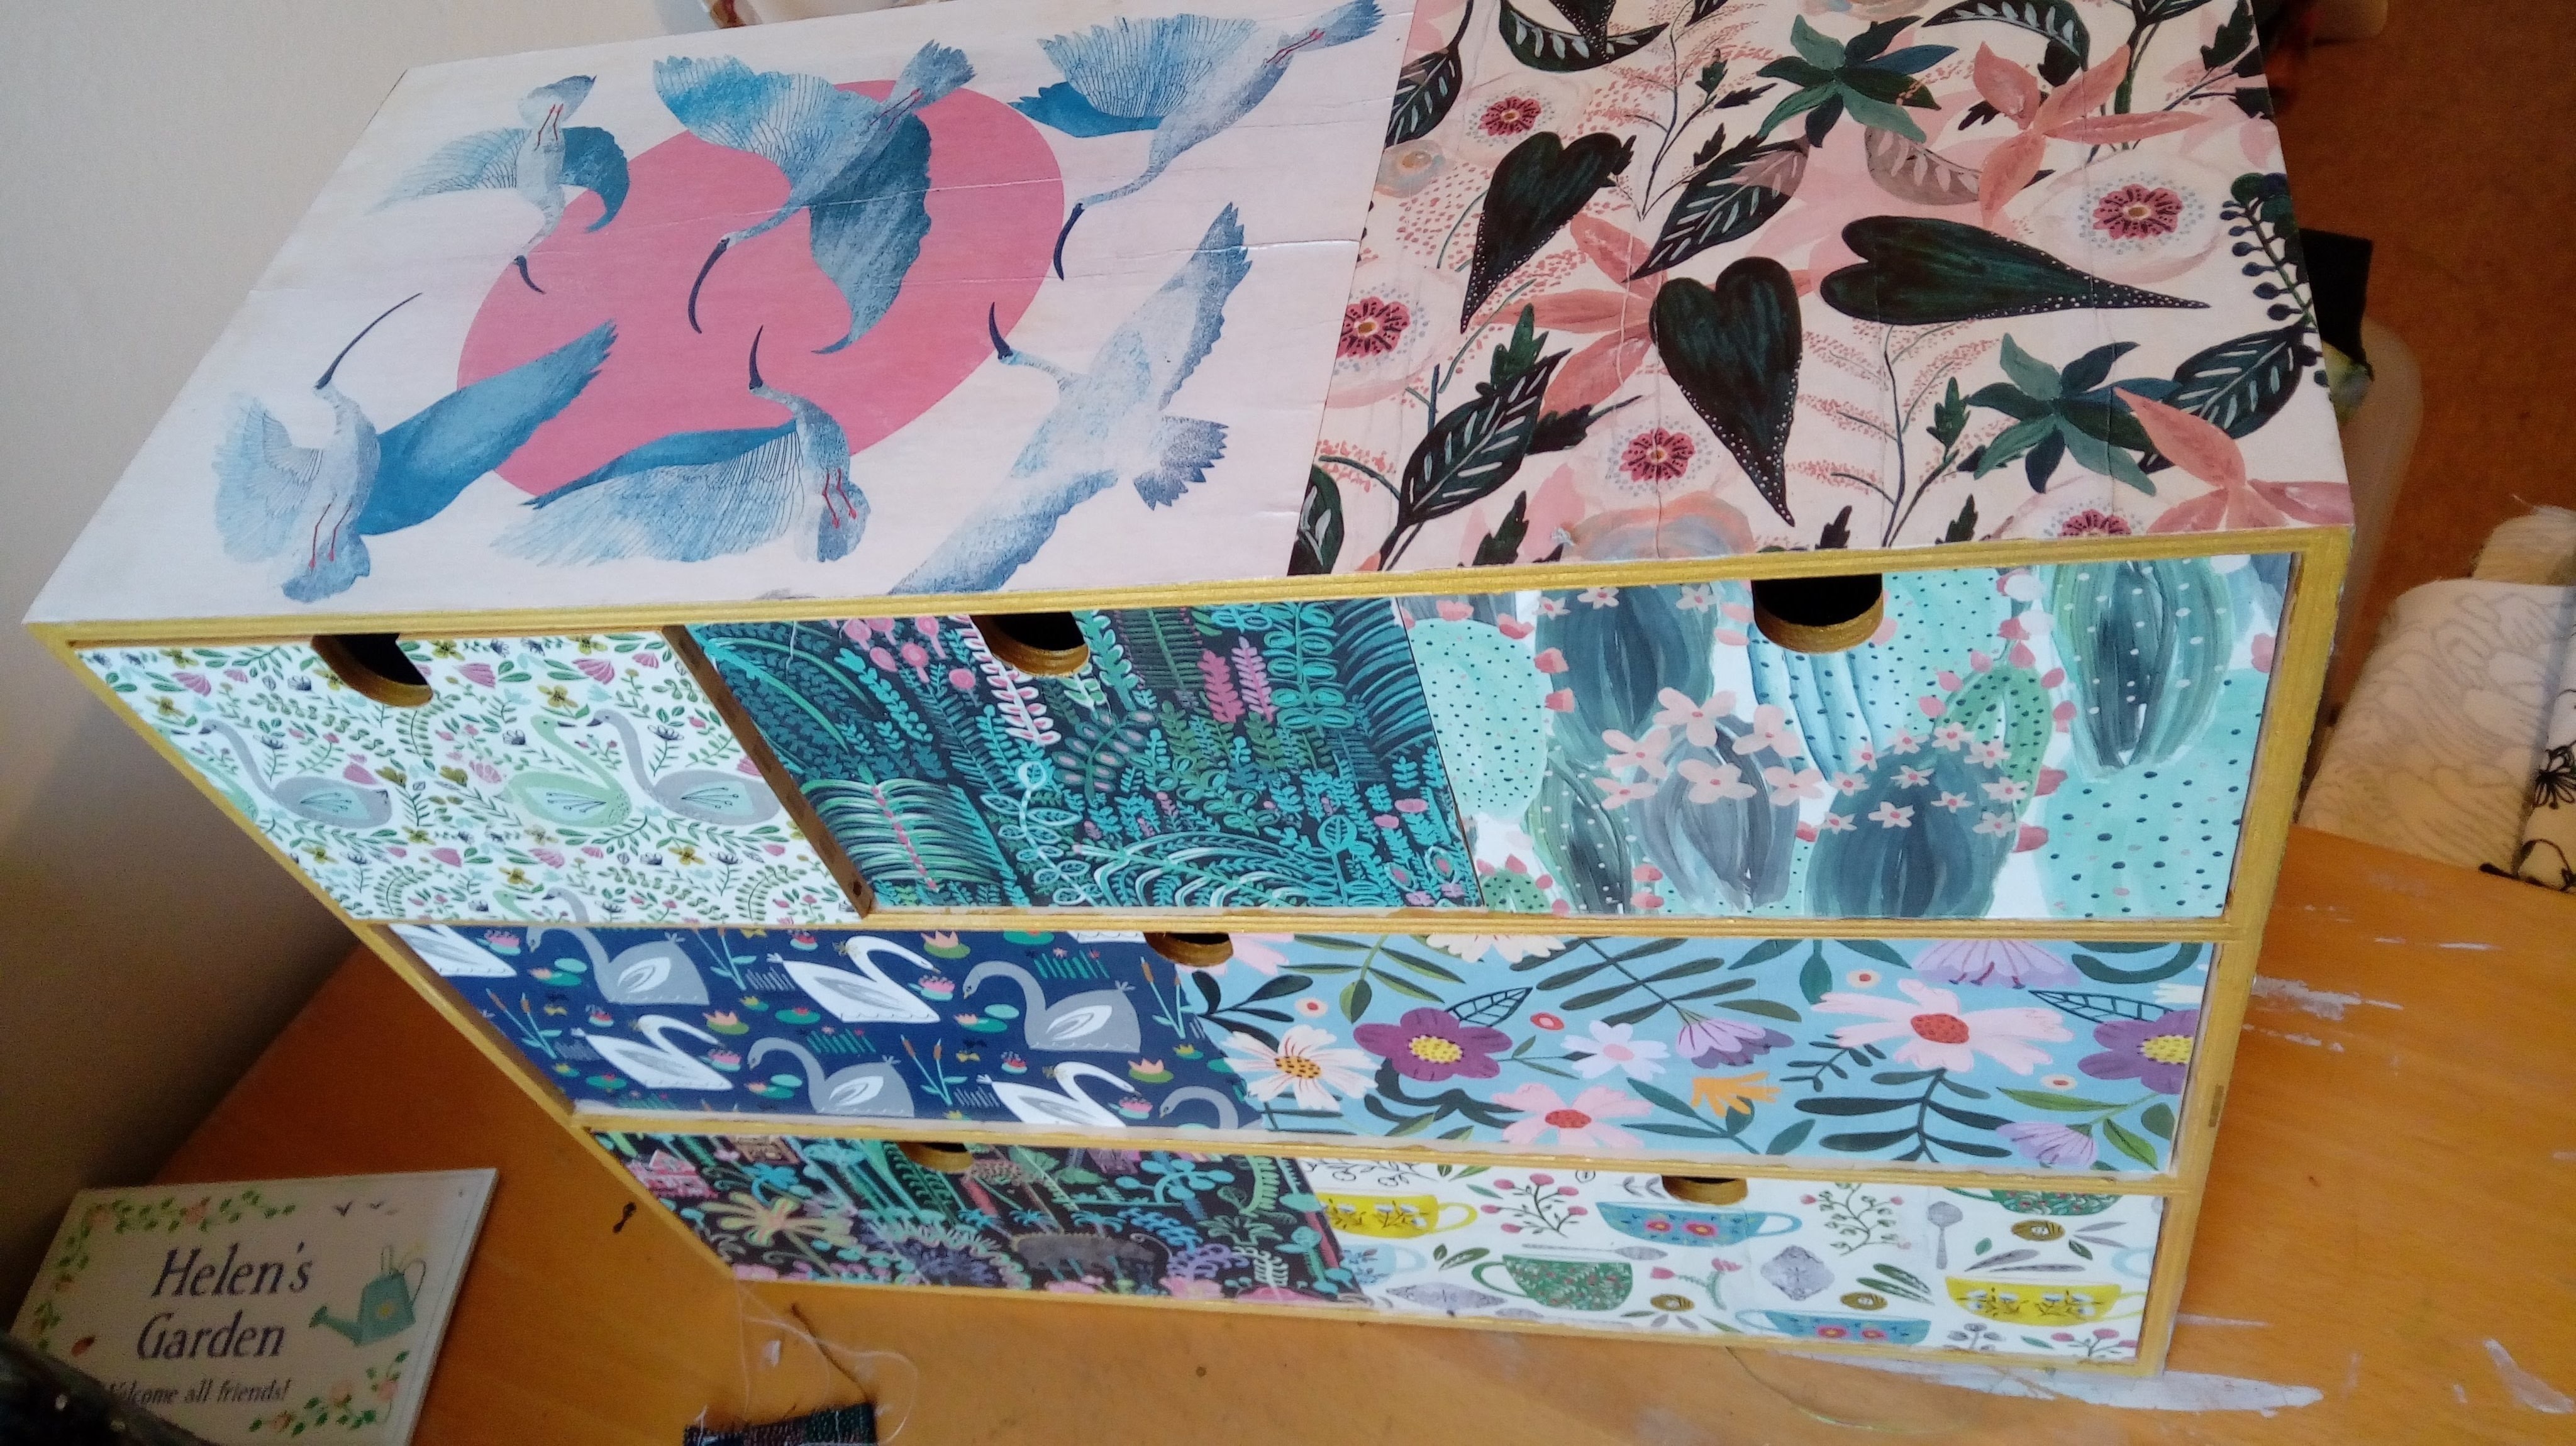
 Step 1
Start by cutting pieces of paper slightly bigger than each drawer front, or cut up lots of smaller pieces and go for a patchwork effect.
-
Step 2
Using a watered down solution of PVA glue attach your papers to the front of your drawers and the outside edges of the frame of the unit. I painted the PVA onto the wood and then laid the paper on top. As the paper gets wet you're likely to notice it buckle a bit. You have four options:
1. Smooth out the bubbles with a brush or your fingers (be careful not to rub too much or the paper will disintegrate)
2. Soak the paper in a PVA solution first and then lay it onto the wood (smoother finish but a more messy process)
3. Accept the quirks of the paper bubbling and move onto Step 3
4. Throw the whole project out the window in frustration (not recommended) -
 Step 3
Once the glue solution has dried your papers should be firmly stuck to the frame. Use a craft knife to trim away any excess and give a nice neat edge.
-
 Step 4
Use gold paint to add a bit of glam and sparkle to the edge of your drawers and any exposed parts of the frame.
-
 Step 5
Give everything a coat of varnish to seal everything in and give a strong shiny finish.
-
 Step 6
Replace the drawers, fill with sweeties/treasure/random stuff and admire your new storage system.


