


About
add your very own pics to a ring binder
If a "normal" ring binder is too boring for your needs, just customize it ;)
As usual: my reasoning behind this project: My inspiration board was full with stuff, so I needed space and wanted to use ring binders for storing my inspirations from now on. BUT a bought ring binder really was way too boring for a creative purpose like this. So I came up with this idea... I didn´t search for allready exsisting how to´s, so please just take this one as my way to do it ;)
-
 Daisy Dawn added Customized Ring Binder to Books and Notes
22 Apr 14:16
Daisy Dawn added Customized Ring Binder to Books and Notes
22 Apr 14:16
-
Daisy Dawn favorited Customized Ring Binder
22 Apr 14:15
-
Daisy Dawn commented on Customized Ring Binder
22 Apr 14:15
-
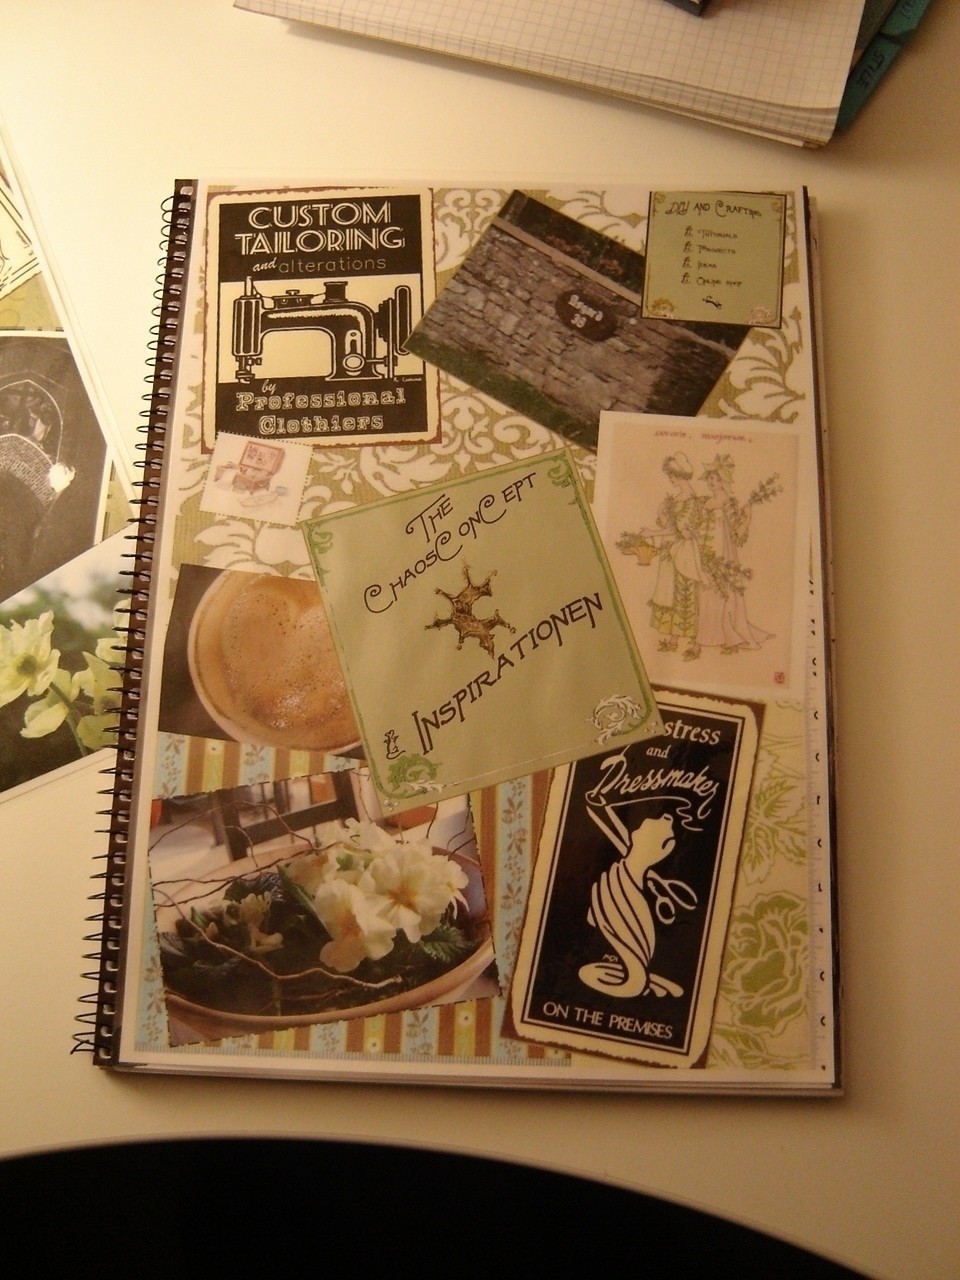
 Step 1
This is the ring binder I bought: red but boring. So, it was time for a kind of scrapbooking by using the computer.
-
 Step 2
For creating a new cover just collect the makings I listed.
The tutorial now starts with how to create the cover sheets in Microsoft Word, of course you can use your prefered text editing software as well: First open it. (sorry, but I only have the german version of MS Word, but I guess the icons should be the same in the english version.) and: yes, thats my current desktop ;)
While Word is initializing, start your lamintator as well, because it needs time to heat up. -
 Step 3
In Word open a new empty document (use the same size your ring binder has, DIN A4 for instance), minimize the borders on each side to the minimum and start to paste images from a file. Start with images that will be in the backround of the finished covers, patterns or scans of fabrics for instance:
-
 Step 4
Search your saved images or the internet for images you want to use (allways respect copyright and only use your own or free images to avoid legal consequences!)
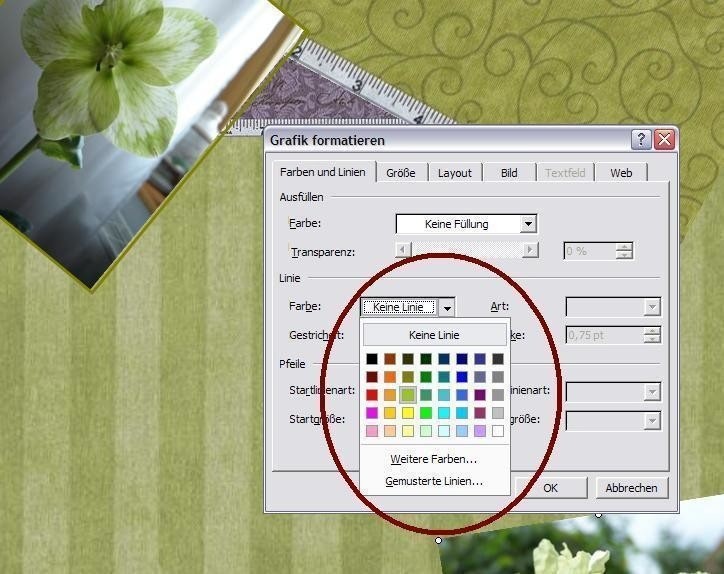
To arrange several pictures on your page, right-click on the just opnened image and choose "format image (or format picture?) then a new windows appeares, where you can change the properties and settings of the added image: -
 Step 5
First you need to change the "layout" into "fitting" or "behind text". If you choose "behind text" you will be able to move the image over the edges of the page; maybe interesting, if you want to want to have the image skewed and don´t want to see white corners on your cover. But note: if you use this option, all the following images have to be set to the same setting as well (at least if you use Microsoft Word).
-
 Step 6
You can frame each added image, too. If you use a common color or one kind of frame, the several images will look moore matching.
Hint: if you´d like to have your own lable on the cover, create one by using a image processing aplication, like Adobe Photoshop, Paint Shop Pro or even Window´s Paint and add this into the Word document.
Give it a shot and experimentee with software like this :)
-
 Step 7
Put as much images as you like into your page and arrange them after your fancy; by using the same steps for every image: first paste, then right click on the image, then left-click "format image", in the new window adujust settings like layout or frame and so on...
If something went wrong: the "undo" button allways is my best friend ;). If you didn´t press on "save" after every step you took, you should be able to undo a few steps by using this button.
-
 Step 8
If everything looks good print it. Do the above described steps for 2 pages: front cover and back cover . Of course you can use the same page for both- frot AND back. But I to my taste, it looks much better, if you use different images and pages for front and back of your ring binder.
-
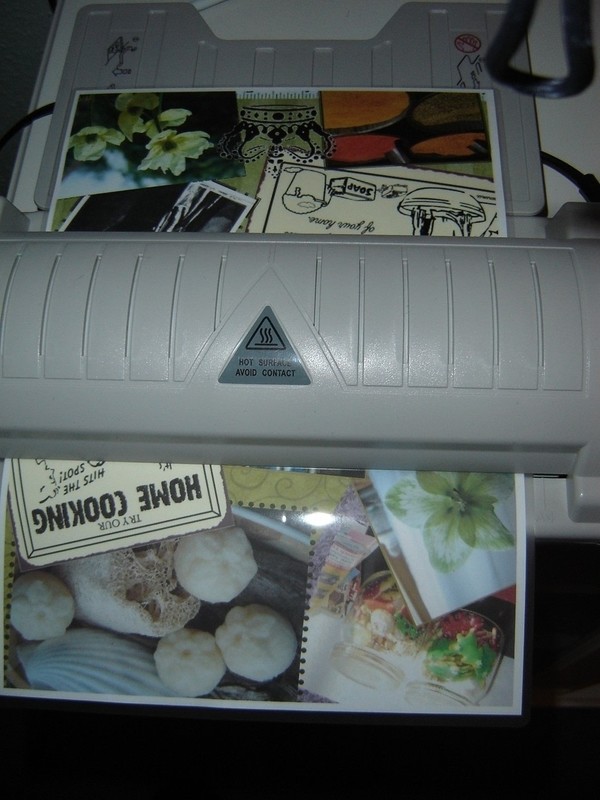
 Step 9
Now seperately laminate both sheets (sorry for the messy pic, but it´s 1 a.m. here and my cam is very old :( )
-
 Step 10
After laminating the sheets paint the parts of your ring binder, that at the end will not be covered by the sheets with a color that matches to the new covers. You can use a permanent marker as I did, India ink, or sprayable varnish. (while taking the following pictures: thanx to the gods I´m two-handed ;) )
-
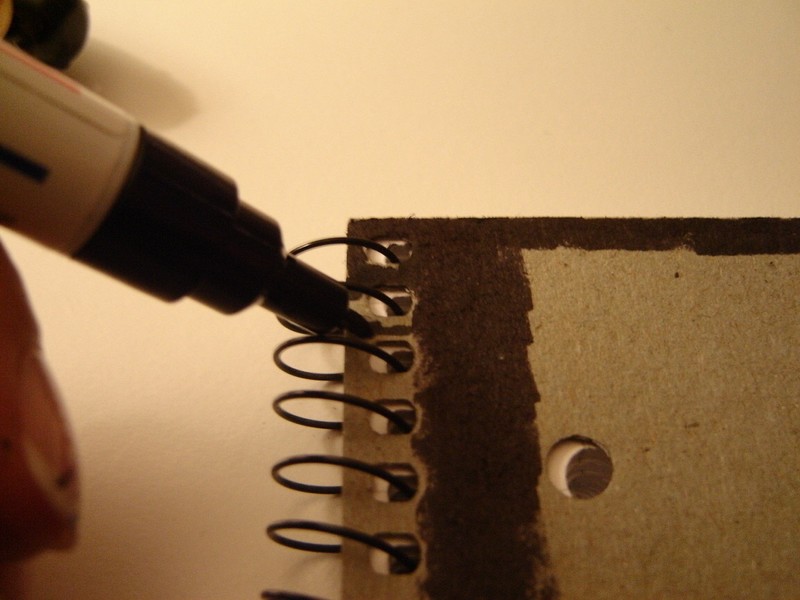
 Step 11
If you use a marker or ink, make sure to paint the spaces between the spiral as well. For this I used a thiner pencil.
-
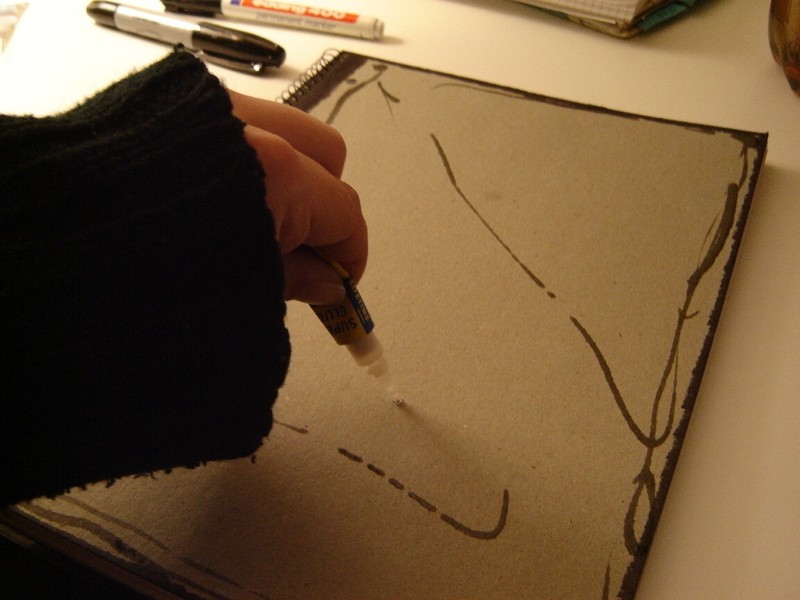
 Step 12
Now glue the laminated sheets on the original ring binder covers. I used super glue and universal adhesive. (If somebody has made experience with hot glue, please let me know :). I wasn´t sure, if this would work out good enough.)
-
 Step 13
Let the binder dry and enjoy your new unique ring binder :)
My music recommendation (what I was listening to whlie making this covers): AND ONE, and right now I get this feeling of longing, the same I had have back there, when I was on class trip in the eight degree... 16 years ago ... the same record as back in theese days and the same kind of mood while listening... (AND ONE is a really good german Synth-pop band; just google for them ;)


The only other thing I would say though is I call what you used a spiral notebook and not a ring binder. A ring binder has rings that open up that you can add paper too. But they both hold paper and I'm sure your instructions could be adapted to all sorts of notebooks and binders too.