Custom Bound Books
Extract from Trash Origami • By Michael G. LaFosse and Richard L. Alexander • Published by Tuttle Publishing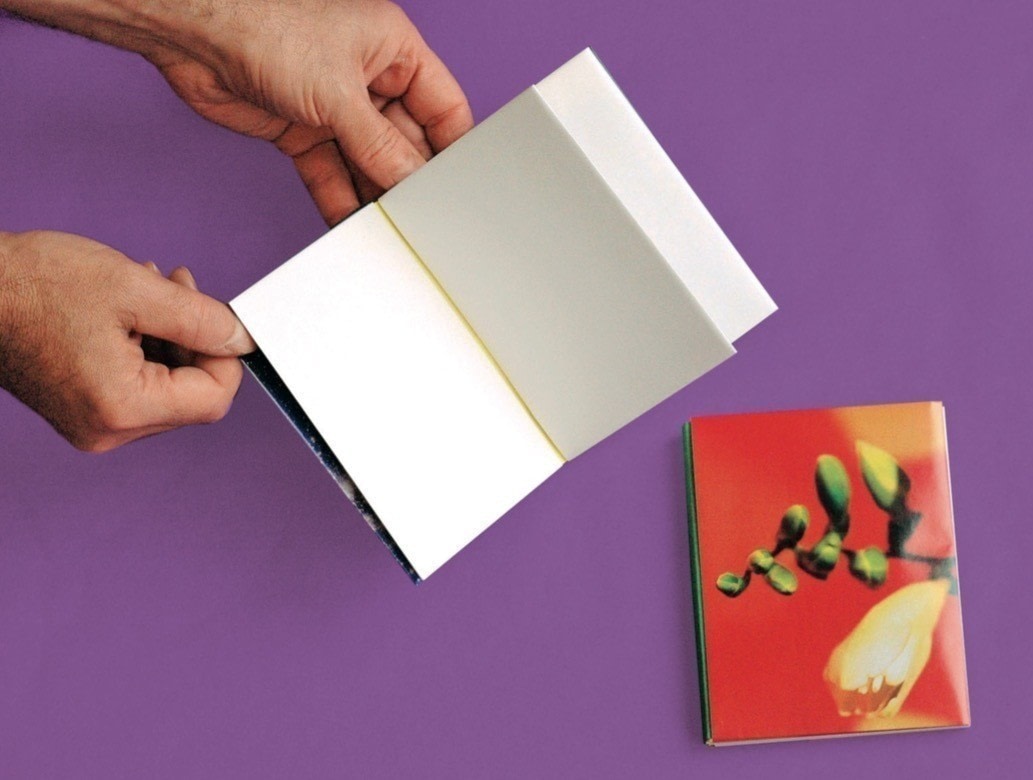

About
Trash Origami
This book is easily made from just about any kind of rectangular sheets, even squares! The ingenious design is infinitely and easily expandable, and needs
no other types of fasteners! Posters, flyers, magazine and calendar pages are excellent for decorative covers. The backs of printer scrap paper (printed on one side, yet blank on the other) can form the blank pages (to write on), and other discarded pages (printed on both sides) make the perfect connector units, since nothing shows. You can even lay out your pages in your word processer, and
set your printer to print only the portions of the page that will be exposed in
the finished book, in order to pre-print text and images of the stories you wish
to share with your highly personalized, custom-bound book! You will need at least ten sheets of rectangular or square paper that measure the same size and dimension. Printer paper is ideal. Three sheets will be used for the pages of this book; four sheets to form connecting units; two sheets to form the covers and one sheet to form the spine.
-
 Miss_Fit favorited Custom Bound Books
09 Jul 19:28
Miss_Fit favorited Custom Bound Books
09 Jul 19:28
-
 Jenee Nicole added Custom Bound Books to Crafty
28 Apr 08:56
Jenee Nicole added Custom Bound Books to Crafty
28 Apr 08:56
-
 Chudames favorited Custom Bound Books
27 Mar 22:11
Chudames favorited Custom Bound Books
27 Mar 22:11
-
 opal.hartman.7 favorited Custom Bound Books
12 Mar 05:17
opal.hartman.7 favorited Custom Bound Books
12 Mar 05:17
-
 Alissa B. favorited Custom Bound Books
08 Mar 02:00
Alissa B. favorited Custom Bound Books
08 Mar 02:00
-
 Tuttle Publishing published her project Custom Bound Books
04 Mar 23:10
Tuttle Publishing published her project Custom Bound Books
04 Mar 23:10
You Will Need
-
 Step 1
Pages: fold one of the short edges to lay midway up the sheet. Close is good enough.
-
 Step 2
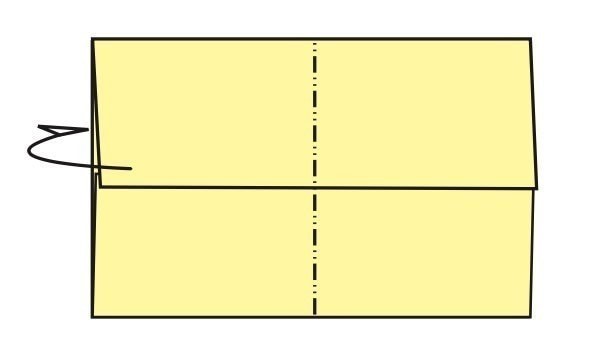
Fold the opposite edge to meet it there. You will have a neat rectangle with a horizontal split.
-
 Step 3
Fold in half, short edge to short edge, with the split inside.
-
 Step 4
The finished page unit. You will need three of these.
-
 Step 5
Connector Unit: fold one of the short edges to lay midway up the sheet.
-
 Step 6
Fold the opposite edge to overlap, by about an eighth of an inch (5 mm) or so, making the connector unit narrower that the page units. Connectors must fit into pages. You can check the fit by inserting the connector into the open side of a page unit. Make adjustments and use your adjusted unit as a guide for the others.
-
 Step 7
Fold in half, short edge to short edge, with the split on the outside.
-
 Step 8
You will need four connectors.
-
 Step 9
Covers: fold the short edges of a sheet to meet at the middle of the paper, the same as for folding the pages. Fold in half, short edge to short edge, split inside.
-
 Step 10
You will need two covers.
-
 Step 11
Spine: fold the two short edges of sheet to overlap slightly at the middle of the paper, the same as for folding the connector units. Valley-fold two parallel creases, about a half-inch (1.5 cm) apart, split inside. You should make the space between the creases larger if your book is thicker.
-
 Step 12
Square up the spine so that it looks like this. You will need only one spine.