


About
Great project for total t-shirt reconstruction
I am heading off to college in the next few months and received this one-size-fits-all t-shirt from my university. Of course, being the small person that I am, it was humongous on me; so, I decided it needed a little makeover (plus, I wouldn't look like everybody else.) Because of my experience with my 1920's inspired dress, I had experience with the binding/straps techniques and decided to make a cami top.
Tags
-
 lauren_r favorited Crossback Cami
17 Jul 22:38
lauren_r favorited Crossback Cami
17 Jul 22:38
-
 Abby C. favorited Crossback Cami
10 Jul 02:06
Abby C. favorited Crossback Cami
10 Jul 02:06
-
 Cheshire x. favorited Crossback Cami
09 Jul 20:19
Cheshire x. favorited Crossback Cami
09 Jul 20:19
-
 Pramodini Arela published her project Crossback Cami
03 Jul 04:05
Pramodini Arela published her project Crossback Cami
03 Jul 04:05
-
Step 1
PUT ON SHIRT (1) This is important to gauge how short you want your shirt to be so that you know if you will have enough fabric to make the binding and straps. I needed at least 6 inches of excess fabric. If you don't have enough, you might need another shirt.
-
Step 2
(2) See how large your arm holes are. If they are a comfortable size that won't expose to much of your sides when the sleeves are removed, then that is good. But in my case, the arm holes were much to large, so I had to cut across the sleeve to leave room so I could sew up the sides. ALWAYS PLAN BEFORE CUTTINGS.
-
 Step 3
CUT THE SLEEVES OFF. At the seams, cut the sleeves off to remove excess bulk that could result in inaccurate cutting.
-
 Step 4
CUT OFF THE EXCESS AT THE BOTTOM. Put the shirt on and gauge where you want it to fall, marking that position with chalk or a pin. Then you can measure all around the bottom to get more accuracy or just eyeball it and cut it off.
-
 Step 5
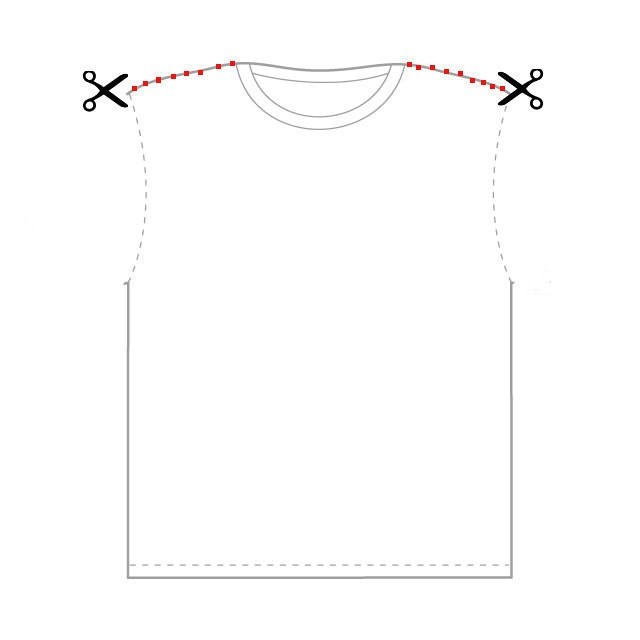
SEPARATE FRONT AND BACK AT THE SHOULDERS.
-
 Step 6
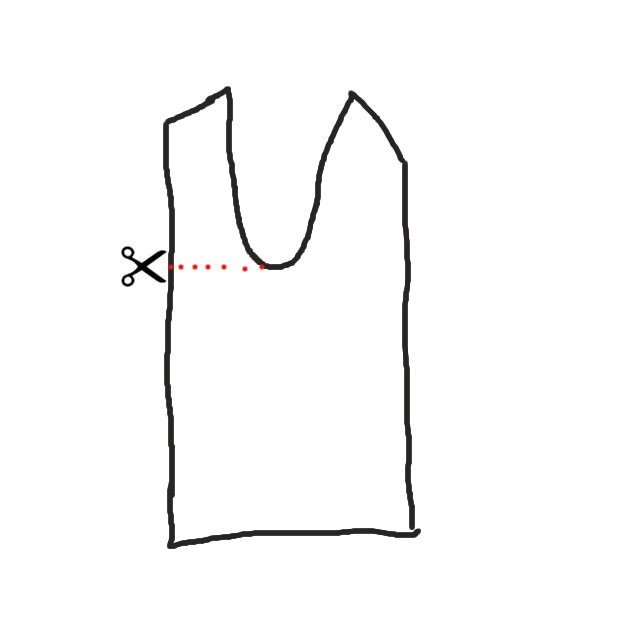
CUT THE FRONT SHAPE. Fold the front in half, matching side seams to side seams or shoulder seams to shoulder seams. Using free hand or a cami you already own as a template by lining the straps ups with the shoulder seams, trace the front triangle shapes at the top, not the straps. Then cut. Because the armholes were too big for me, I ended the sides above the bottom of the arm hole. But if the arm hole is the right size for you, you can start at the bottom and line the armhole up with the new armhole.
-
 Step 7
(OPTIONAL) SEW UP THE SIDES. because I cut above the bottom of the armhole, I have to close the gap and sew up the sides. I did this by starting at the new arm hole and sewing at a diagonal to the bottom of the shirt. I then made sure I liked the fit and zigzag stitched up the seam allowance for strength.
-
 Step 8
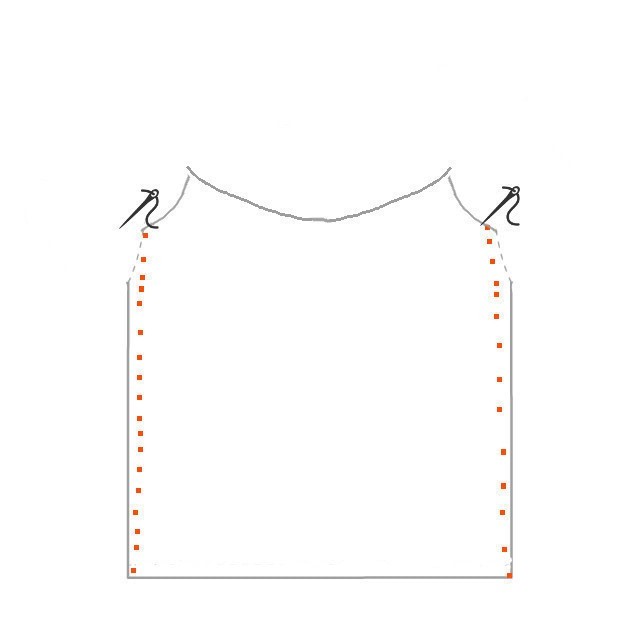
CUT THE TOP BACK OFF. With the back folded in half (matching side seams to side seams or shoulder seams to shoulder seams), cut a straight line from the bottom of one arm hole to the next.
-
Step 9
DETERMINE THE WIDTH OF YOUR STRAP/BINDING. I chose to make my straps 1/2", resulting in a 2 inch wide strip that will double over to bind the sides and create straps. Just take whatever measurement you want the width to be and times it by 4.
-
Step 10
CUT STRIPS. Using what is left over from the sleeves, square up one side and cut the width for your strip. This should be long enough to span the front neck portion of the shirt. Then using the excess from the bottom, cut more strips of the same width.
-
 Step 11
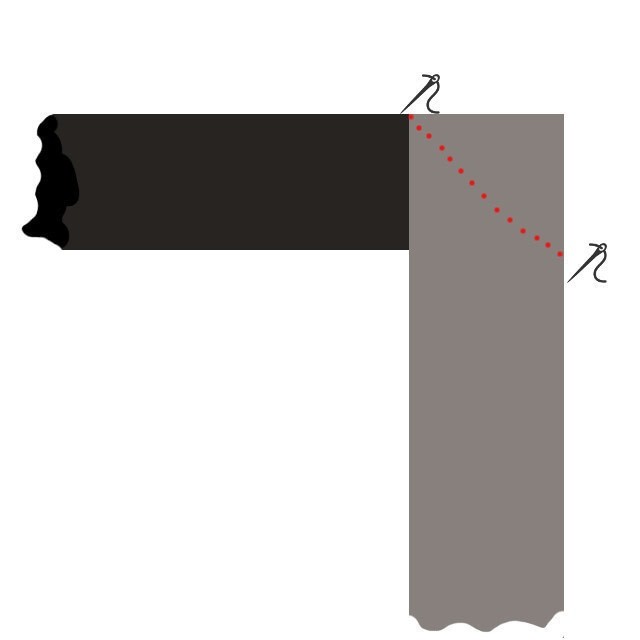
SEW THE LONG STIRPS TOGETHER. To create one long continuous strip, take two of the strips from the bottom and pin them at a perpendicular angel. The sew at a diagonal from the top left corner to the bottom right, like you would for quilting. Then cut off the excess. This will reduce bulk and create a smoother line. Repeat for the other long strip. DO NOT ADD THE SHORT STRIP FROM THE SLEEVE.
-
Step 12
CHECK TO SEE IF THE STRIP IS LONG ENOUGH TO CROSS IN THE BACK AND GO ALL AROUND THE PERIMETER OF THE SHIRT. This would be the time to use your dress form or friend.
-
Step 13
(OPTIONAL) IRON THE STRIP. To make it easier, you can iron the strip by folding both sides toward the middle and then in half again.
-
 Step 14
SEW THE BINDING/STRAP TO THE SHIRT. With the short strip, pin the strip and the top shirt neck right sides together and sew a straight stitch across (I used a 1/2 inch seam allowance). Cut off excess and iron it up if you want. Fold the top down to meet the seam allowance and then fold in half over the seam allowance and pin. Sew on the right side making sure to stay as close to the seam line as possible.
-
Step 15
PIN THE OUTER BINDING. fold the back of your shirt in half and mark the middle. Do the same with the long strip. Match the centre points together and pin with right sides facing each other. Then pin along the back and arm areas of the shirt.
-
 Step 16
SEW THE BINDING TO THE SHIRT. Starting from the left sew around the shirt and ending on the right (same seam allowance). You can stitch the seam allowance onto the straps part for a guide to fold it later.
-
Step 17
(OPTIONAL) You can iron the newly sewn binding up for a more crisp finish if you want.
-
 Step 18
COMPLETE STRAPS AND BINDING. Starting with the sewn portion, fold the top down to meet the seam allowance in the middle, then fold the whole thing in half to finish the binding. Continue all the way around the sewn area. Then, with the straps, fold both sides toward the middle and in half. Secure all with pins and sew a straight stitch as close to the edge as possible on the front side of the shirt.
-
Step 19
TRY ON AND ADJUST THE STRAPS. With a dress form or a friend, put on the shirt and tie a single knot in the back. Then adjust the straps to where you want it to be. Mine was about 3" from each side seam and 5" from the base of the knot.
-
Step 20
(OPTIONAL) pin the Knot so you can tack it down later and keep it in place.
-
 Step 21
SEW THE STRAPS ON. With your machine, sew the straps to the back of the shirt. I sewed on the seam line that was already there and above it to make it more secure.
-
Step 22
TRY IT ON AGAIN TO CHECK THE POSITION. This is good to do before you cut anything off in case you want to change it.
-
Step 23
CUT OFF EXCESS. I zigzag stitched the ends of my straps to give it security.
-
 Step 24
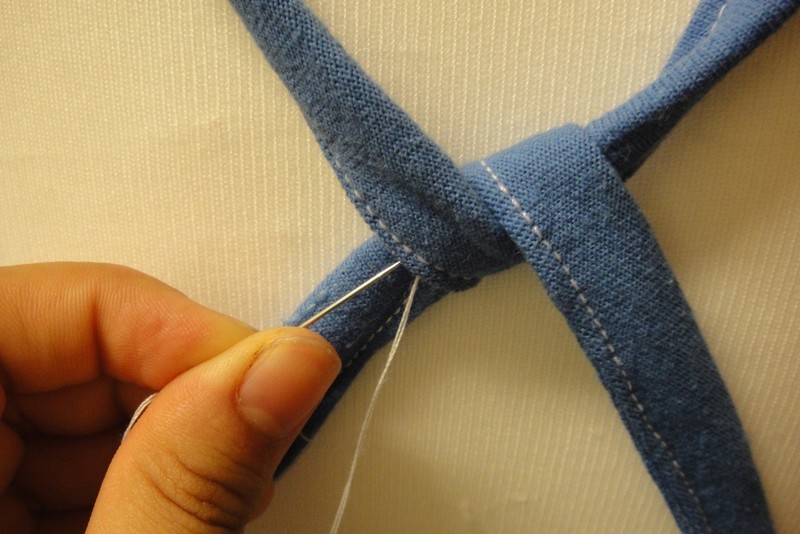
(OPTIONAL) With a needle and thread, tack the knot in place with just some invisible in and out stitches to keep it from moving.
-
Step 25
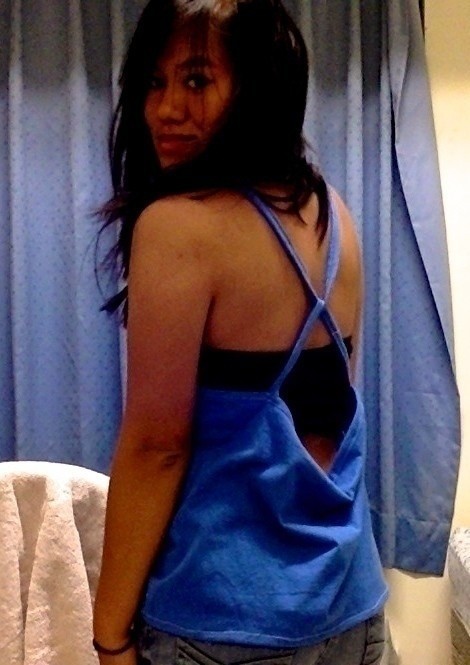
PUT IT ON AND ROCK IT OUT!