About
Stamp yourself on someone's heart with this picture
Once you have learned how to make one of these stamps the sky is the limit and you will be able to print anything from bags to greetings cards
Tags
-
 Tierra T. favorited Cross Stitch Heart Picture (Made Using Your Own Stamp)
08 Nov 03:42
Tierra T. favorited Cross Stitch Heart Picture (Made Using Your Own Stamp)
08 Nov 03:42
-
 Chudames favorited Cross Stitch Heart Picture (Made Using Your Own Stamp)
27 Jul 08:29
Chudames favorited Cross Stitch Heart Picture (Made Using Your Own Stamp)
27 Jul 08:29
-
 Katrina P. favorited Cross Stitch Heart Picture (Made Using Your Own Stamp)
05 Jul 04:13
Katrina P. favorited Cross Stitch Heart Picture (Made Using Your Own Stamp)
05 Jul 04:13
-
 Kichiru added Cross Stitch Heart Picture (Made Using Your Own Stamp) to Lovely things ♥
19 May 11:50
Kichiru added Cross Stitch Heart Picture (Made Using Your Own Stamp) to Lovely things ♥
19 May 11:50
-
Kichiru added Cross Stitch Heart Picture (Made Using Your Own Stamp) to Really do this !
18 May 20:31
-
 Niki W. favorited Cross Stitch Heart Picture (Made Using Your Own Stamp)
20 Feb 00:04
Niki W. favorited Cross Stitch Heart Picture (Made Using Your Own Stamp)
20 Feb 00:04
-
 Crafta La Vista published her project Cross Stitch Heart Picture (Made Using Your Own Stamp)
05 Feb 20:39
Crafta La Vista published her project Cross Stitch Heart Picture (Made Using Your Own Stamp)
05 Feb 20:39
-
 Step 1
Draw your design on the lino square - for a cross stitch picture you just need a simple X
-
 Step 2
Cut out a square from your lino - the size depends on how big you want to make your picture
-
 Step 3
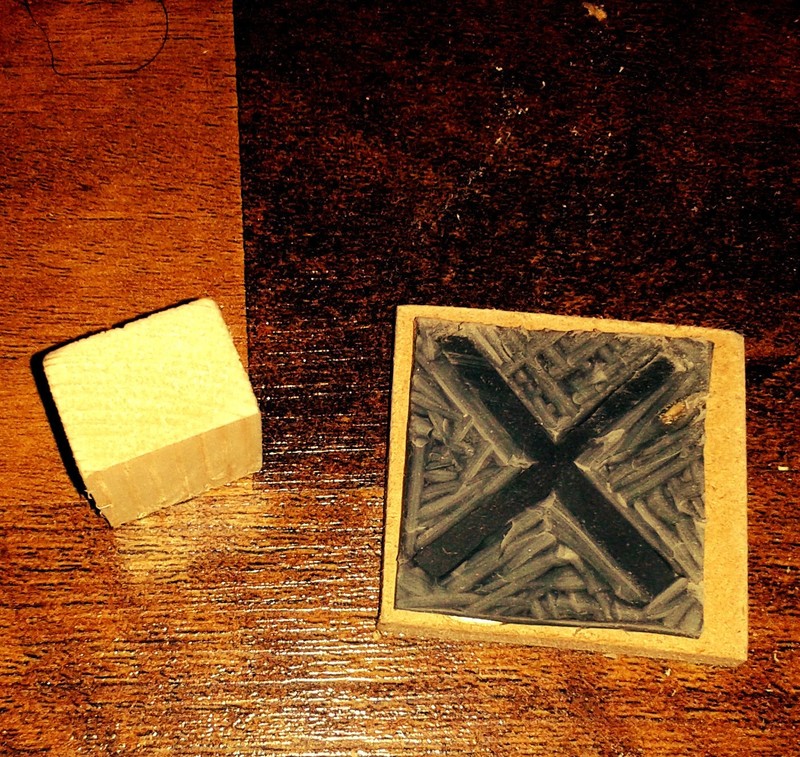
Take your lino cutter and cut around the outside of your X, to give yourself 4 triangles
You will need to remove enough of these triangles so that when you put the stamp in your ink, only the X gets ink on it
Then remove the corners off your X so it has straight edges, rather than pointy
-
 Step 4
Cut 2 pieces of wood - 1 that is slightly larger than your stamp and 1 that is smaller than the first piece
Glue the stamp to the larger square, making sure it goes on evenly - you don't want it bumpy
-
 Step 5
Flip the larger piece of wood over so the stamp is on the bottom and glue the small piece of wood on top
Leave the glue to dry - which won't be long if you are using a hot glue gun
-
 Step 6
Take a piece of plain material - I used canvas to give it a vintage feel
Start near the of you material at the bottom and do your first X with read ink, working 6 in a row
To either side of this, leave the bottom square blank and do another 6 X's up
This time leave 2 X's up and do another 6 on either side
Go 3 up next but this time only do 5 x's
Lastly start 4 up and do 3 X's
Then clean the ink off your stamp (or make another the same size) and fill in all the blank space with peach/skin coloured X's
For this part I didn't have any peach ink to hand so I used a skin coloured pen I had around the house and drew those ones on free hand - because they are much lighter you don't need to worry about them being as uniformFinish it off by putting the material in a frame and stretching it out