

About
Butterflies to flitter inside as well...
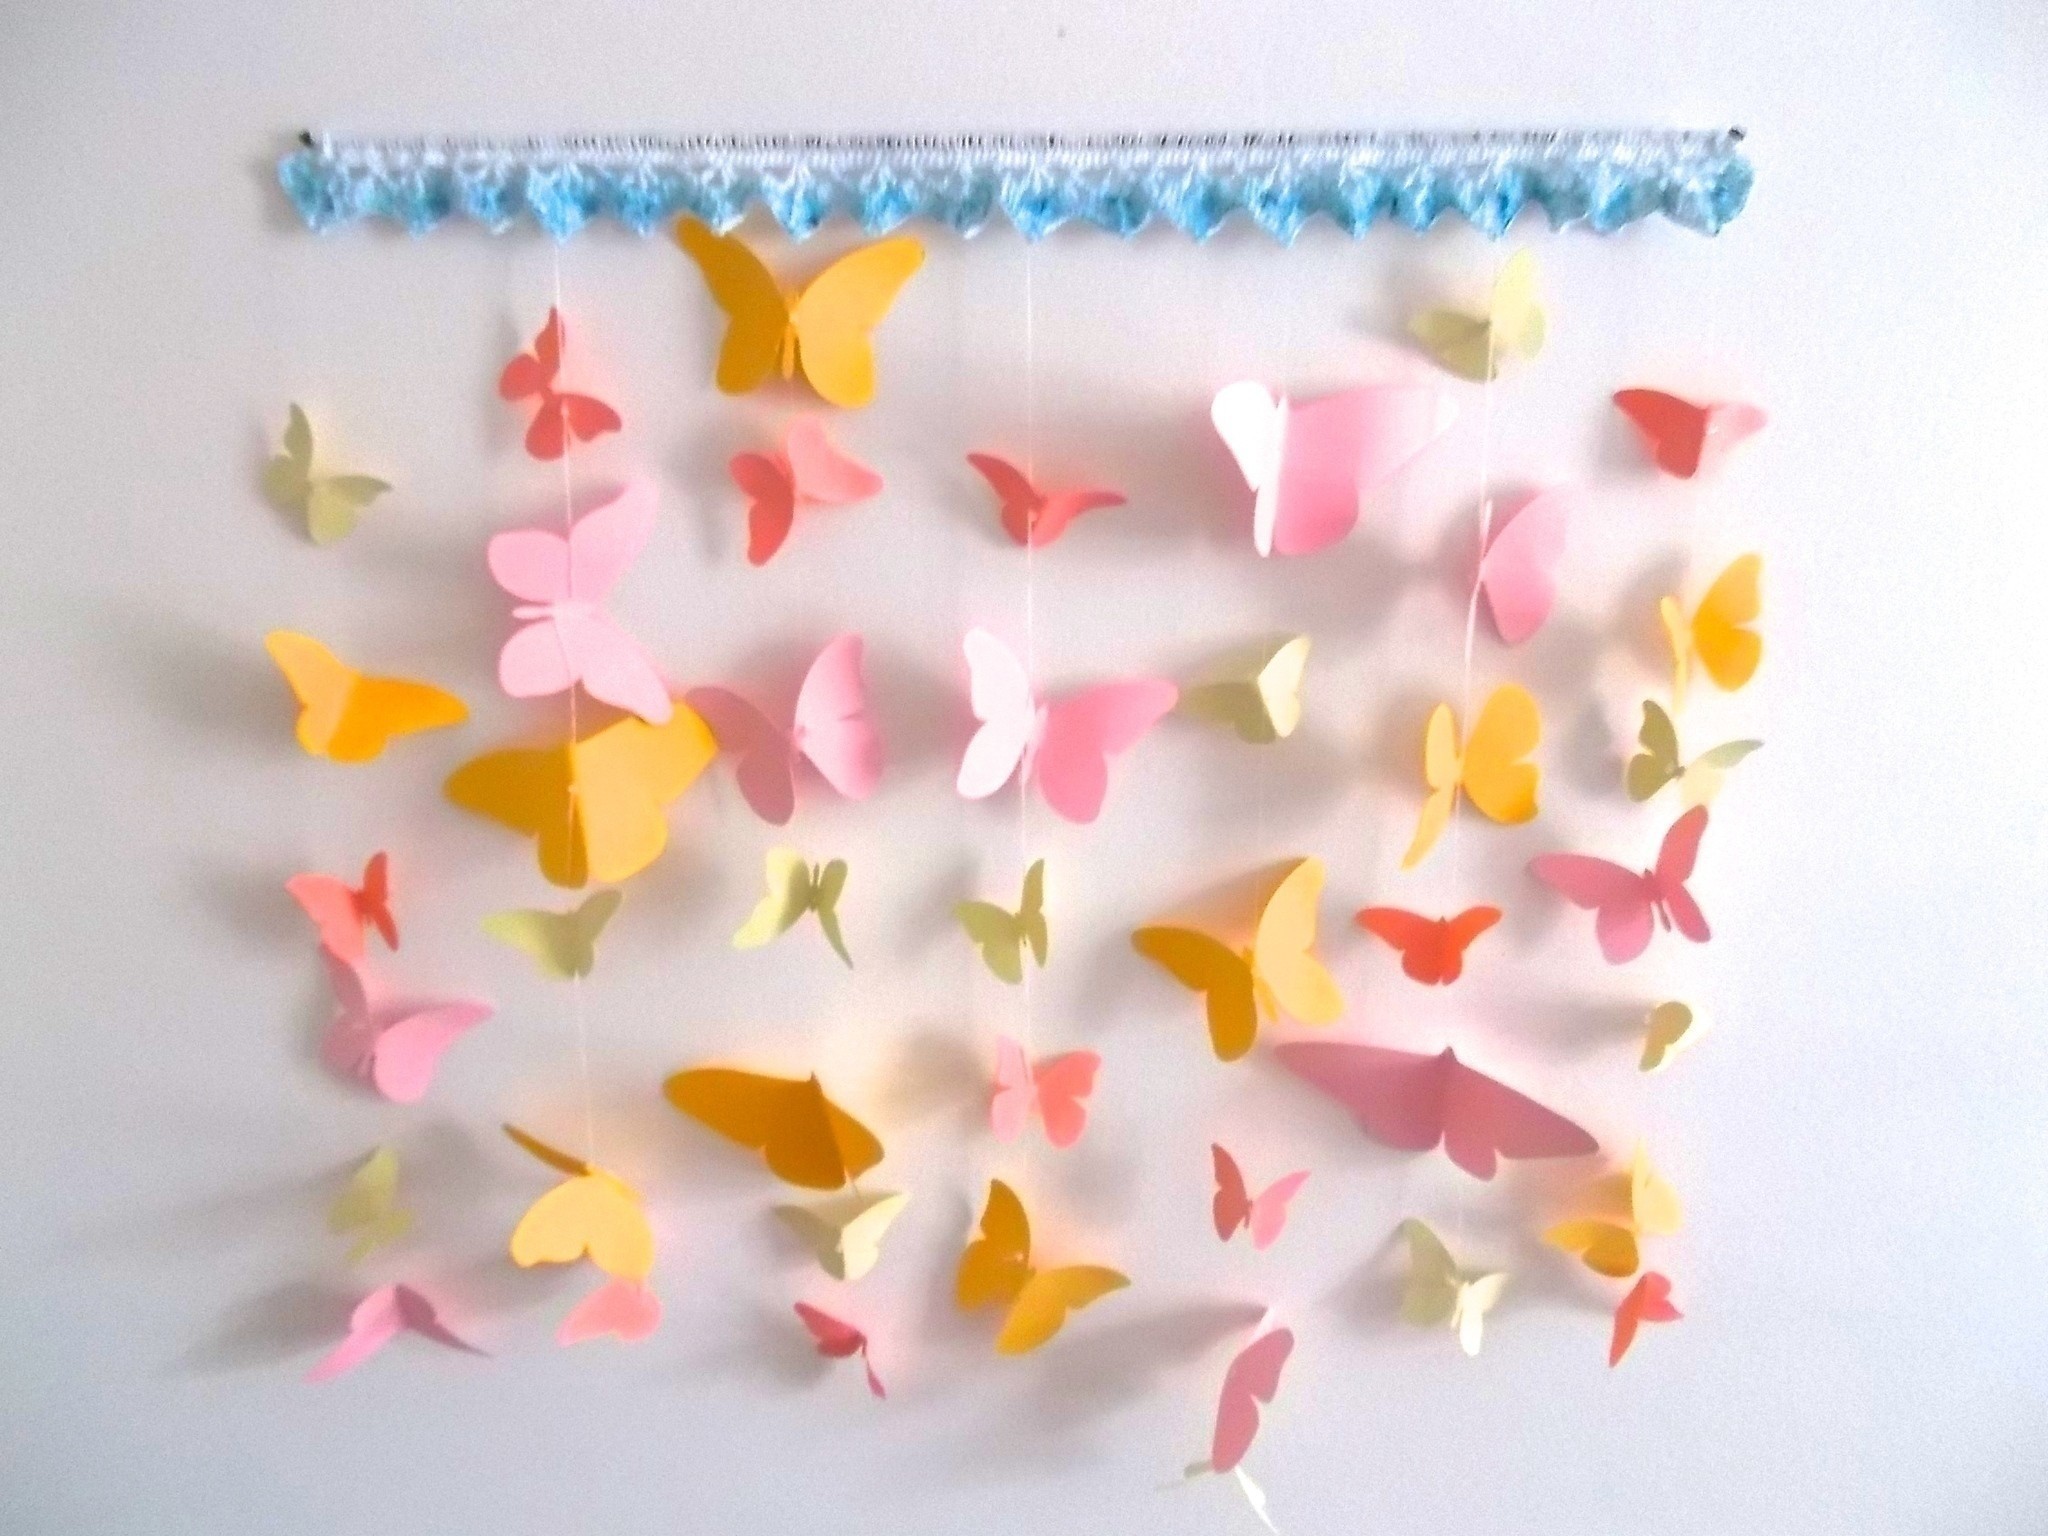
My aunt bought a circular butterfly mobile ages ago, and she has it hung up in her dry cleaning and alterations shop. She asked me if I could create a companion decoration like it for her shop's window. You see, the shop has a little nook with curtains hung in front of the windows and around that recess so that clients can try on their ill-fitting apparel for her to hem or fix. However, she wants something behind the plain curtains in front of the window to liven up her shop.
Aaand that's where I come in. :3
Tags
Downloads
- 103807_2F2014-08-06-230359-Screen+Shot+2014-08-06+at+4.03.46+PM.png 39.9 KB [ Download ]
-
 Arolina M. added Crochet Trimmed Butterfly Curtain to My collection
21 Sep 06:56
Arolina M. added Crochet Trimmed Butterfly Curtain to My collection
21 Sep 06:56
-
 Nicole Y. favorited Crochet Trimmed Butterfly Curtain
10 Apr 06:41
Nicole Y. favorited Crochet Trimmed Butterfly Curtain
10 Apr 06:41
-
 TheSewingMaven favorited Crochet Trimmed Butterfly Curtain
29 Apr 02:12
TheSewingMaven favorited Crochet Trimmed Butterfly Curtain
29 Apr 02:12
-
 Conn entered her project Crochet Trimmed Butterfly Curtain to Secret Santa
28 Dec 22:53
Conn entered her project Crochet Trimmed Butterfly Curtain to Secret Santa
28 Dec 22:53
-
 lisa r. added Crochet Trimmed Butterfly Curtain to crafts just for fun
04 Oct 01:05
lisa r. added Crochet Trimmed Butterfly Curtain to crafts just for fun
04 Oct 01:05
-
Maddy W. favorited Crochet Trimmed Butterfly Curtain
26 Sep 15:03
- Quirky-Ark favorited Crochet Trimmed Butterfly Curtain 24 Aug 18:23
-
 bobbie.prado added Crochet Trimmed Butterfly Curtain to Gaby
19 Aug 08:16
bobbie.prado added Crochet Trimmed Butterfly Curtain to Gaby
19 Aug 08:16
-
 Ana favorited Crochet Trimmed Butterfly Curtain
14 Aug 13:07
Ana favorited Crochet Trimmed Butterfly Curtain
14 Aug 13:07
-
 Crafty Pirate favorited Crochet Trimmed Butterfly Curtain
10 Aug 21:33
Crafty Pirate favorited Crochet Trimmed Butterfly Curtain
10 Aug 21:33
-
 Step 1
I uploaded the file of butterfly shapes, so use those as templates for yourself and search up more images if you like. I used my Cricut Explore to cut out butterflies for me, but you could alternatively:
Print out a copy of each butterfly shape, trace several copies of each onto paper, and cut them out. Do that over the time of a few TV shows or movies (and might I suggest BBC's Sherlock? *wink*) to pass the time more quickly.
Buy a butterfly paper punch or two and use it to punch out lots and lots of butterflies.
Whatever method you end up using, feel free to cut out as many butterflies as you'll need. I just cut out about 100 with different sizes and colors and then cut out more when I needed them. -
 Step 2
Make the butterflies look more realistic by turning your 2D cutouts into 3D butterflies. Put butterflies in groups of 6 or less and gently fold them down the middle. Shuffle that stack a bit and then fold them down the middle again to make sure that none are more sharply folded than others. Then grasp a wing and curve it over a finger to create a little arch in the wing.
-
 Step 3
Repeat those steps for all your butterflies.
-
Step 4
This curtain needs to have stabilization at the top, which you can make from skewers or wire clothes hangers.
For skewers, use some 20 gauge copper wire (or similar material) and wrap it around the ends so that no thread slides off. You can alternatively do anything that has the same stoppage effect; wrap the ends with yarn, for example.
-
 Step 5
For clothes hangers, cut away the excess except the longest straight piece of wire that you can savage from it. Use your pliers to curl the ends into loops if possible, but I just took some 20 gauge copper wire that I had and wrapped it around the ends so that no thread would slide off.
I'm going to call this a rod, like a curtain rod, for easier reference in the next steps.
-
 Step 6
Why should I have a trim, you ask? Well, it's not necessary but I wanted it to A) hide the unsightly gray/brown color of the coat hanger I used and B) it would provide nice, even holes for attaching chains of butterflies without worrying about said chains moving around. If you want to avoid crocheting, just tie your chains to the rod and dab glue on the top to ensure that the chains won't slip and slide on the rod.
Anyhow, if you're going to add a trim, take your thread and loop it around your rod. Pull the thread that's closer to the spool of string through that loop. Pull the tail to tighten and you now have a (kinda) slip knot for crocheting.
Sorry that I don't have an actual picture, but the concept's like shown in that picture: pull some thread through the initial loop to create the slip knot.
-
 Step 7
There's three rows in the design for the trim:
Row 1: Double stitch all the way across the rod. Make sure that you don't crochet TOO many so that the rod is completely packed.
-
 Step 8
Row 2: Chain stitch three times before doing a double stitch, inserting your ook into the top of a double stitch 4 stitches to the left. Chain stitch thee more times and do another double stitch, inserting your needle into the top of the same stitch. Chain stitch three times yet again and do yet another double stitch at the top of the same stitch. Then chain stitch for the last set of the three times and do a slip stitch, inserting your hook four double stitches to the left. Repeat until you've reached the end of the rod, but around two inches from the end, you can start fudging up the spacing; no need to insert your needle exactly four stitches to the left, especially because you might not have enough stitches up at the end. Basically, just do what you need to get visibly even spacing.
-
 Step 9
Row 3: Chain stitch three times and then do three double stitches in the first section of the first scallop. Do four double stitches in the second section before chain stitching three times. Do four more double stitches in the third section and then three following double stitches in the fourth and final section. Without doing any chain stitches, double stitch three times into the first section of the next scallop and double stitch four times in the second section, followed by three chain stitches, four double stitches in the third section and three section in the final section. Repeat those double stitches for the next scallops. For the last scallop, after double stitching three times in the final section, chain stitch three times and slip stitch, inserting your hook into the left-most stitch of the scallop.
-
 Step 10
To hide your tails, insert your hook anywhere and pull the tail through. Continue poking and pulling until you have a long-ish section of tail hidden before cutting off the excess.
-
 Step 11
I only had white cotton thread (besides the variegated purple as shown in the last picture of the previous step; I don't have a lot of that so I didn't want to completely deplete my supply), but this white I knew would merely blend in with the curtains, which I found too boring for all the time I spent crocheting. Thus I used an ink pad for stamping and brushed a bit of ink onto the tips of the trim before using a thumb to rub the ink around and diffuse the coloring. Food coloring or dye would look amazing, too but do what suits you and your arsenal of materials.
-
 Step 12
Grab your stringing material, be it thread or fishing line (I used a mix of both because I couldn't find the fishing line at first.). Cut a length for how long you want the chain of butterflies to be, and insert a bead onto it using a needle or nothing at all (fishing line is stiff enough for the latter). Tie two knots around the beed at the end of the string to secure it...
-
 Step 13
... before stringing on a butterfly. You can use a needle already attached to your string to poke a hole, but I didn't want to dull my sewing needle on the thread so I used a pre-poked hole from a headpin.
-
 Step 14
Repeat the process--stringing on a bead, tying two knots to secure it, and adding a butterfly--until you're satisfied with the length. Make sure there's enough room at the top for tying it to the rod later.
-
 Step 15
Picture of Attaching chains to rod
DSCN2070.JPG
DSCN2073.JPG
DSCN2075.JPG
If you chose to have a trim, count the number of points on your trim and plan which ones you want to have a chain hanging from it.If you chose not to have a trim, don't worry about that step.
Hanging up the rod before adding chains makes this process easier, so start by cutting out a length of string that's about 4-5" longer than your rod and tying both ends of the string to your rod.
Begin by adding chains from the middle out. Take one string of butterflies and loop the top of the cording through the tip of the center crocheted point (or just loop it over your rod, if you didn't crochet). Then tie two knots to secure the chain. Hide the tail like you hid the tails for the crochet trim (fifth picture of step five). Rinse and repeat until all your butterfly chains are attached.
-
 Step 16
If you don't have a trim, dab a bit of glue on where the string and rod touch so that the chain doesn't slide to and fro.
Ta da! Your new wall decor is complete!


