

Crochet Flamingo Bag
Extract from Colourful Wayuu Bags to Crochet • By Rianne de Graaf • Published by Search Press


About
Colourful Wayuu Bags to Crochet
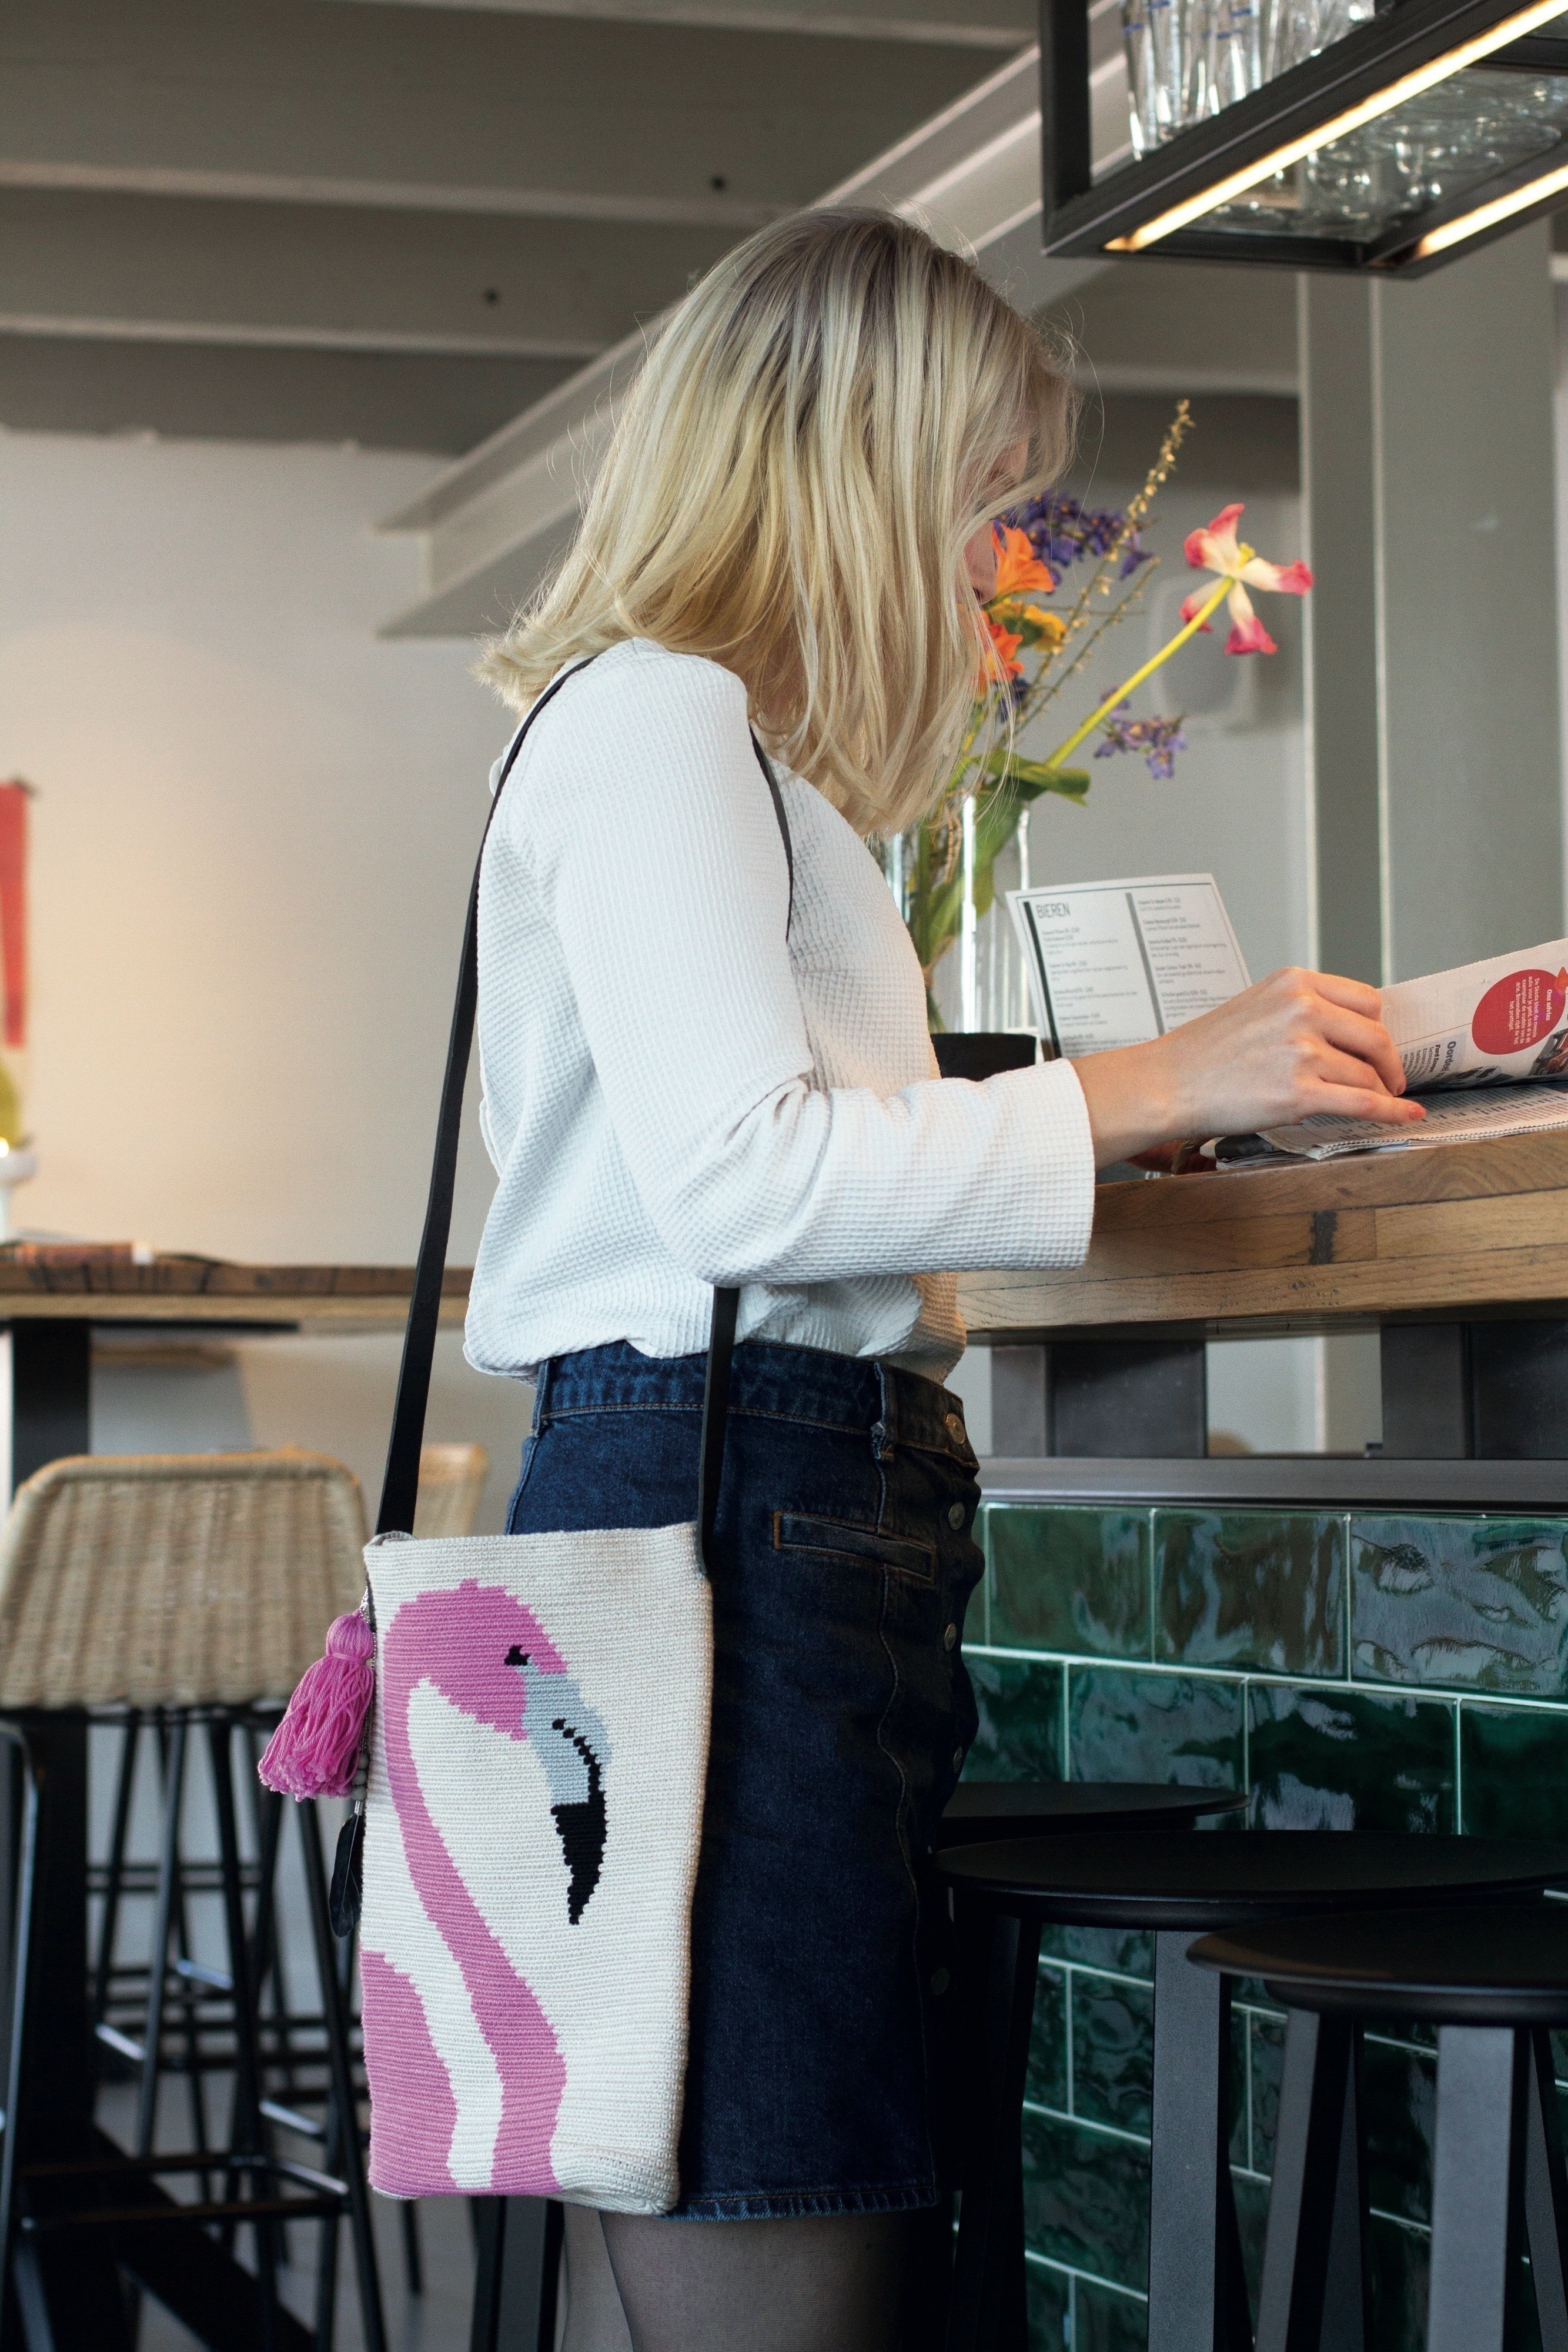
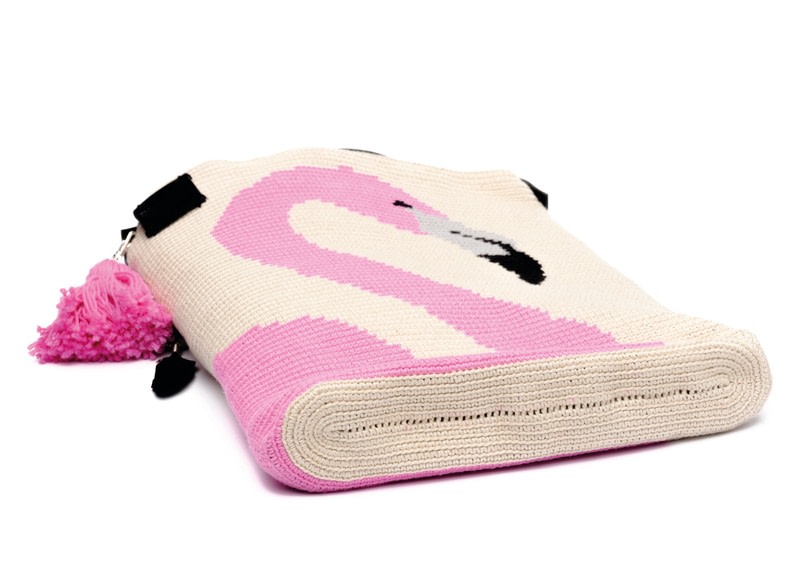
I once saw flamingos flying in the wild. Wow, what an experience that was! If I close my eyes, I can visualize them again, flying... the beautiful pink colour, the crazy curved beaks and their long legs. It made such a huge impression on me that a flamingo bag was simply inevitable!
This design has an oval base, which is a different model from the other bags in the book. The base is kept simple so that you can create it quite easily, without needing to pay too much attention to the yarn changes. Besides, I don’t think that such a beautiful flamingo design needs a distinctive base pattern.
Pattern repeats
The chart has a repeat of 88 stitches. This means that the number of stitches from the base must be divisible by 88 for it to match the chart. The pattern is repeated two times over 176 stitches. Note that, in this pattern, the flamingos are crocheted so that their backs are against each other and they both look in the same direction.
Dimensions
Base diameter is approximately 9 1⁄2 in (24cm) and 2in (5cm) wide; height is approximately 12 1⁄4 in (31cm).
Tags
© 2024 Rianne de Graaf / Search Press · Reproduced with permission. · ‘Colourful Wayuu Bags to Crochet’ by Rianne de Graaf ISBN: 9781782216742 RRP Price: £9.99 Publisher: Search Press Available from www.searchpress.com
-
 Key West Witch favorited Crochet Flamingo Bag
26 Jun 07:31
Key West Witch favorited Crochet Flamingo Bag
26 Jun 07:31
-
 Debora R. replied to a comment on Crochet Flamingo Bag
04 Mar 10:32
Debora R. replied to a comment on Crochet Flamingo Bag
04 Mar 10:32
-
Debora R. commented on Crochet Flamingo Bag
04 Mar 10:29
-
 Eunice P. favorited Crochet Flamingo Bag
13 Nov 22:57
Eunice P. favorited Crochet Flamingo Bag
13 Nov 22:57
-
 RiannesHaaksels favorited Crochet Flamingo Bag
16 May 06:37
RiannesHaaksels favorited Crochet Flamingo Bag
16 May 06:37
-
 Libby W. added Crochet Flamingo Bag to Crochet
05 May 15:55
Libby W. added Crochet Flamingo Bag to Crochet
05 May 15:55
-
Libby W. favorited Crochet Flamingo Bag
05 May 15:55
-
 Gloria M. commented on Crochet Flamingo Bag
30 Apr 03:02
Gloria M. commented on Crochet Flamingo Bag
30 Apr 03:02
-
 Lotusburger favorited Crochet Flamingo Bag
29 Apr 06:50
Lotusburger favorited Crochet Flamingo Bag
29 Apr 06:50
-
 Cindy S. favorited Crochet Flamingo Bag
28 Apr 19:06
Cindy S. favorited Crochet Flamingo Bag
28 Apr 19:06
You Will Need
-
 Step 1
Base
Work 60 chains using yarn A.
Add one length of yarns B, C and D.
Round 1: work 3 sc in first chain from hook, 1 sc into the next 58 chains, 6 sc into the next chain. Work from here on the other side of the chain, 58 sc, 3 sc into the same chains as the first 3 sc (128 sts).
Round 2: work 2 sc into each of next 3 sts, 58 sc, 2 sc into each of next 6 sts, 58 sc, 2 sc into each of next 3 sts (140 sts).
Round 3: *2 sc in first st, 1 sc*, rep twice from * to *, 58 sc, *2 sc in next st, 1 sc*, rep five times from * to *, 58 sc, *2 sc in next st, 1 sc*, rep twice from * to * (152 sts).
Round 4: *2 sc, 2 sc in next st*, rep twice from * to *, 58 sc, *2 sc, 2 sc in next st*, rep five times from * to *, 58 sc, *2 sc, 2 sc in next st*, rep twice from * to * (164 sts).
Round 5: *3 sc, 2 sc in next st*, rep twice from * to *, 58 sc, *3 sc, 2 sc in next st*, rep five times from * to *, 58 sc, *3 sc, 2 sc in next st*, rep twice from * to * (176 sts).Work from here onwards using the chart. First, have a look at the section on staggering, so you can learn how to make the end result nice and neat. The explanation of the crochet chart below describes how to work the first rounds. The rest should be self-evident.
-
Step 2
Staggering
Please note, the pattern is staggered at the point at which you start in the chart. In this pattern, you do not have to pay much attention to whether the staggering is correct, because it is all in yarn A and will therefore not be noticeable. -
Step 3
Starting the crochet chart
Round 1: work 22 sc in yarn A, 132 sc in yarn D, 22 sc in yarn A.
Round 2: 21 sc in yarn A, 134 sc in yarn D, 21 sc in yarn A.
Round 3: 21 sc in yarn A, 19 sc in yarn D, 10 sc in yarn A, 76 sc in yarn yarn D, 10 sc in yarn A, 19 sc in yarn D, 21 sc in yarn A.
Continue to work as shown in the chart.
Work approximately 69 rounds. -
Step 4
Holes for the cord
This design uses two magnet closures instead of a drawstring. This is because, otherwise, the bag will pull the design out of shape when you close it. For an oval bag, you can also choose to use a zip closure. Sew the magnetic closures in the middle of the long sides of the bag. -
 Step 5
Fastening off the bag
Fasten off the bag according to the description on page 21. Attach the leather shoulder strap to the sides of the bag. Take a cotton yarn thread and a sharp needle, and use the holes at both ends of the shoulder strap to stitch it to the back. Decorate the bag to your liking using colourful decorations. -
Step 6
Variations
Would you like to create a plain oval bag? Now you can! Use the description of the base for the flamingo bag and use the chart as it is. Just as with the Plain & Glitter Stripes pattern, change the yarn every 10–15 stitches to keep the thread tension even.


What does it mean to "Add one length of yarns B, C and D" after the beginning chain of 60?