About
Get Even More Creative Using the We R Memory Keepers Fuse Tool
The Fuse tool allows you to do many creative projects for your scrapbook pages, your card making and anything in between. It creates great little pockets to tuck things into or seals your photos to save those precious memories.
Tags
-
 Peg R. published her project Creating With The We R Memory Keepers Fuse Tool
08 Oct 06:00
Peg R. published her project Creating With The We R Memory Keepers Fuse Tool
08 Oct 06:00
You Will Need
-
 Step 1
The first thing I found was that I could not work in my crafting area and had to move to the kitchen and move our table closer to the outlet for the short cord on this tool to reach. Once I got the tool plugged in and heated I began sealing the vertical lines on a 12" x 12" page protector. That was fairly easy. I did learn that I could not press too lightly or tool heavily while doing this or the wheel will not turn and create the seal. Word of advice is to practice a lot on a separate page protector until you are comfortable with the pressure that is needed to do this correctly.
-
 Step 2
I was very excited to try the Fuse tool to see how I could use it in my paper crafting. After deciding to create an ATC pocket and a shaker card I started to get to work. For this review, I received some of the 12" x 12" page protectors along with some of the waterfall sized pockets to use. I love both of them because of their sizes and being able to do different types of projects with them.
The first thing I did was to make it easy and I created a template and I highly recommend doing this if you want anything with a uniform pocket so that you can simply and easily follow the lines when cutting and sealing with the tool. I used a 12" x 12" piece of cardstock and left 1/4" for a border on each side. Each pocket measures 2 3/4" x 4" and the large pocket on the left if you want one of those is 3 1/2" wide by 12" long. From there a little frustration set in.
-
 Step 3
The next step is to cut the openings for each ATC to fit into the individual pockets. For this, you must let the tool cool and switch the tips. You receive 2 tips with this tool....one for cutting and one for sealing. You, also, receive a ruler to use.
Place a large piece of cardboard into the sleeve and on top of it slide in your template.
Now, line up the ruler opening with the first "cut" mark you have on your template. You may have to work a little on this to get it to show through the ruler opening in the center. The included ruler I found hard to use working on a large project so I switched to a regular metal ruler and lined it up with the cut lines. The ruler is just too small and would have been better if it was full sized.
You will also need to practice on how much pressure to use while cutting. I found that light pressure will not cut through and a heavy pressure will give you a ragged edge.
-
 Step 4
Here is what you will have once you have completed these first steps. Ok, not bad for the first few tries at it, but the key is to practice using it.
-
 Step 5
You can, now, begin creating the special pieces that you want to safely store in those pockets.
Here I cut a flowered piece of vellum and added the theme of the ATC's that I was using the page protect for onto it using some adhesive letters. It was then placed into the sleeve.
-
Step 6
The first thing to remember when creating an ATC is that they are always 2 1/2" x 3 1/2" in size. ATC's are cards that are traded by crafters to share their creativity. They are like baseball cards and are traded and never sold.
They are done in whatever ways you want. You can use markers, stamps and ink, stickers, paint, sketch your design on or whatever you want. Just make sure that if they will be mailed they are flat enough to be put into an envelope and keep in mind that ATC's are collected so many people put them sleeves just like the ones created using the Fuse tool so they need to be flat for this, too.
On the back they contain:
Your Name
Some may contain your address or email but only if you want it on
Theme of Card
Date Made
Series #-based on same theme but with different designs for each ATC, Edition Number or Number of card to how many made ie. 1/8 or 1 of 8 -
 Step 7
For some of the backgrounds on these cards, I used Pan Pastels.
-
 Step 8
Others I used green ink and a blending tool.
-
 Step 9
Some of the flowers were made using favorite punches and embellished using adhesive gems.
-
 Step 10
This one combined my favorite stamp set with the Pan Pastel background.
-
 Step 11
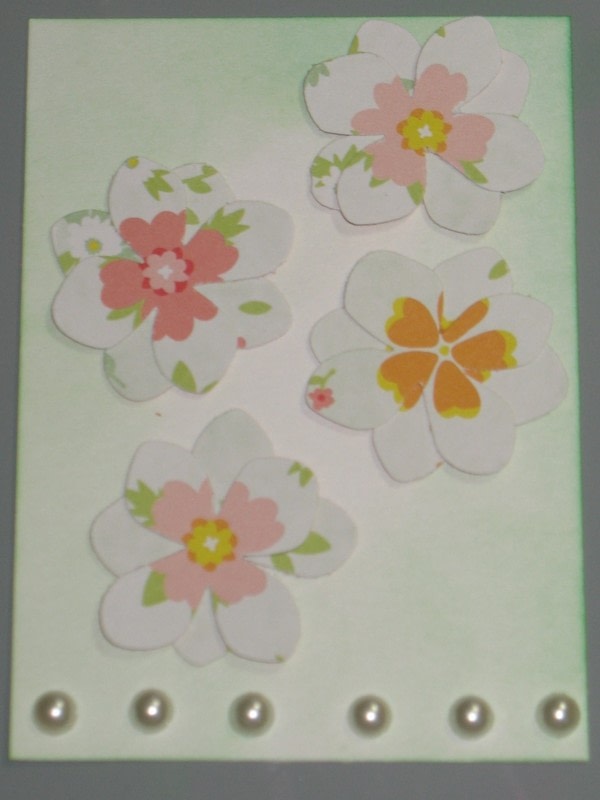
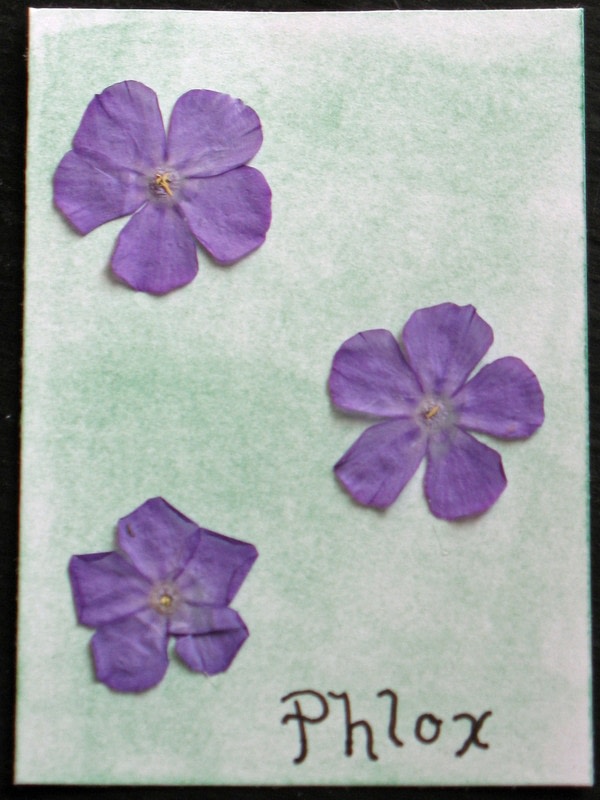
These were flowers from our garden that I dried and added to the ATC.
-
 Step 12
This was a simple one created using a piece of patterned paper, a tag and a sticker.
There are many ways to create fun ATC's and the important part is to have fun in creating them and trading them.
Store the ones you receive in a pocket page that you created using the Fuse tool and you will have many memories to share later on.
-
 Step 13
After creating a place to keep my ATC's, I wanted to have some fun and use the Fuse tool to create a shaker card.
For this, I began with using one of the waterfall pockets that I had received.
-
 Step 14
I chose one of my favorite holiday stamps and found the die that would work to cut out the circle that I wanted for the shaker part. Then, I moved to the next size up to cut the circle out. Remember you need it to be larger than the opening on your card.
-
 Step 15
The die was then placed onto the pocket and taped down so that it would not move when it was run through the die cut machine.
-
 Step 16
You may have to run it through several times to get it cut all the way through. Place the smaller die onto the circle.
-
 Step 17
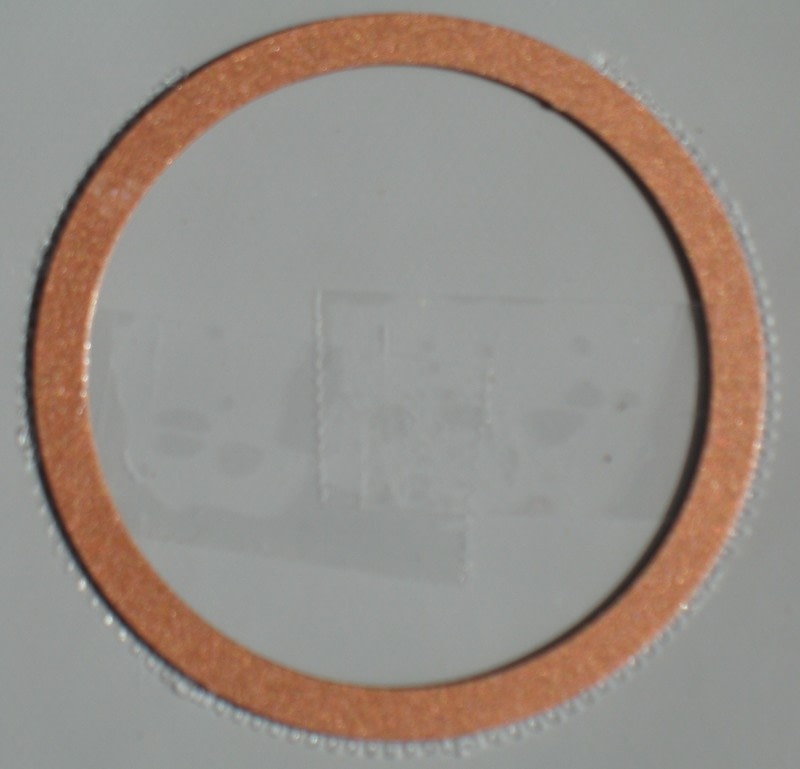
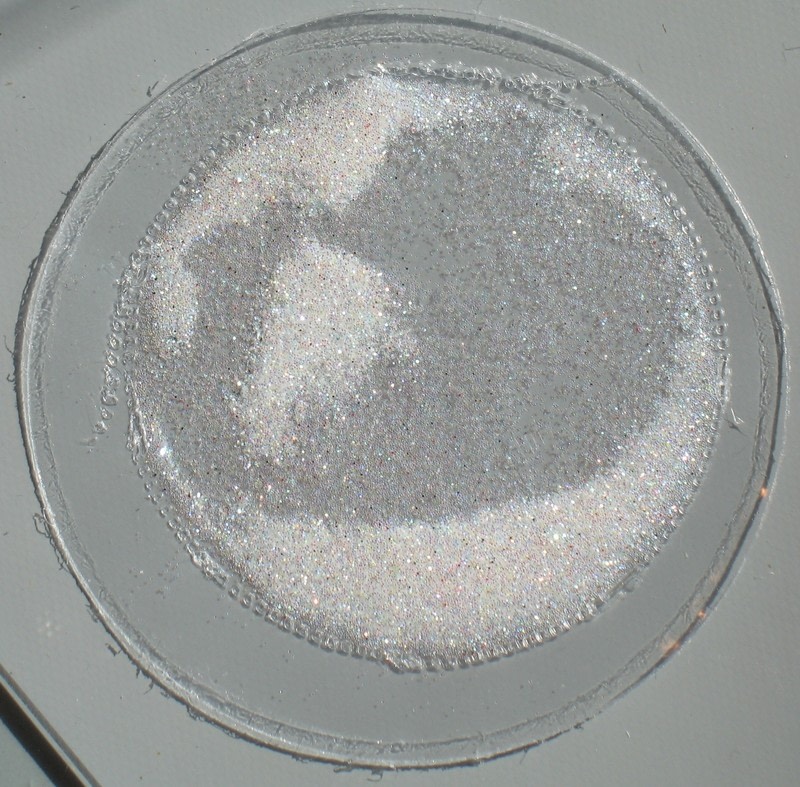
Use the Fuse tool and the sealing tip to go around the outside of the die. Remember to leave an opening at one spot to put the glitter in.
-
 Step 18
Seal the opening up using the Fuse.
-
 Step 19
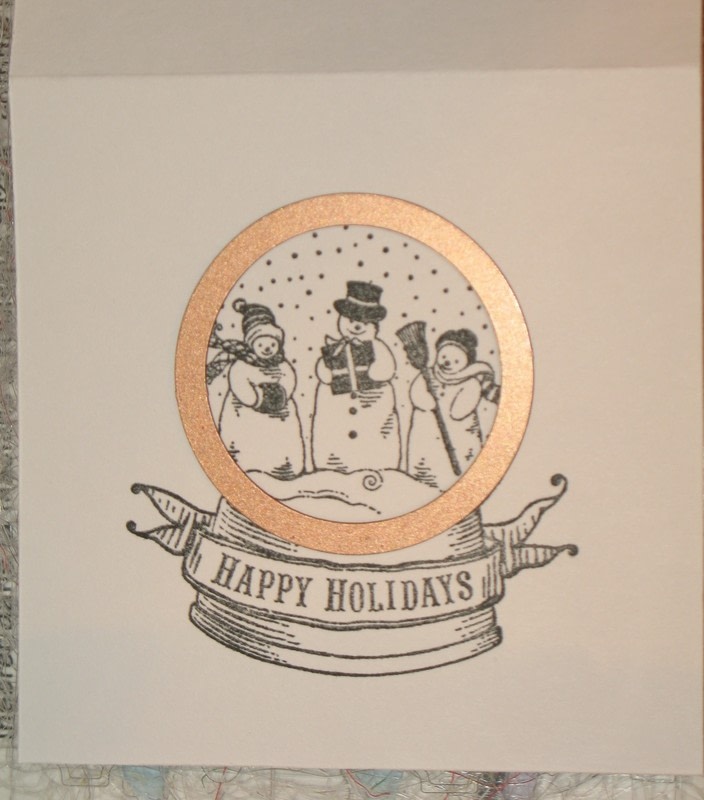
Stamp the design onto your card base. This card is a 4" x 4" card.
-
 Step 20
Place the small sized die that you used earlier to seal around onto the area of the image you want cut out.
-
 Step 21
This is what you will now have.
If you want any color added to the image now is the time to do that.
-
 Step 22
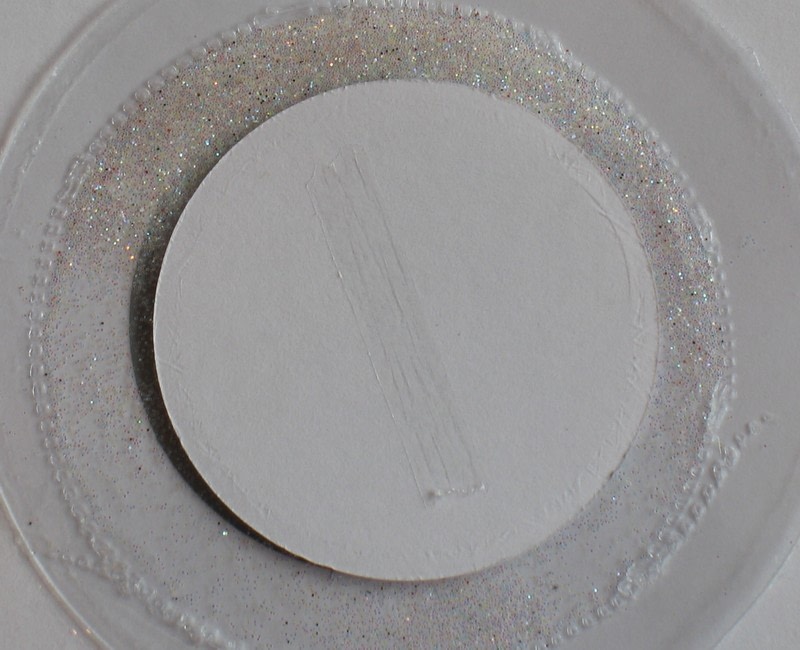
Place the shaker piece over the opening on the inside of the card and securely tape it in place.
Line up the die cut circle behind the opening after placing some adhesive onto the back of it.
-
 Step 23
Lay a 4" x 4" square of cardstock over it so the tape secures it to the paper. Adjust the image as you need so that it lines up with the opening. Add some more adhesive to the top and bottom and secure it into the card base.
-
 Step 24
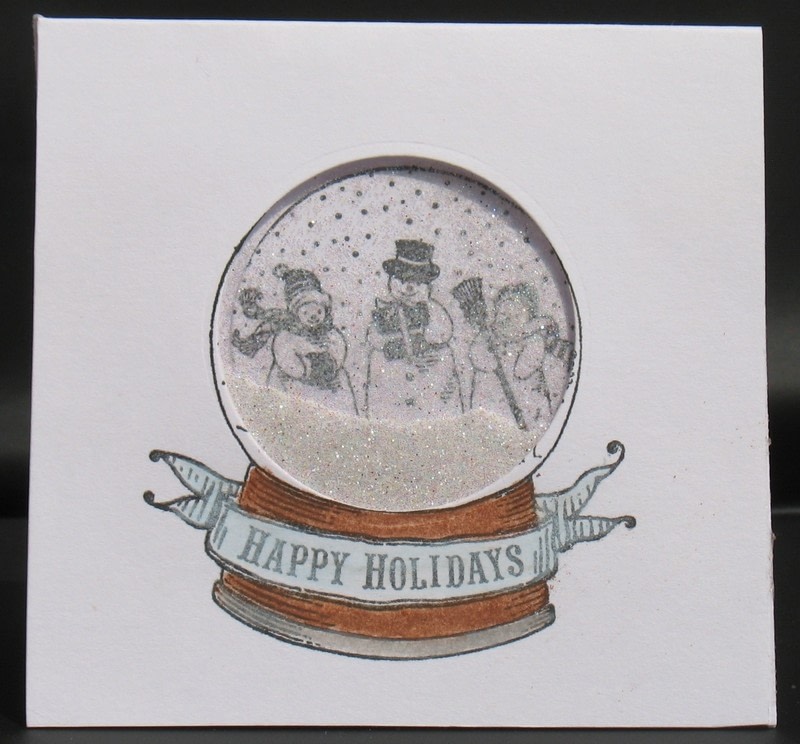
Color the image using some colored pencils or markers to finish off the shaker card.
-
Step 25
After using the Fuse Tool by We R Memory Keepers on these projects, I would say it is definitely a fun addition to anyone's craft room. The key to it is to practice before doing your finished project.
It does have its drawbacks such as the too short of cord and the ruler, but overall it is something that is very handy and can be used for many types of projects. Once you have learned how much pressure you need to cut and seal this tool will be easy for you to use. I would recommend it.