
About
Quilling Art
Most of the projects in this book involve creating a card outline drawn from a template, which is then filled with a variety of coiled or curved shapes. Below is how to set up the outline using a heart shape as an example.
-
 Vivien T. favorited Creating A Quilled Outline
13 Sep 22:29
Vivien T. favorited Creating A Quilled Outline
13 Sep 22:29
-
 Erica D. favorited Creating A Quilled Outline
03 Feb 16:39
Erica D. favorited Creating A Quilled Outline
03 Feb 16:39
-
Jennifer L. favorited Creating A Quilled Outline
29 Jul 20:29
-
 GMC Group published her project Creating A Quilled Outline
14 Mar 15:24
GMC Group published her project Creating A Quilled Outline
14 Mar 15:24
You Will Need
-
 Step 1
Place the template over a blank sheet of 90lb (250gsm) cardstock paper. Take a quilling needle or compass and use it to trace around the outside outline. Remove the template. You should be able to see the tracing on the base paper.
-
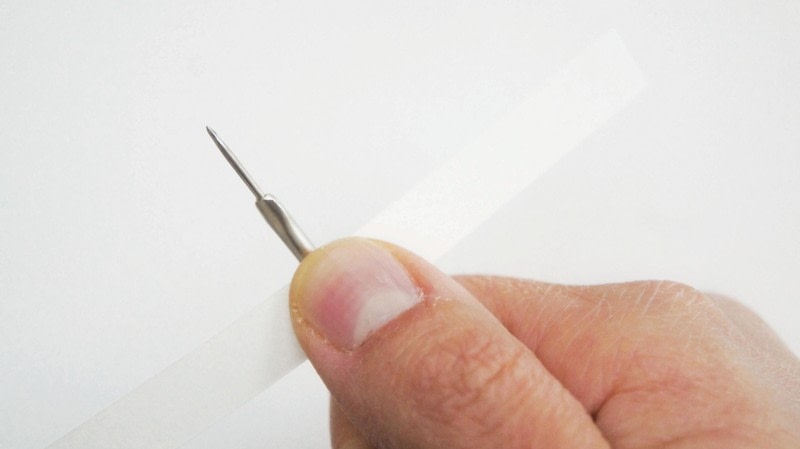
 Step 2
To create the outline, take a piece of 90lb (250gsm) cardstock paper and cut a strip that is 3⁄8in (1cm) wide. Take your quilling needle and bend the strip around it to create a curve.
-
 Step 3
Place the strip on top of the heart template and shape it to the curve of the left side of the heart outline.
-
 Step 4
Use a pair of tweezers to mark the bottom point of the outline on the strip.
-
 Step 5
Fold the strip where you have made the mark to form the bottom point and the right side of the heart.
-
 Step 6
Since the heart is a symmetrical shape, keep the strip folded together. Then, at the end of the right side, fold over the excess and trim to make both sides even in length.
-
 Step 7
You should have a shape like this after cutting.
-
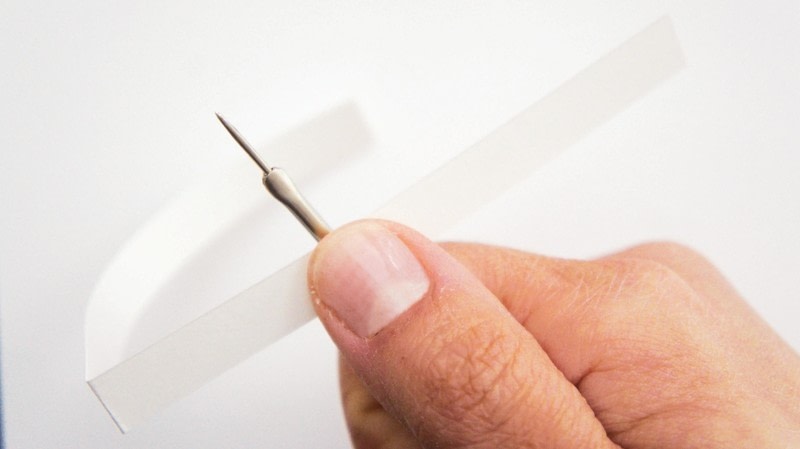
 Step 8
Take the quilling needle and bend the cardstock strip around it to create a curve to the right side.
-
 Step 9
After creating the curve, you should have a heart-shaped outline.
-
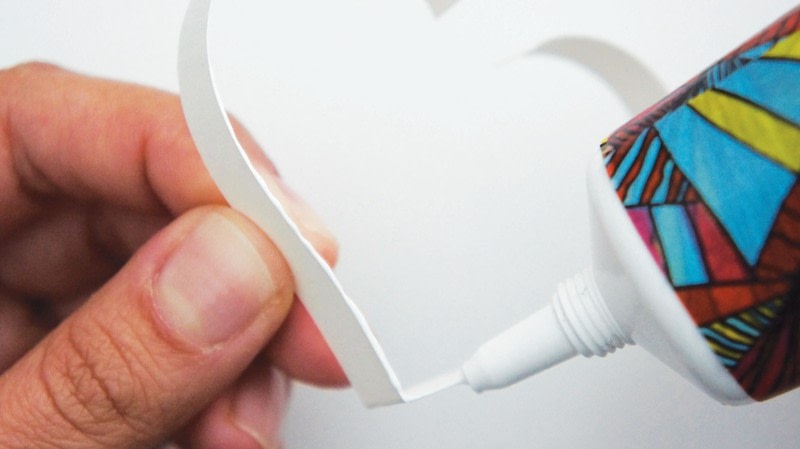
 Step 10
Apply glue to the edge that will touch the base paper.
-
 Step 11
Place it over the traced outline and press gently until it sticks.
-
 Step 12
Your outline is complete!
Tips
Do not press too hard while you are tracing, as you risk damaging the base paper. Also do not apply too much glue on the edges of the outline when sticking it to the base paper, as it may be visible once dry.