


About
Customized wall art, fabric, and more!
You can purchase Inkodye from Lumi.co
The image used for the tutorial was taken by me. The extra examples were made by me using copyright free images.
Tags
-
 Emma H. favorited Create Your Own Vintage Prints
05 Jul 15:10
Emma H. favorited Create Your Own Vintage Prints
05 Jul 15:10
-
 Sue W. favorited Create Your Own Vintage Prints
09 Aug 17:42
Sue W. favorited Create Your Own Vintage Prints
09 Aug 17:42
-
 FrankieStein favorited Create Your Own Vintage Prints
16 Feb 06:18
FrankieStein favorited Create Your Own Vintage Prints
16 Feb 06:18
-
 Thatcartoongirl favorited Create Your Own Vintage Prints
29 Oct 16:11
Thatcartoongirl favorited Create Your Own Vintage Prints
29 Oct 16:11
-
 Shayla F. entered her project Create Your Own Vintage Prints to StickyGram
04 May 21:36
Shayla F. entered her project Create Your Own Vintage Prints to StickyGram
04 May 21:36
-
 Tasha-Elizabeth added Create Your Own Vintage Prints to Photography
09 Apr 18:26
Tasha-Elizabeth added Create Your Own Vintage Prints to Photography
09 Apr 18:26
-
Tasha-Elizabeth favorited Create Your Own Vintage Prints
09 Apr 18:26
-
 Charlotte H. added Create Your Own Vintage Prints to tegning/farve
30 Mar 12:47
Charlotte H. added Create Your Own Vintage Prints to tegning/farve
30 Mar 12:47
-
 nigrummonten favorited Create Your Own Vintage Prints
04 Feb 05:16
nigrummonten favorited Create Your Own Vintage Prints
04 Feb 05:16
-
 Melissa G. favorited Create Your Own Vintage Prints
13 Jan 05:57
Melissa G. favorited Create Your Own Vintage Prints
13 Jan 05:57
-
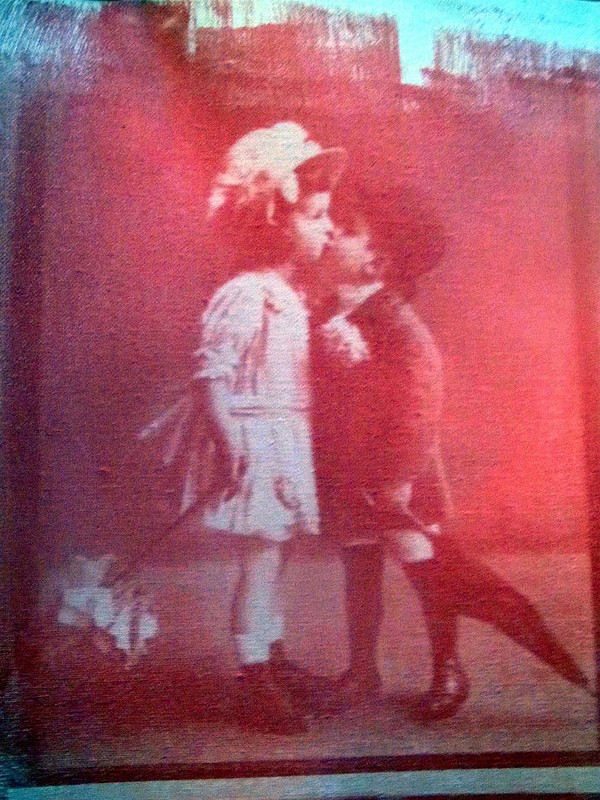
 Step 1
The first step you will have to do is find an image (preferably an image with lots of sharp areas. I used a photograph I took last summer and raised the contrast.
-
 Step 2
Then you have to turn your image into a grey scale image and THEN turn your grey scale image into a negative.
This can be done easily with mostly any online photo-shop website. Try Picmonkey.com
-
 Step 3
Now you will have to print your image onto the transparent paper. You can find this kind of paper online.
Make sure you do not touch the printer's ink on the paper, let it dry. To be on the safe side I sprayed mine with clear acrylic spray paint to help sustain the image.
-
 Step 4
After you have your image printed and it has dried completely your next step is to gather all of your supplies. The foam paint brush, canvas, and your dye.
Simply paint your canvas with Inkodye. You truly do not need that much dye at all. Use a thin layer of dye. Also, you can dilute your dye with water, thus saving TONS of dye for future projects.
I advise painting indoors because as soon as it hits the sun, the canvas begins to change and fix therefore your image will not look as sharp.
Then after you have painted your canvas, place your image onto the canvas, making sure the side that has been printed on is facing upwards. If you place the inked side on the wet canvas, it will be ruined with smeared black ink.
After that, place the canvas directly under the sunlight. This is the fun part, watching the colors change!
***Approximate time in the sun: 8 minutes if sunny. 16 minutes if cloudy.
-
 Step 5
After your dye has set outside long enough, you need to wash the unexposed dye in hot soapy water vigorously.
If you skip this step and sunlight hits the canvas in the future, your image will become dull because the dye will keep processing.
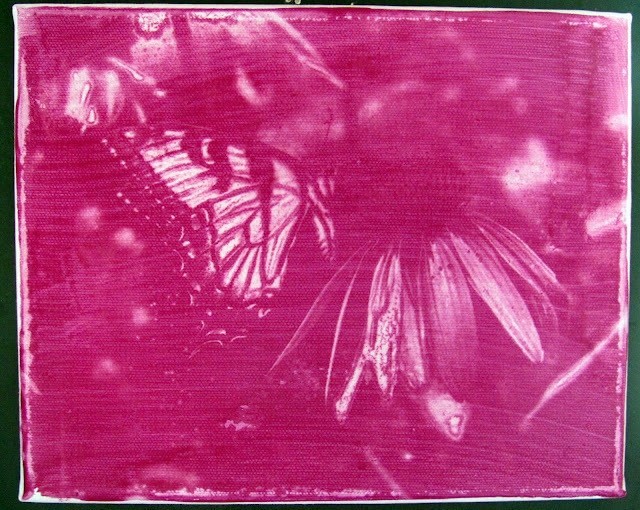
This is my favorite project and I hope it inspires others to try it! My experience with Inkodye has led me to favor fabric to print on. The ending result is more vibrant.
RECAP:
Find an image<Turn it into grey-scale <Then to a negative<Print on Transparent Paper<Paint Canvas with Inkodye<Place Image on Canvas<Place canvas in sun<Wash Unexposed dye with hot soapy water= A great work of art


Comments


