

About
A timelapse video and step-by-step of my sketching, inking and shading!
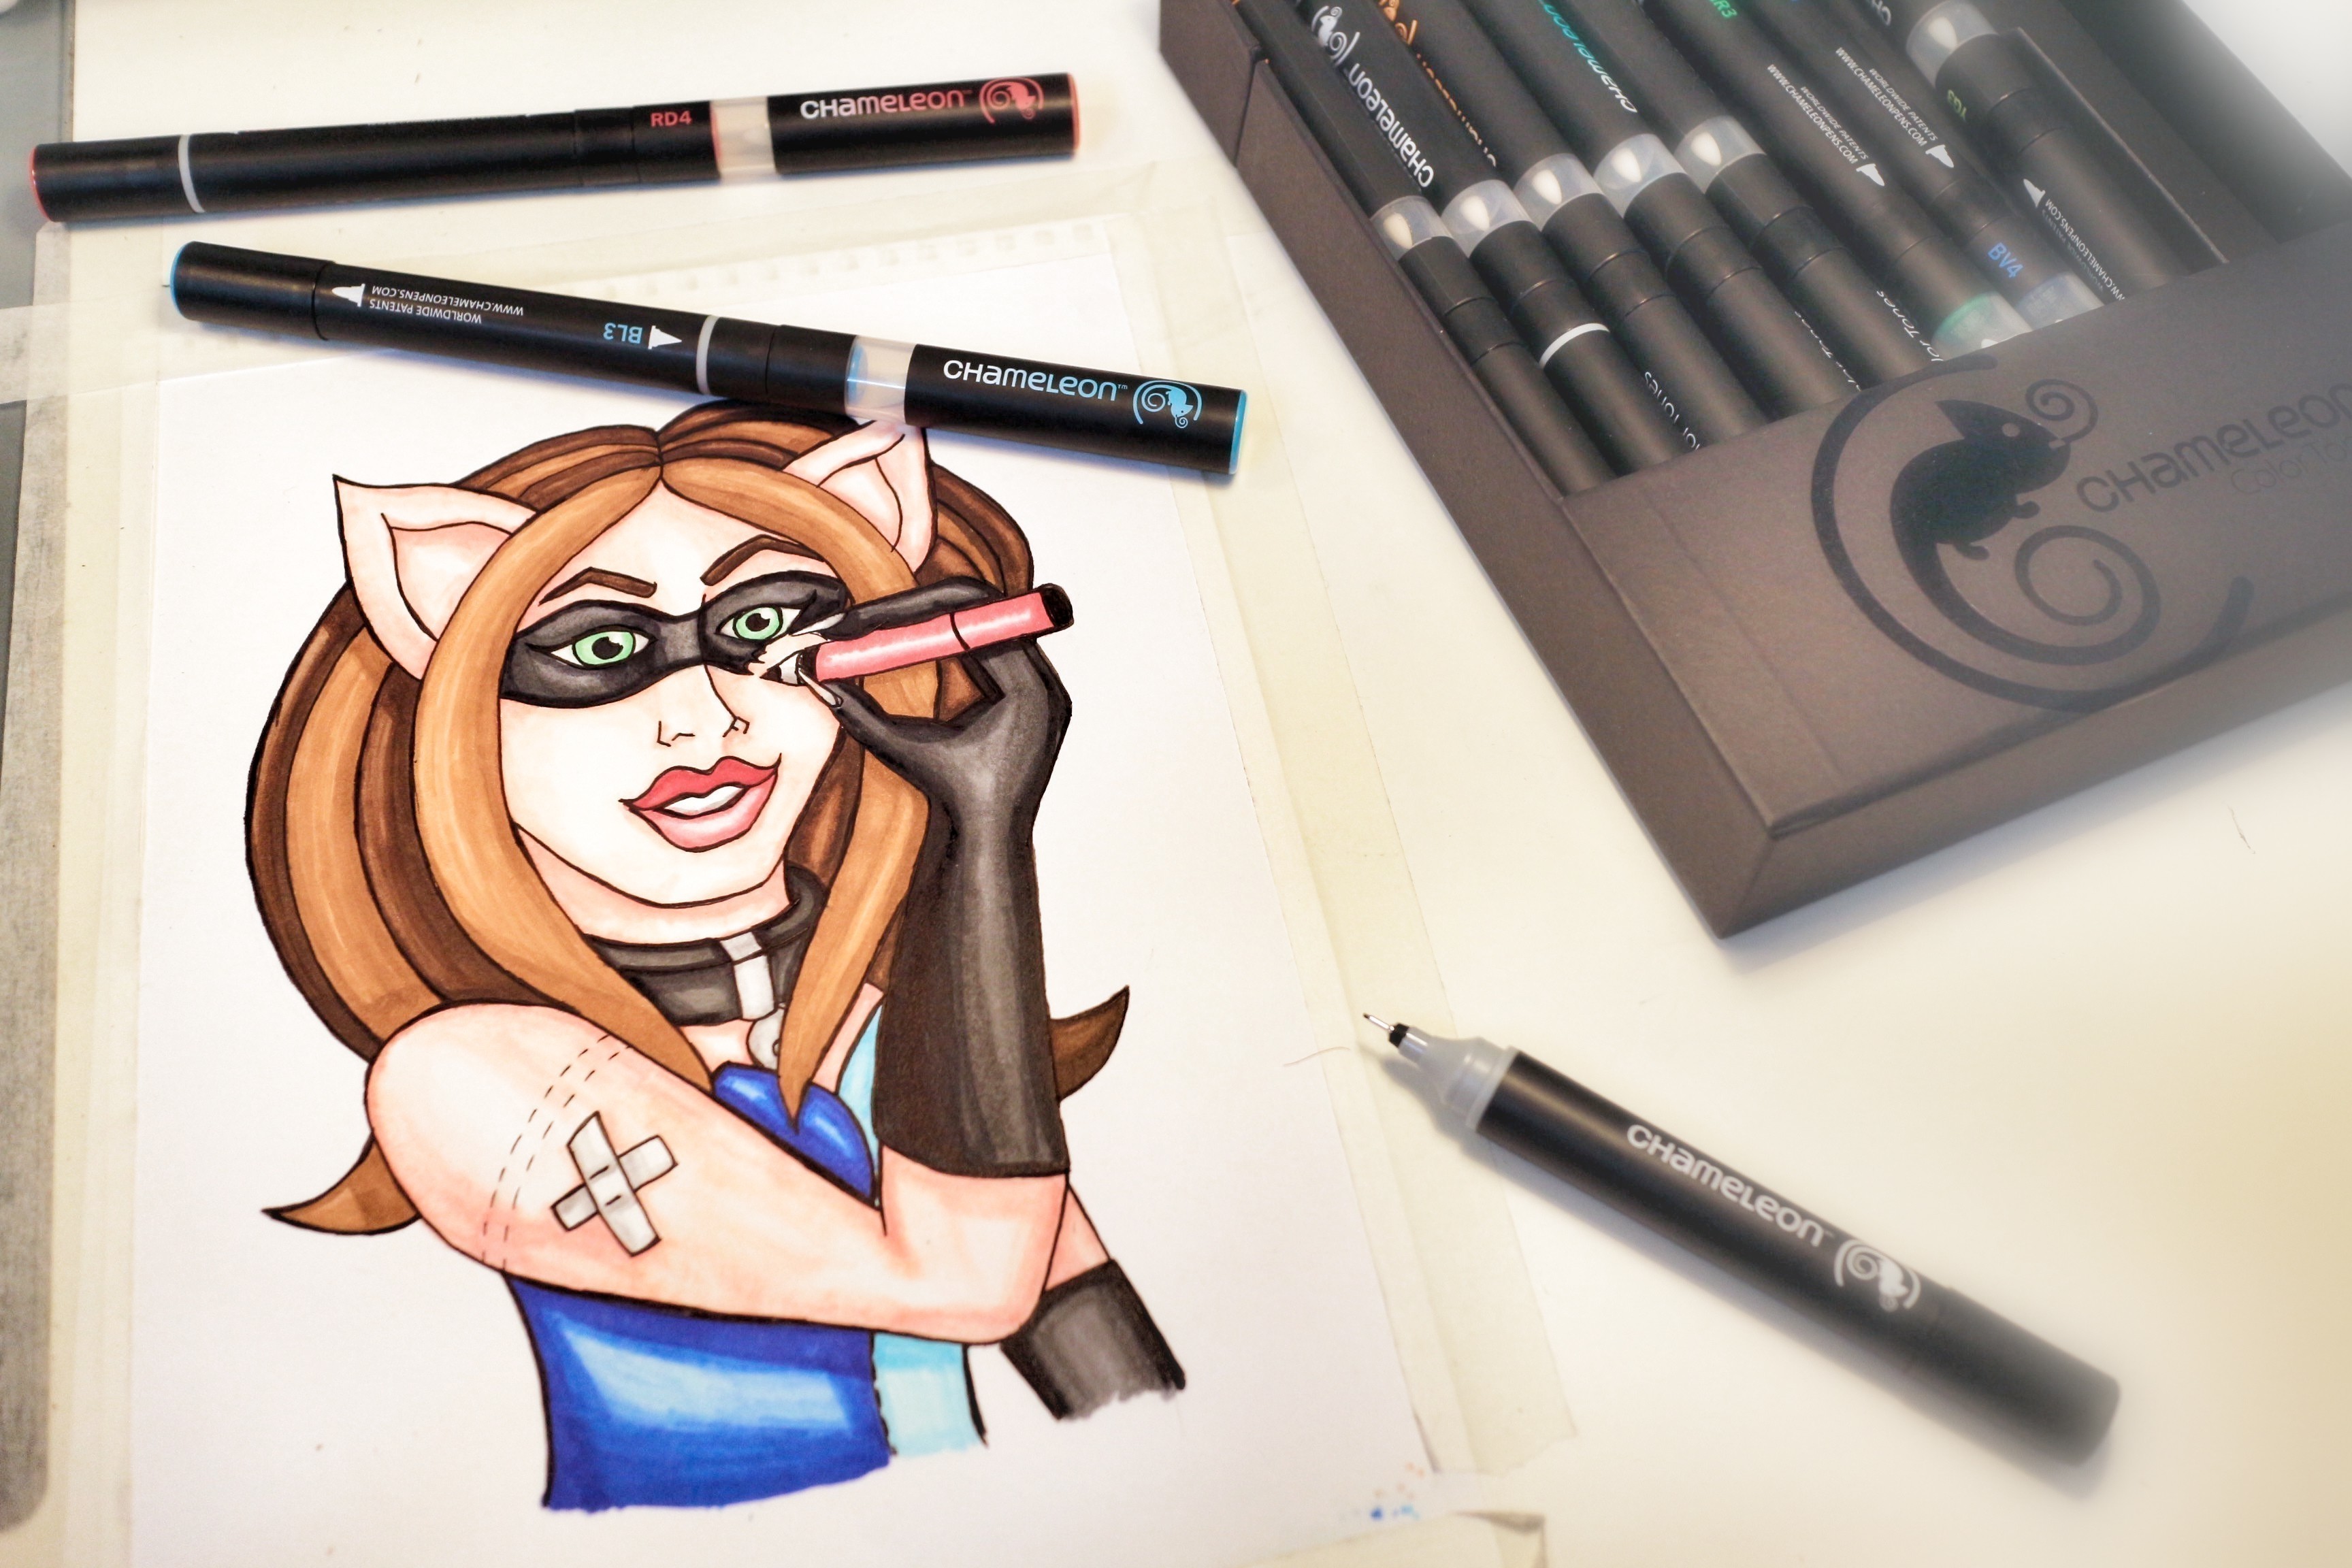
I usually colour Crafterella on the computer, but when Chameleon Pens sent me a set of their new colour changing pens, I couldn't resist trying to colour her by hand. It took me a little time to get used to working from light to dark, but I was so impressed with the finished result.
Tags
-
 DawnRedwood favorited Crafterella Timelapse
19 May 15:06
DawnRedwood favorited Crafterella Timelapse
19 May 15:06
-
 Edinburgh Sketcher favorited Crafterella Timelapse
04 Aug 20:31
Edinburgh Sketcher favorited Crafterella Timelapse
04 Aug 20:31
-
 Cat Morley published her project Crafterella Timelapse
04 Aug 06:00
Cat Morley published her project Crafterella Timelapse
04 Aug 06:00
-
Step 1
Here's a timelapse video of my entire drawing, feel free to ask any questions!
-
 Step 2
I started by lightly and roughly pencilling in the idea for my drawing with a 2H pencil.
-
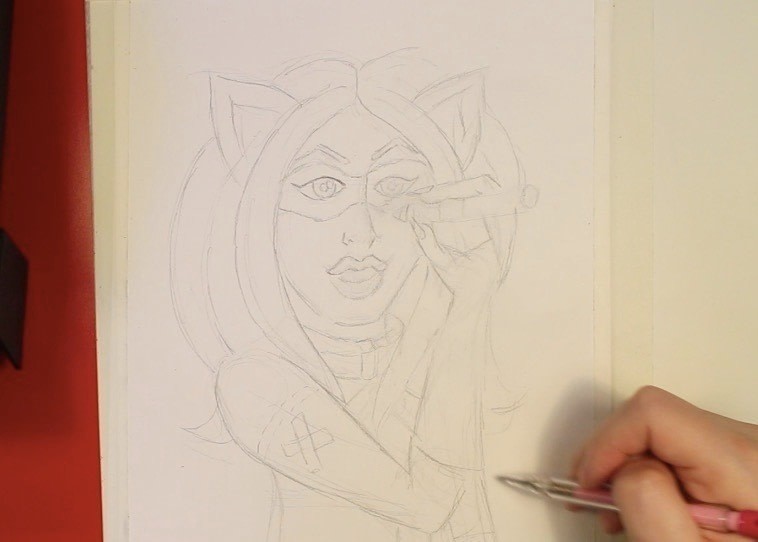
 Step 3
When I was happy with my drawing, I used a 2B pencil to draw my sketch properly, adding the lines more boldly.
-
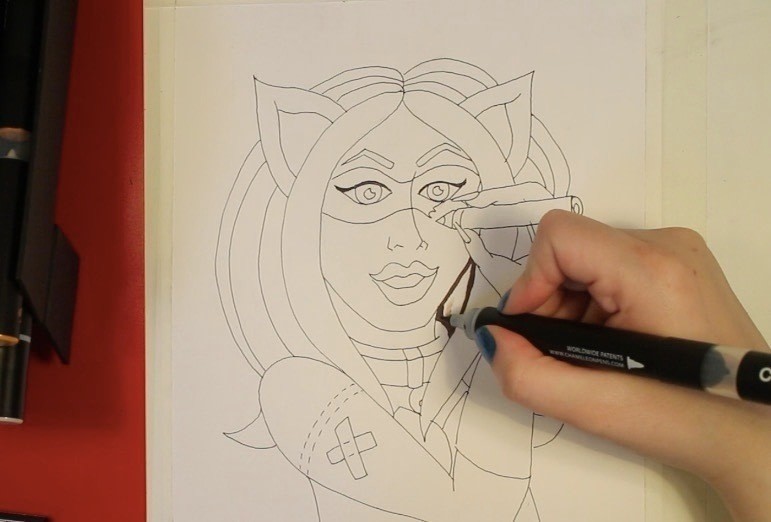
 Step 4
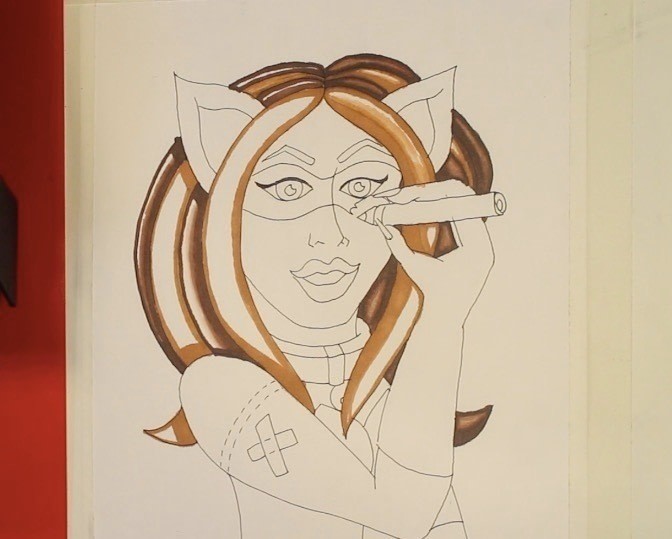
When you're happy with your sketch, ink the design in with a fine liner pen. Leave the ink to dry for a few minutes.
-
 Step 5
Use an eraser to remove your pencil sketches and get a nice clean sheet of paper.
-
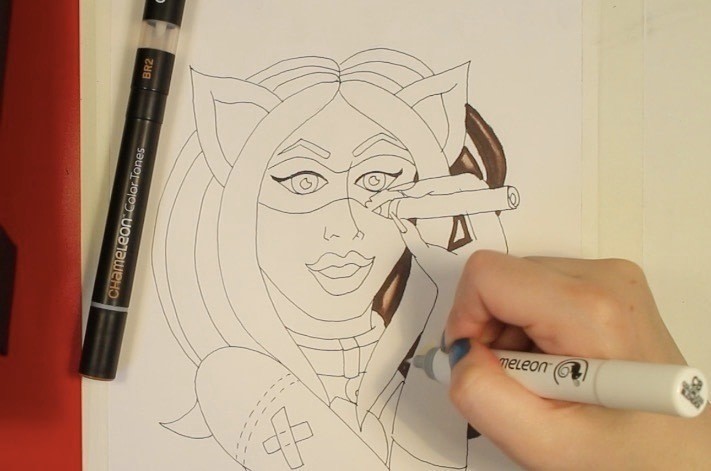
 Step 6
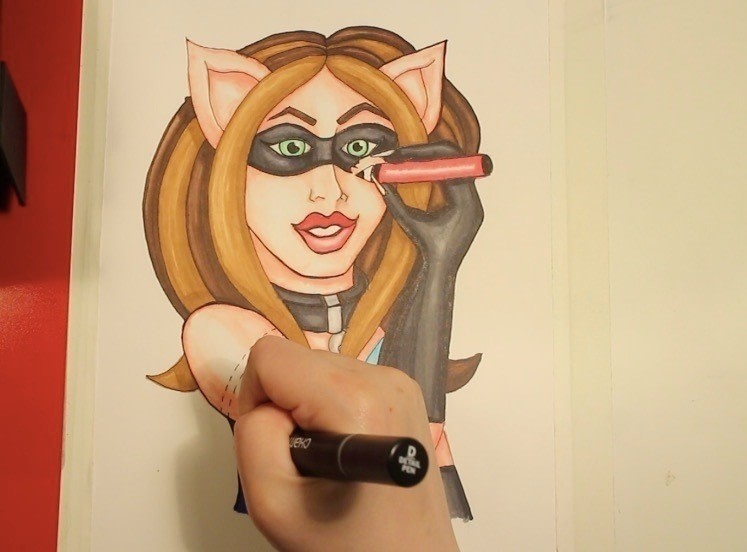
I then started colouring my drawing with the Chameleon Colour Changing pens, starting with dark brown on Crafterella's hair. I started by outlining her hair with the original colour of the pen.
-
 Step 7
I then lightening the colour of the pen for a few seconds with the alcohol tip before filling in the hair, starting in the very middle and working my way out towards the edges as the pen darkened, creating a gradient.
-
 Step 8
I also used the colourless blending pen to help smooth out my gradients.
-
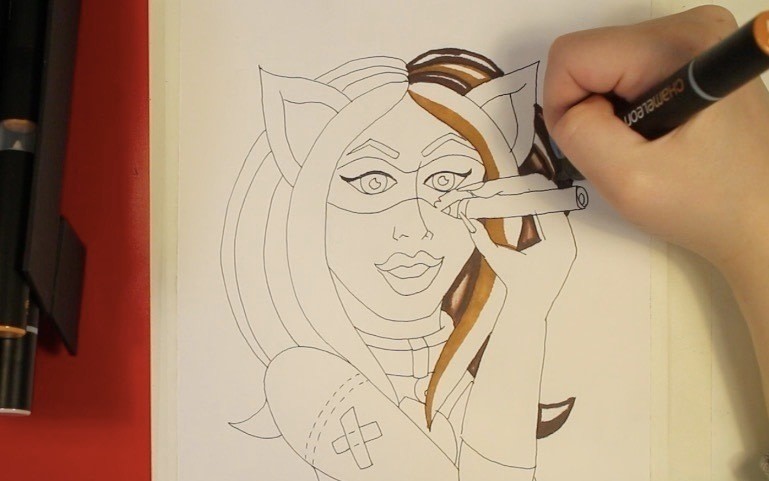
 Step 9
I then started outlining the highlights of her hair with a lighter brown, in the same way I did in step 6.
-
 Step 10
I also blended a little of the light brown's original colour into the lighter parts of the dark brown strands.
-
 Step 11
I continued working between the highlights and lowlights of the hair with the two colours.
-
 Step 12
Fill in the lighter parts of the highlights by lightening the light brown with the alcohol and creating gradients like we did in step 9.
-
 Step 13
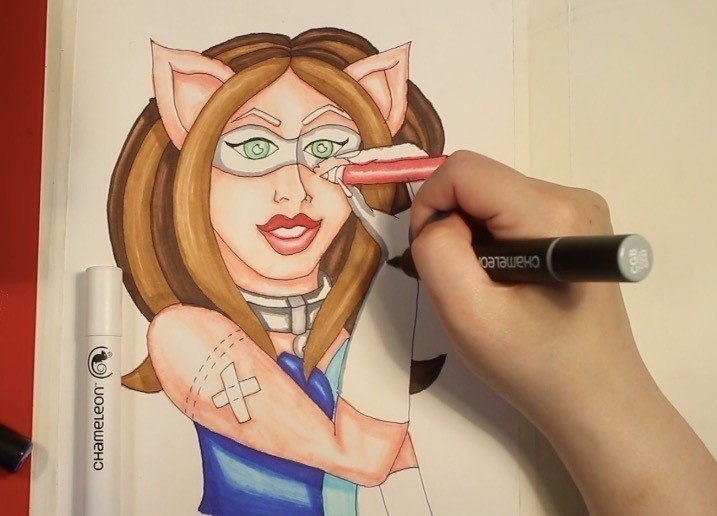
I then started working on the costume with a light blue and dark blue pen. Draw thick lines with the original colour of the pen to create shadows.
-
 Step 14
I then started working on the skin using a pale orange pen. I really carefully outlined my shadows as the key for the skin was to keep it as light as possible.
-
 Step 15
I then used the blending pen to blend the skin outlines into the white of the page, working my way towards the middle of her skin.
-
 Step 16
Slowly build up the colour of the skin, going over the shadows and blending inwards to build up the shade.
-
 Step 17
Keep building up the drawing until your happy with it, careful not to go to heavy on the colour - you can always add more later.
-
 Step 18
I then started tracing the outlines of the lips with red.
-
 Step 19
I also added a lightened shade of green pen to the eyes.
-
 Step 20
Fill in the lips, making the top lips much darker than the bottom lip.
-
 Step 21
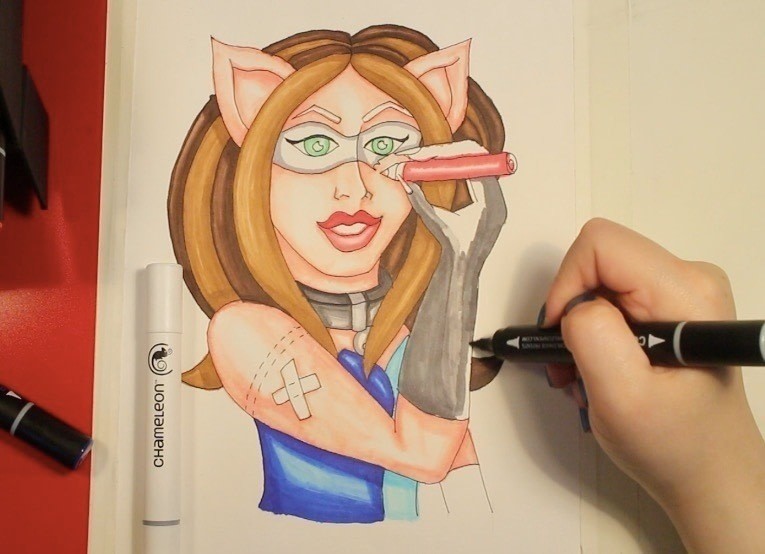
I then started working on the dark grey / black areas of the drawing such as her mask, collar and gloves. Outlining them with a grey pen.
-
 Step 22
I shaded in these with grey, creating a gradient across the middle.
-
 Step 23
I then started adding bold shadows to the outline with a black pen.
-
 Step 24
I slowly built up dark shadows and gradients on these areas, similar to how I did the skin, alternating between grey and black.
-
 Step 25
As my drawing began to look more complete, I added black to the pupils of the eyes and dark brown to the eyebrows.
-
 Step 26
I then started adding really definite shadows with black.
-
 Step 27
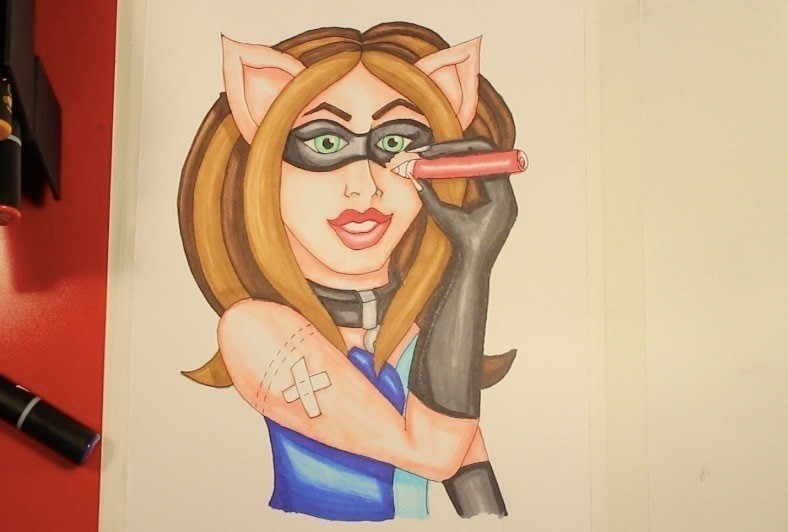
Once I was happy with the colouring, I added a thick black outline to my drawing with the details pen.
-
 Step 28
Finally I used the blending pen to touch up the drawing.