About
What’s Rob Ford’s favorite sewing trick?
CRACK STITCHING!
Today I come to you with a special Tip’s Tuesday. In honor of our city’s mayor, let’s talk about CRACK Stitching… no, not the same kind of crack.
Crack stitching, also referred to as stitching in the ditch or edge stitching. If you look up crack stitching, you will likely find tutorials for quilting, but it is also an important technique in garment making. Used on waistbands, crack stitching closes the back of a waistband while making the stitch virtually invisible from the front of the garment.
-
 Suzi T. favorited Crack Stitching
08 Nov 16:24
Suzi T. favorited Crack Stitching
08 Nov 16:24
-
 Steph. added Crack Stitching to Techniques
17 Oct 21:34
Steph. added Crack Stitching to Techniques
17 Oct 21:34
-
Steph. favorited Crack Stitching
17 Oct 21:34
-
 Shop Showcase published her project Crack Stitching
08 Oct 09:25
Shop Showcase published her project Crack Stitching
08 Oct 09:25
You Will Need
-
 Step 1
Crack stitching can be a tricky stitch to execute, so it’s a good idea to first pin baste your waistband in place.
-
 Step 2
About 1/8″ down from the front of the waistband sew your waistband backing to your skirt using a long running stitch.
-
 Step 3
Now that everything is basted in place, it’s time for crack stitching!
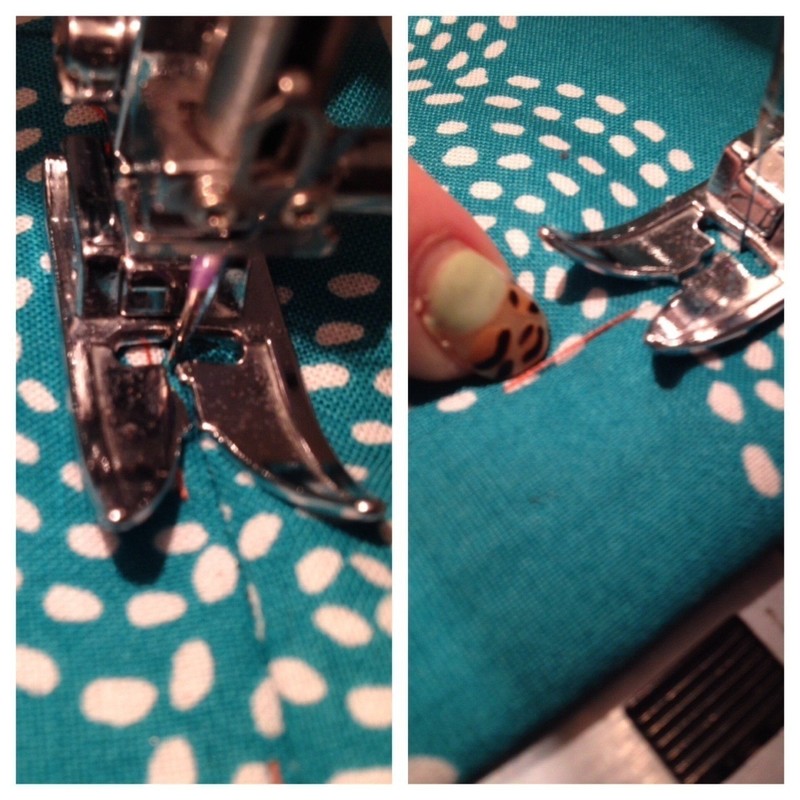
Line up your fabric in your machine so the needle lands right in the crack between the skirt and waistband. Sew along the waistband from end to end.
Careful to stay in the crack. You also need to be sure you are catching the back of your waistband in this stitch. Every inch or so, stop and feel with your nail that the backing fabric is indeed in your stitch.
-
 Step 4
And you’ve done it. You’ve successfully crack stitched!
We hope that this crack stitching tutorial helps make your garments clean and finished. We only wish we could say the same for Rob!