About
Bert's Crochet Baby Blanket
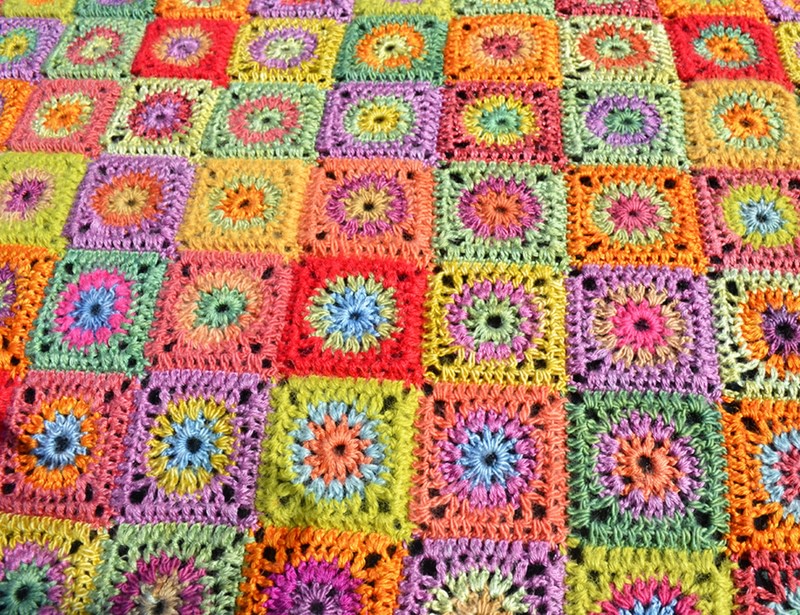
Cornucopia was designed as a colour experiment; I wanted to explore the effect of subtle tonal and saturated colour in the same blanket.
I started with a skein of bright yellow and added extra colours that worked together from my stash.
After the first few rows of motifs of the blanket I realised I had chosen fruity natural colours and so named it Cornucopia, the mythological “Horn of Plenty” which overflows with fruits and flowers.
The more I look at the blanket the more fruits I can see – strawberries, cherries, apples, mangos, limes, kiwi’s, oranges ……………….
YARN
I made Cornucopia with scraps of yarn in my stash, plus some skeins of Skein Queen hand dyed 4 ply/Fingering yarn.
I probably used 20 or 30 colours, which can be divided up into 10 base colours.
Or you can also make the blanket using just the 10 base colours.
You can use any 4 ply yarn you wish as long as it’s the same meterage, Amongst others I have used some of the following in the blanket.
Fyberspates - Scrumptious 4 ply, Vivacious 4 ply
Drops - Alpaca
-
 Key West Witch favorited Cornucopia Crochet Blanket
26 Jun 07:31
Key West Witch favorited Cornucopia Crochet Blanket
26 Jun 07:31
-
 Lotusburger favorited Cornucopia Crochet Blanket
11 Jan 11:39
Lotusburger favorited Cornucopia Crochet Blanket
11 Jan 11:39
-
 Summer favorited Cornucopia Crochet Blanket
25 Jul 00:55
Summer favorited Cornucopia Crochet Blanket
25 Jul 00:55
-
 Cindy S. favorited Cornucopia Crochet Blanket
22 May 03:08
Cindy S. favorited Cornucopia Crochet Blanket
22 May 03:08
-
 Crafterella featured Cornucopia Crochet Blanket
04 May 23:00
Crafterella featured Cornucopia Crochet Blanket
04 May 23:00
-
 Mandy C. favorited Cornucopia Crochet Blanket
29 Apr 18:39
Mandy C. favorited Cornucopia Crochet Blanket
29 Apr 18:39
-
 Search Press published her project Cornucopia Crochet Blanket
29 Apr 09:00
Search Press published her project Cornucopia Crochet Blanket
29 Apr 09:00
-
 Step 1
SIZE & TENSION
Cornucopia can also be made with a DK yarn, I recommend a DK with 240 to 260 metre per 100g
The measurements below are for both yarn weights, sizes are approximate.4 ply/Fingering
Each square measure 6 cm/2.25” (blocked)
The blanket measures 115 cm/45” square
DK
Each square measures 8.5 cm/3.25” (blocked)
The blanket measures 170 cm/65” squareEveryone has a different tension, so before you start your project you will need to measure your first square. Experiment with a few hook sizes to get the effect you want and then block the finished motif. Once it is blocked you can measure it. If it is too big try again using a smaller hook, if it is too small try again using a larger hook.
To ensure the ends don’t pop out, sew the end in one direction, turn the needle round and sew back over the end. This may leave a little bump but it will smooth out and become unnoticeable when the blanket is washed.
-
 Step 2
SEWING IN ENDS
DO NOT leave sewing until the end or you will end up spending days and days sewing in ends.
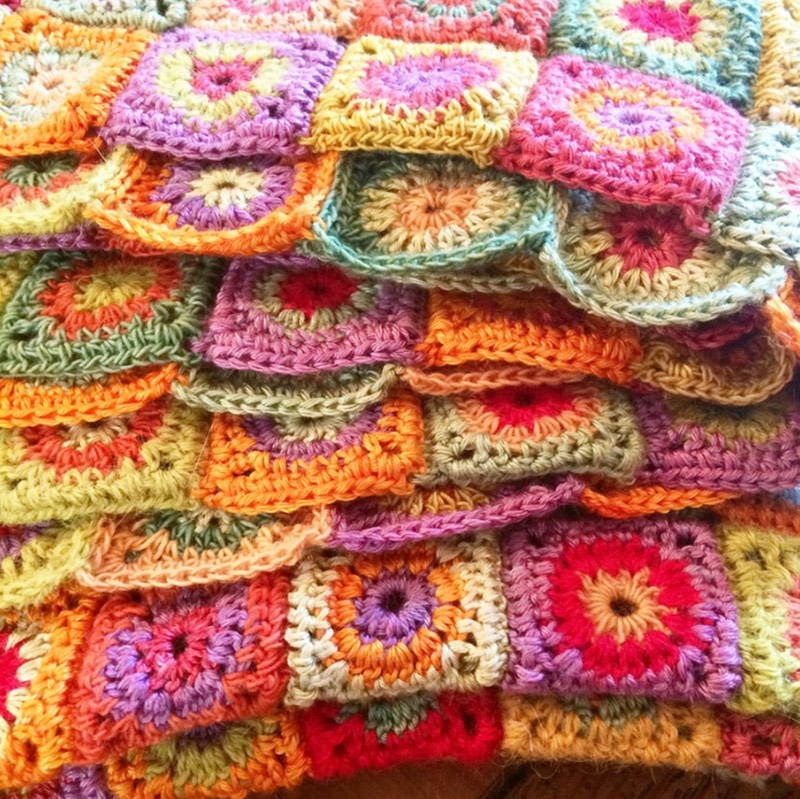
I prefer to sew in all my ends, as it firms up the motifs and seams, making the motif more solid.
To ensure the ends don’t pop out, sew the end in one direction, turn the needle round and sew back over the end. This may leave a little bump but it will smooth out and become unnoticeable when the blanket is washed. -
 Step 3
COLOUR
The colour placement of the blanket is completely random, so you will need a collection of colours rather than specific colours.
Choose fruity colours and make sure you choose a mix of saturated and subtle colours, I’ve named the colours after the fruit which will give you an idea of which colours to choose -
 Step 4
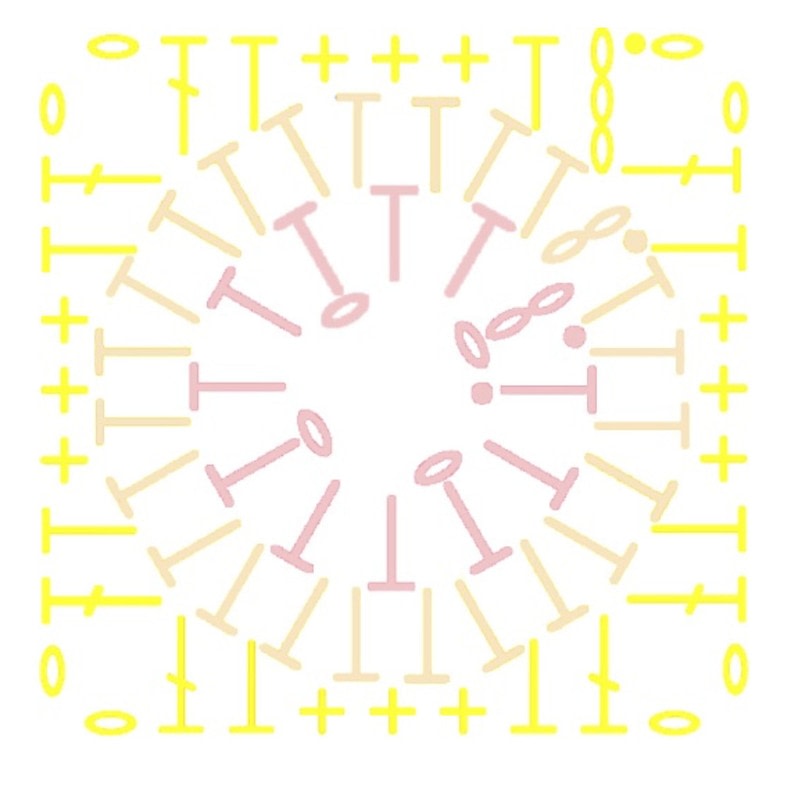
SQUARE MOTIF PATTERN
Round 1 – Colour 1
Make a 4 ch foundation ch and join into a ring with a sl st.
Into the foundation ring - crochet 2 ch (counts as 1 htr/hdc), 11 htr/hdc.
Join to the 2nd st of original 2 ch with a sl st. -
 Step 5
Round 2 – Colour 2
In this and all following rounds work into the gaps between sts from the previous round
Into the first gap - 2 ch (counts as 1 htr/hdc) and 1 htr/hdc
Into each following gap - 2 htr/hdc
Join to the 2nd st of original 2 ch with a sl st. -
 Step 6
Round 3 – Colour 3
*Into the first gap (which will become a corner) - 3 ch (counts as 1 tr/dc)
Into next gap – 1 htr/hdc
Into next 3 gaps – 1 dc/sc in each
Into next gap – 1 htr/hdc
Into next gap (which will become a corner) – 1 tr/dc, 2 ch*
Repeat from * to * 3 more times but replace the first 3 ch with 1 tr/dc
Join to the 3rd st of original 3 ch with a sl st. -
 Step 7
Round 4 – Colour 3
*Into the first 2 ch corner - 2 ch (counts as 1 htr/hdc), 1 htr/hdc (there isn’t really a gap between the first 2 ch and the next gap, but it is easy to squeeze the second htr/hdc in between the two if you position your hook at a slight angle)
Into next 6 gaps – 1 htr/hdc in each
Into the 2 ch corner - 2 htr/hdc, 2 ch*
Repeat from * to * 3 more times but replace the first 2 ch with 1 htr/hdc
Join to the 2nd st of original 2 ch with a sl st. -
 Step 8
EDGING and FINISHING
I haven’t edged Cornucopia as I like to see the different colours of the squares, however if you would like to do an edging I recommend 2 rows of htr/hdc.
When the blanket is finished, you will need to wet/wash/block it, this settles all the stitches so they fall into the right places.
I wet mine in a sink and then spin them in a top loading old fashioned spin drier, then I lay the blanket flat on a sheet spread on the floor and smooth it out so that it dries flat.