

About
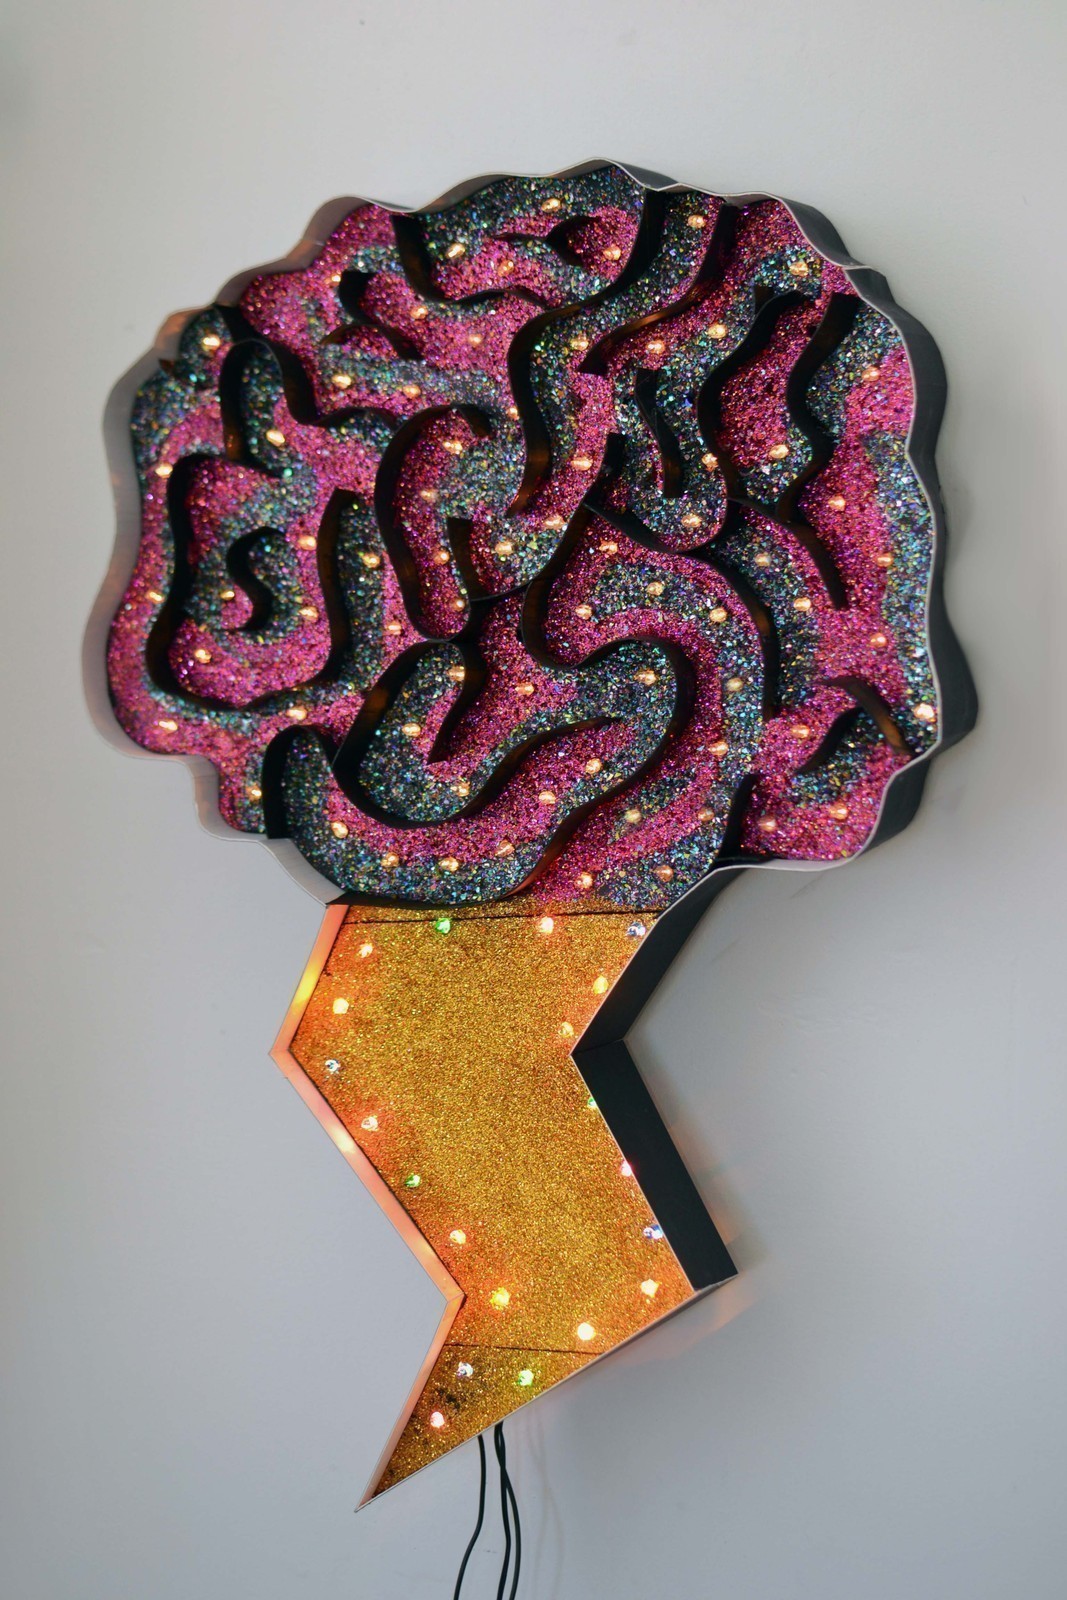
Marquee style light that you can make in any shape you please!
THis is how I made a marquee style light. I used left over materials from an architectural model I made years ago at school and used some of the techniques I used back then. This is my first tutorial so I apologise in advance if the instructions aren't clear.
I hope you enjoy the tutorial!
PS Theres a video tutorial that you can check out here http://www.youtube.com/watch?feature=player_embedded&v=NL2I3zpk-08 although I'll try to intergrate video footage directly into the steps of my next how to
Tags
-
 evangelina c. favorited Cool Light Thing
15 Oct 00:43
evangelina c. favorited Cool Light Thing
15 Oct 00:43
-
 Taylor K. favorited Cool Light Thing
11 Jul 00:38
Taylor K. favorited Cool Light Thing
11 Jul 00:38
-
 JimmyJamma favorited Cool Light Thing
29 May 00:13
JimmyJamma favorited Cool Light Thing
29 May 00:13
-
 Monice M. favorited Cool Light Thing
19 May 07:28
Monice M. favorited Cool Light Thing
19 May 07:28
-
 Cassy C. favorited Cool Light Thing
04 Apr 18:51
Cassy C. favorited Cool Light Thing
04 Apr 18:51
-
 Millie H. added Cool Light Thing to cool ideas
18 Mar 22:01
Millie H. added Cool Light Thing to cool ideas
18 Mar 22:01
-
 Caaryn S. favorited Cool Light Thing
09 Mar 02:59
Caaryn S. favorited Cool Light Thing
09 Mar 02:59
-
 Justine :] added Cool Light Thing to Random
04 Mar 16:08
Justine :] added Cool Light Thing to Random
04 Mar 16:08
-
jenni b. added Cool Light Thing to stuff to make
02 Mar 20:18
-
neko g. added Cool Light Thing to otaku bordome
22 Feb 03:54
You Will Need
-
Step 1
Begin by designing your light then transfer design onto a piece of foam core. Be sure to count how many bulbs there are on your set of fairy lights so you can roughly plan how and where the lights will be distributed.
-
Step 2
Cut out the shape using a craft knife. If your design has separators within the body of the light (like mine to in the brain part), create grooves for the paste board by scoring two cuts approx 2mm apart long the length of the intended groove. Push the foam down to create a cavity. Vertically score strips of pasteboard apporx 2.5cm wide, 1-5mm apart. This will allow the board to bend easily. Apply glue on the insides of the grooves and slot a strip of paste board cut to the appropriate length into place. Continue until all the separators are complete.
-
Step 3
At this point I drilled the holes for the lights through the foam core using a 5.5mm drill bit. However steps 3-5 can more or less be done in whatever order you prefer. After drilling the holes I gave the foam core a once over with some fine sand paper. Then I used PVA glue to bond glitter to the right side of the foam core.
-
Step 4
Next, create a border around the entirety of the shape out of strips of pasteboard approximately 5cm wide. Score vertically in places where the board needs to bend. Secure into place using a hot glue gun. I would recommend beginning with the corners, apply glue across the vertical length of the join. Wait for the glue to dry, then reinforce the horizontal joints with more glue, working in one direction around the light.
-
Step 5
Lastly slot the individual bulbs from a strand of fairy lights into the holes previously drilled. All I did next was nail a couple of hooks into the wall and hey presto, you've got your self a pretty awesome looking light thing! :)

Where can u get paste board & foam core? I've never heard of it before.