


About
Handmade cards are so sweet
Inspiration
When I make a card series I like to use my materials to help dictate the quantity and content of the cards. Small pieces of fabric or paper that you just love but only have a swatch of, can get all the love they deserve, as the center piece of your card.
Card size
There is nothing more frustrating then making a beautiful card to send to someone and you realize you don’t have an envelope big enough. If it is a non –traveling card this is no problem. I love making funky shaped cards for my honey. For the others I try to think before hand about how it will be delivered. All of these will be mailed. For mailing cards I almost always go with a standard card size envelope and make the card to that size. I really enjoy more creative solutions for envelopes so when it is a hand delivered card you can have more fun. Just keep in mind the postal service has gotten pickier in the last 6 years with mailed packages and you want your precious handmades to get there. So with all that said I made the cards all the same size by picking a scrap paper that would make size appropriate cards.
Paper
I like to use a heavy printmaking paper with some tooth. Printmaking papers are made to stand up to abuse and they press beautifully back into flat pieces of artwork. They also stand up really well under the sewing machine foot.
Burnishing and glue
I like to use a glue stick to secure paper that will later be sewn and really any rather thin paper or small scraps that might fall apart under glue.
The most important part of glueing is burnishing
Use a cover sheet to protect your card and absorb any excess glue.
Be very serious with your burnishing, it will make your card look polished.
I like to use a bone folder (it is really hard)
But a chopstick will also work.
-
 Miss_Fit added Collaged Cards to Greeting Cards
10 May 17:19
Miss_Fit added Collaged Cards to Greeting Cards
10 May 17:19
-
 Philippe T. favorited Collaged Cards
28 Nov 15:25
Philippe T. favorited Collaged Cards
28 Nov 15:25
You Will Need
-
 Step 1
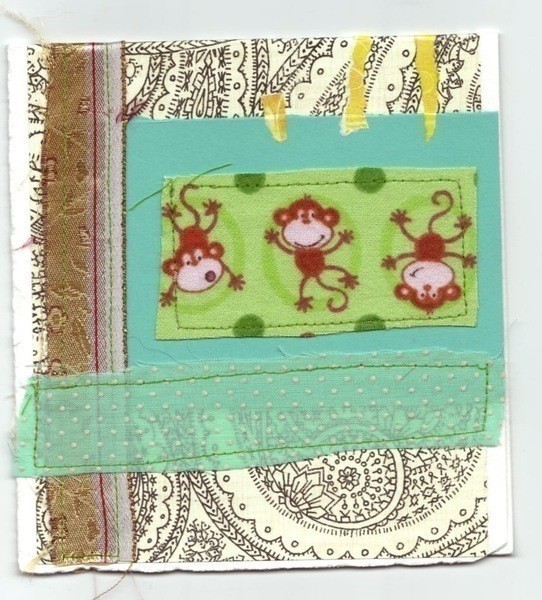
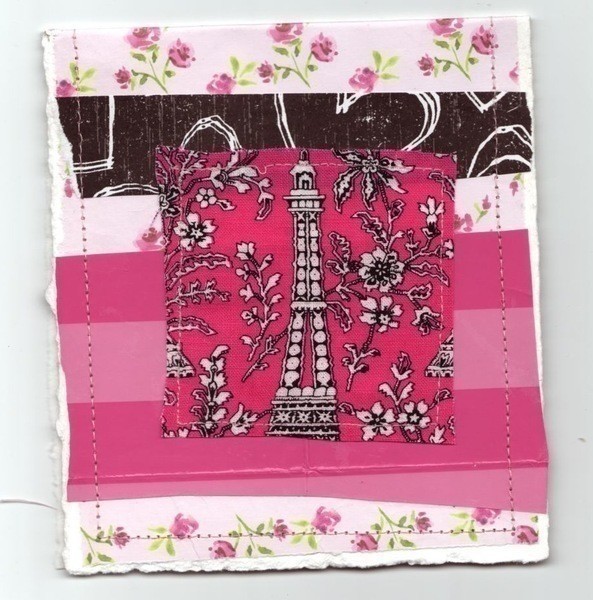
With this particular series I had a need for Three “congrats on your new baby” cards. We had one boy, one girl, and one undecided. So I decide to make them based on the classic gender color schemes. I scavenged my paper/cloth scrap boxes for three-color piles. I kept in mind to look for a large background piece of paper for each, then a swatch that was to be the focal point, and then some accents that might or might not make it into the composition.
-
 Step 2
tear or cut cards to size (i like to tear mine I like the torn edge)
-
 Step 3
Fold an burnish along folded seam
-
 Step 4
Glue your background in place (this could also be painted or stained or plain) burnish, burnish, burnish
-
 Step 5
Arrange your collage playing around with different scenarios and
Thinking about how you will eventually attach each piece -
 Step 6
Attach your collage elements, burnish the ones with glue or glue stick
I always gluestick first any paper I may be sewing later.
When sewing on your card test on a scrap first (machine tension on paper and cloth can be tricky) -
 Step 7
After the entire image has been secured, cover the work on the interior of the card with a piece of paper that is slightly smaller than the card itself. Gluestick and burnish, burnish, burnish.
-
 Step 8
Fold your card and using a cover sheet burnish entire card (lots of pressure)
Using heavy books press the cards between clean paper for a day or so.


belle