

About
Hack your favourite pattern, or update a garment you already own!
Create your own gathered inserts to transform your favourite top or dress pattern into an on-trend 'cold shoulder' garment.
-
 Corvii added Cold Shoulder Inserts to Clothing
13 Jul 19:30
Corvii added Cold Shoulder Inserts to Clothing
13 Jul 19:30
-
 Kellyton K. favorited Cold Shoulder Inserts
18 Mar 16:40
Kellyton K. favorited Cold Shoulder Inserts
18 Mar 16:40
-
 Linda of Nice dress! Thanks, I made it!! added Cold Shoulder Inserts to An Excellent Way to Start a Day!
22 Jul 03:12
Linda of Nice dress! Thanks, I made it!! added Cold Shoulder Inserts to An Excellent Way to Start a Day!
22 Jul 03:12
-
Linda of Nice dress! Thanks, I made it!! favorited Cold Shoulder Inserts
03 Jul 14:02
-
Alecia B. favorited Cold Shoulder Inserts
27 Jan 11:47
-
 Melissa Beth favorited Cold Shoulder Inserts
09 Dec 09:16
Melissa Beth favorited Cold Shoulder Inserts
09 Dec 09:16
-
 RavenQuinzel added Cold Shoulder Inserts to Ideas to try
21 Nov 20:52
RavenQuinzel added Cold Shoulder Inserts to Ideas to try
21 Nov 20:52
-
 Pandora C. favorited Cold Shoulder Inserts
20 Nov 12:02
Pandora C. favorited Cold Shoulder Inserts
20 Nov 12:02
-
 shaunimagnifique published her project Cold Shoulder Inserts
19 Nov 09:00
shaunimagnifique published her project Cold Shoulder Inserts
19 Nov 09:00
-
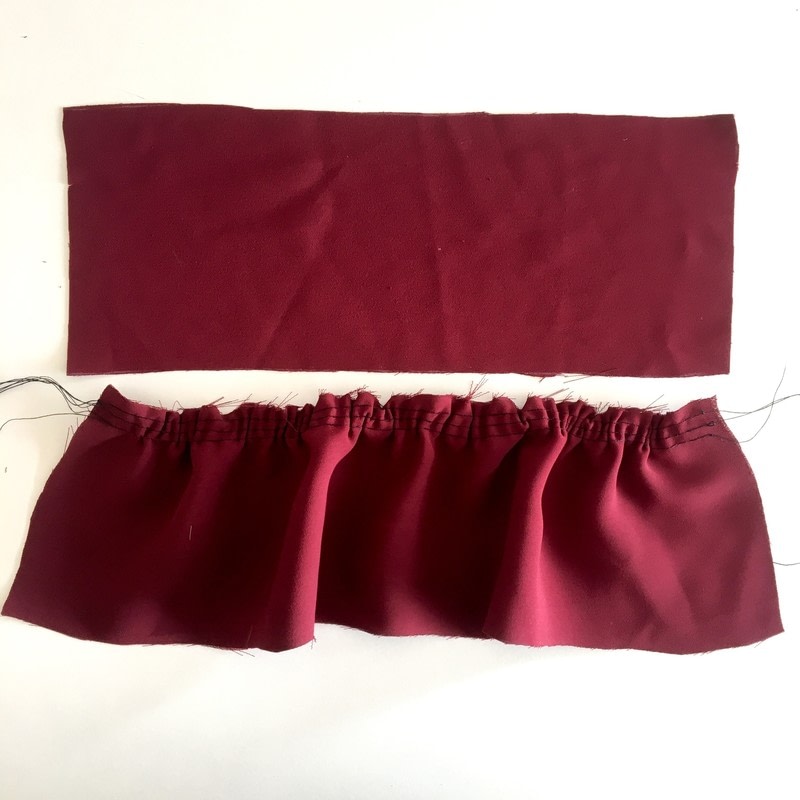
 Step 1
Measure around your arm - preferably wearing your bodice or a muslin of your bodice if yo have one. You want to measure edge of your dress on the front, to the edge of the arm hole on the back.
My cold shoulder inserts are close fitting, so 10.5" long x 10cm deep (this includes a seam allowance) for the basic arm band.
You need to cut out a second, longer piece that will be gathered into the arm band. Mine is 16" long x 4" deep (including seam allowance) but this length can be adjusted depending on how much gathering you want.
-
 Step 2
Gather the longer piece using your preferred gathering method - I like to sew 3 rows of long stitches within a 1.5cm seam allowance (no back stitching at the beginning or end) and pull the end threads to gather.
*Note* For my own project, I folded the longer piece in half depth-ways before gathering. This creates slightly more structured gathers/ruffles and avoids any hemming, but can be a bit bulky depending on your fabric. For the purpose of this tutorial, I haven't folded the gathered piece and it has a bit more 'flow' and drape. If you choose not to fold them, you will need to decide how deep you want your inserts to fall, and hem the bottom of them before adding them to your garment.
-
 Step 3
Gather the piece until it is the same length as the arm band insert.
-
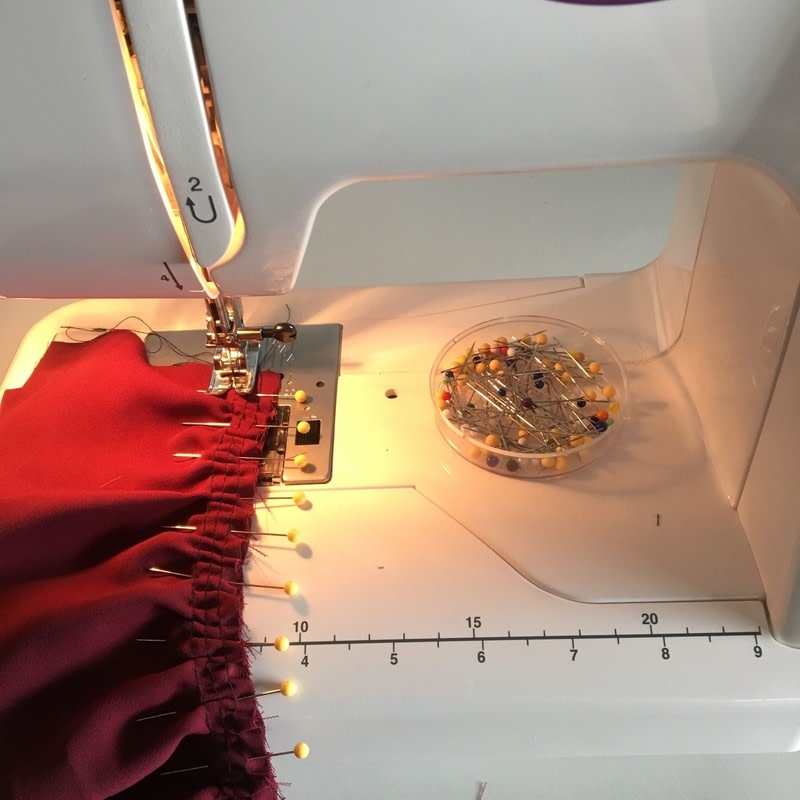
 Step 4
Even up the gathers, and pin the gathered section to your arm band, right sides together.
-
 Step 5
Machine stitch in place, trim or grade your seam allowances to reduce bulk, open the seam out and press lightly.
-
 Step 6
On the other side of the arm band, fold and press 1.5cm towards the wrong side.
-
 Step 7
Fold the arm band in half, so that the folded edge you've just created meets the seam where your gathered piece has been stitched in place.
With all seam allowances folded up towards the arm band, press and pin (all the raw edges will now be concealed).
Hand stitch in place using slip stitch or your preferred method.
Hem the bottom of your insert if required.
-
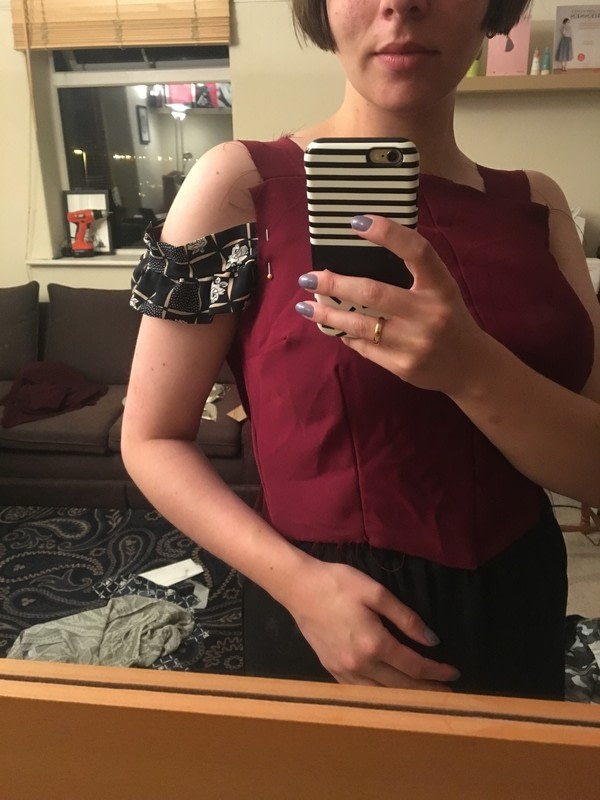
 Step 8
Now make another!
Try your first armband on with either your muslin or garment, marking out the position you'd like it to sit at.
-
 Step 9
If your garment is lined, baste the cold shoulder insert to the outer bodice, and then sew the lining as normal, sandwiching the insert between both shell pieces.
With an unlined garment (or to add to a ready made garment), finish the raw ends of the insert, and baste in place before either top stitching in place while finishing the armholes, or carefully hand stitching afterwards.
Wear and show off!