About
A jar for those with lots of change and little cashy money.
I end up with a pretty good amount of change, but my tiny dorm room can't really accommodate a change bowl. My roommate had the idea of cutting a change slit in the top of a Starbucks Frappuchino to keep change in, and I really liked the idea--they're small, sturdy bottles and hold a fair bit of change before filling up. So I took this nifty idea and ran with it and this how-to was the result. ^_^!
-
 mel M. favorited Cheap And Easy Decopage Change Jar
20 Aug 03:30
mel M. favorited Cheap And Easy Decopage Change Jar
20 Aug 03:30
-
 meggy18 favorited Cheap And Easy Decopage Change Jar
03 Jun 09:24
meggy18 favorited Cheap And Easy Decopage Change Jar
03 Jun 09:24
-
 Len favorited Cheap And Easy Decopage Change Jar
06 Jul 01:33
Len favorited Cheap And Easy Decopage Change Jar
06 Jul 01:33
-
 Step 1
Get a glass or plastic bottle of medium size. I used a Frappuchino bottle, but if there is another beverage you prefer, that'd be fine--just make sure that the top opening is large enough to fit change down into.
-
 Step 2
Take off the labels, if you like. I did because Frapp labels peel off pretty easily, but it really doesn't matter either way.
-
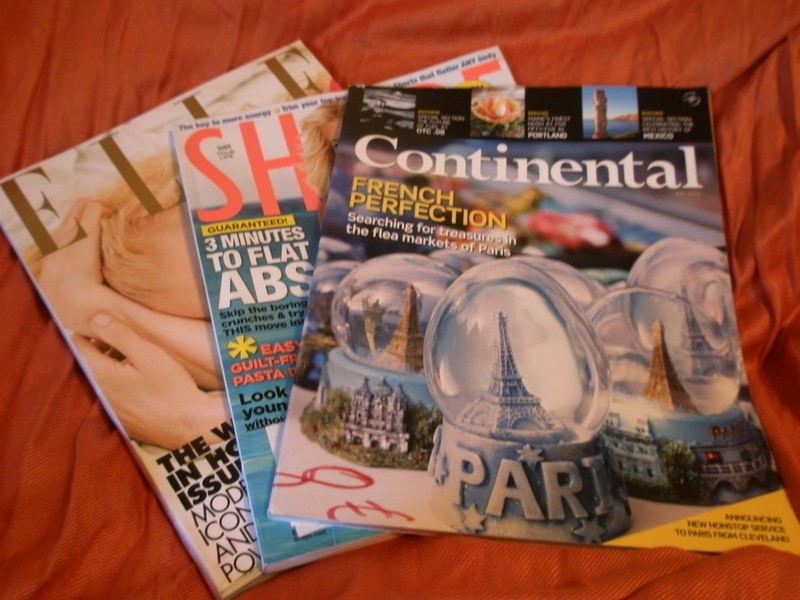
 Step 3
Pick a handful of magazines you don't really need anymore--make sure they have a lot of pictures! (Unless you'd like to do something with text...that'd actually be pretty cool!)
-
 Step 4
Look through the magazines and cut out pictures or words that you'd like your bottle to feature--think about a theme while selecting pictures, like a color or a style. Be sure to trim them to the size and shape that you want, and if you can, check and see how they overlap with each other. No point in having an awesome picture if you accidentally cover it up with another one!
-
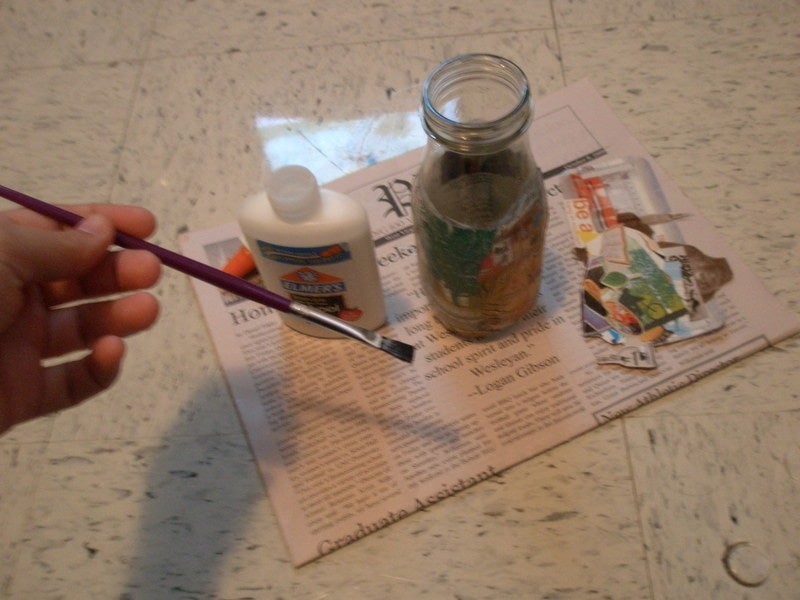
 Step 5
Gather all of your supplies together over a surface you don't mind getting a little bit sticky, like a newspaper. Unscrew the top of a bottle of glue, get a stiff-bristled paintbrush you don't really care about, and use it to apply the clippings to the surface of the bottle.
-
 Step 6
Don't be afraid to use LOTS of glue! The glue here is not just to attach the clippings to the bottle, but also to give the finished product a smooth, matte finish rather than a patchy, part-magazine glossy finish. So cover EVERYTHING with glue! While you're doing this, mind the curves of the bottle, and use the stiff-bristles of the brush (or your fingers) to smooth out bubbles in the pictures.
-
 Step 7
It'll kind of look like this when you're done. After you're finished with that, start on the lid.
-
 Step 8
When I did the lid, I only focused on the flat surface on the top--it would have been obnoxious to decopage the sides of that lid! So if your lid is a color that is compatible with your theme, just leave it--it's easier!
-
 Step 9
After the lid is dry, get a screwdriver (or something like it) and a hammer and make a slit for change in the top. (Be sure not to do this over a nice floor!)
-
 Step 10
When you're done with the hole, slide the screwdriver up and down it to soften out the sides a bit and use some glue to seal the sharp edges of the hole where you can. (Be careful not to cut your fingers!)
-
 Step 11
After that, you just wait for the glue to dry, screw the top on the bottle, and you're ready to drop in some laundry money!
-
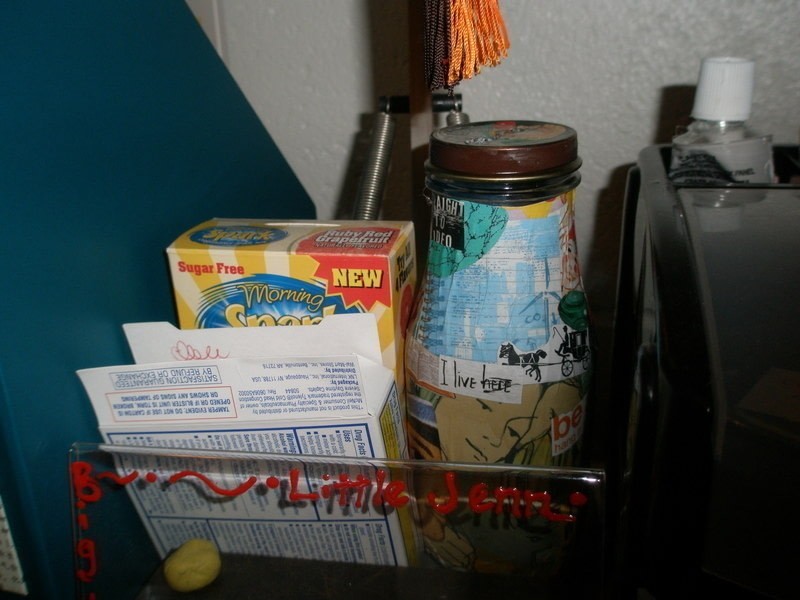
 Step 12
Here's my finished product in action on my messy, messy desk!