


About
For the Pokemon trainers! <3
I made this for my friend, who loves Charmander. (: I know it seems like from the materials list it seems like you need a lot, but really I just made this from bits and pieces of scraps I had at home. Also, this is my first project I've made a tutorial for, so I hope you like it! If you have questions, feel free to ask! I'd love to see the versions you guys make. (:
Tags
Downloads
- Charmander_Pattern.pdf 239 KB [ Download ]
-
 Sarah B. favorited Charmander Plushie
23 Aug 12:50
Sarah B. favorited Charmander Plushie
23 Aug 12:50
-
 Terka V. added Charmander Plushie to Plány
24 Dec 04:46
Terka V. added Charmander Plushie to Plány
24 Dec 04:46
-
 Terri M. added Charmander Plushie to Plushies
25 Jul 23:33
Terri M. added Charmander Plushie to Plushies
25 Jul 23:33
-
Terri M. favorited Charmander Plushie
25 Jul 23:33
-
 Brenda L. favorited Charmander Plushie
01 Apr 23:54
Brenda L. favorited Charmander Plushie
01 Apr 23:54
-
 Djamilah W. favorited Charmander Plushie
13 Mar 02:02
Djamilah W. favorited Charmander Plushie
13 Mar 02:02
-
 HylianWriter534 added Charmander Plushie to To-Make List
02 Mar 04:32
HylianWriter534 added Charmander Plushie to To-Make List
02 Mar 04:32
-
 Jessica C. favorited Charmander Plushie
15 Feb 14:17
Jessica C. favorited Charmander Plushie
15 Feb 14:17
-
HylianWriter534 favorited Charmander Plushie
14 Feb 06:03
-
 Annakitsune favorited Charmander Plushie
22 Jan 17:14
Annakitsune favorited Charmander Plushie
22 Jan 17:14
-
 Step 1
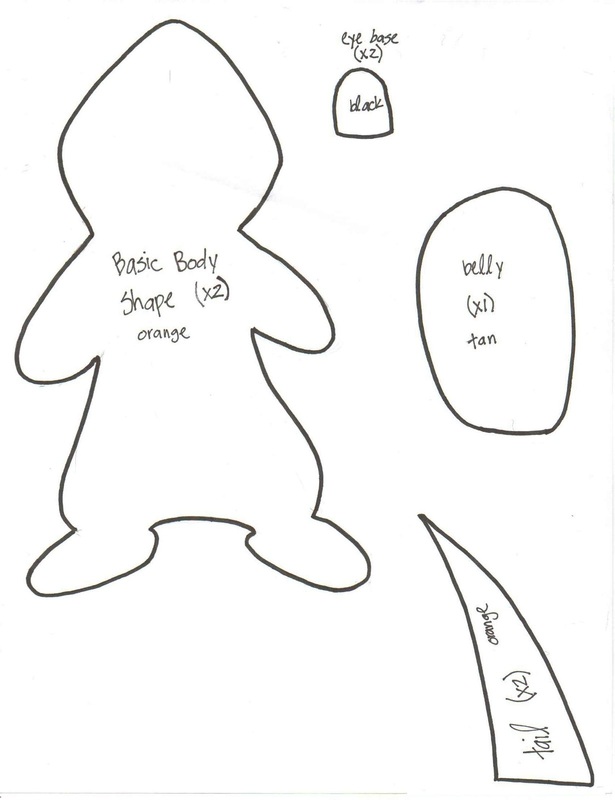
Make a pattern for your plush. You can draw your own, or download and print the one I drew.
-
 Step 2
Cut out the patterns, and cut the felt out accordingly. You will be stitching on the outside, so there is no need for a seam allowance.
-
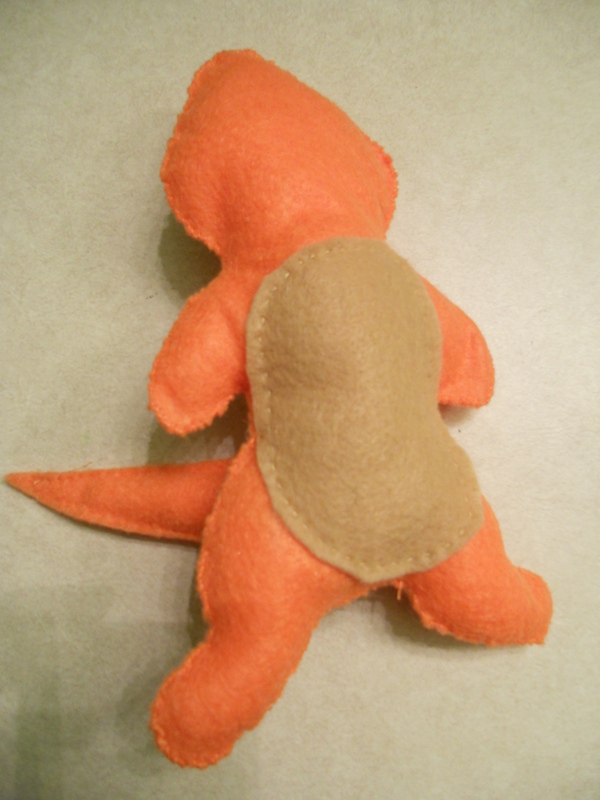
 Step 3
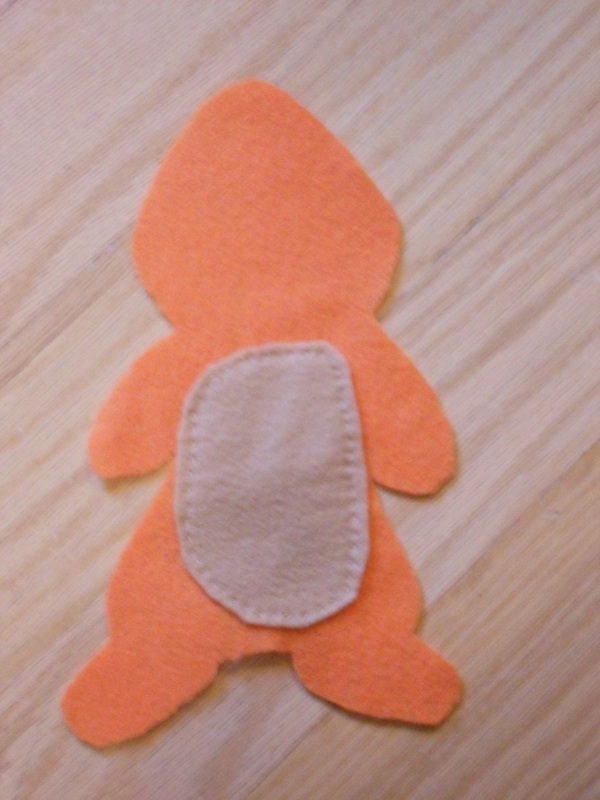
Take one of your "main body shape" pieces (the front). Sew the "belly" piece in the middle of the "main body shape" piece as shown. When you're done, set it aside.
-
 Step 4
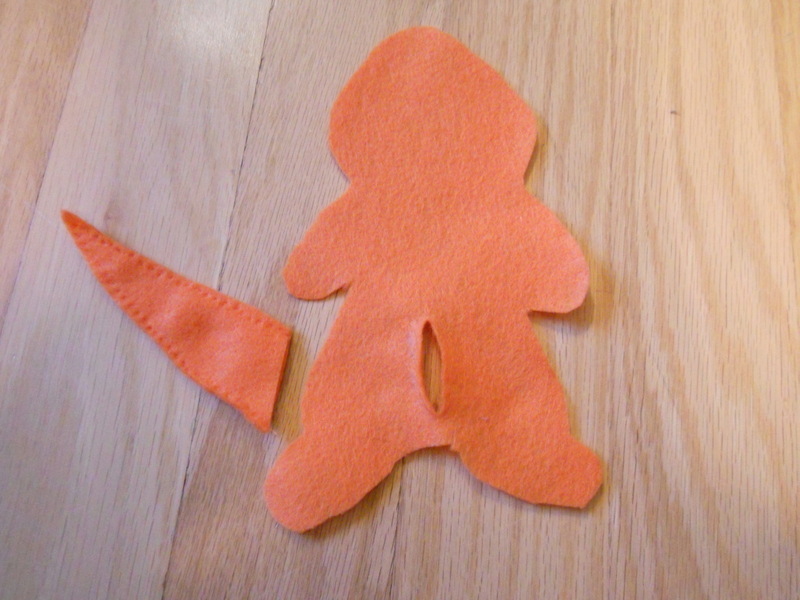
Take the two "tail" pieces and sew them on both sides up to the point. Leave the flat side open.
-
 Step 5
Take the unused "basic body shape" (the back) piece and cut a hole in the back where you want the tail to be. This is where you will sew in the tail. Cut the hole slightly smaller than the base (the flat side) of the tail.
-
Step 6
Put stuffing into the tail, and slide the tail through the hole from the inside out. The pointy end will be away from the body.
I think I deleted the picture for this one. Sorry. :((
-
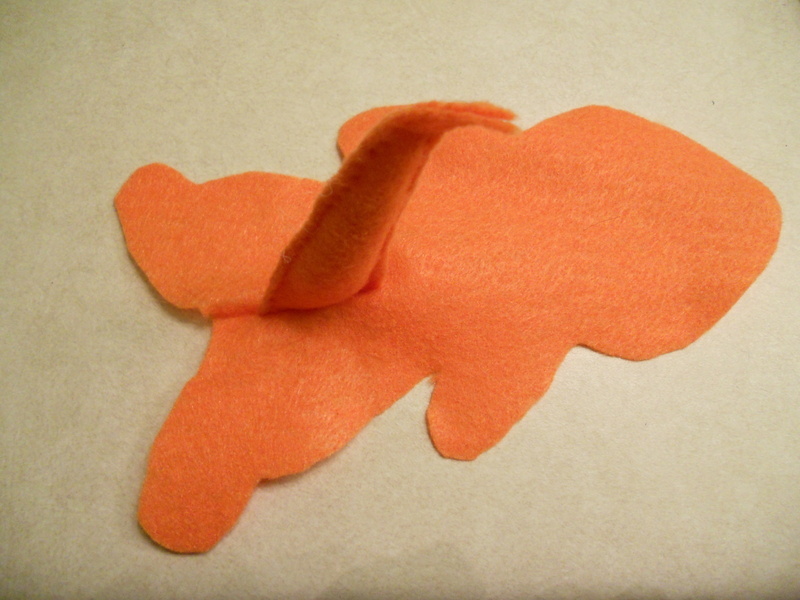
 Step 7
Take the edges of the hole and fold them so that they are parallel to the end of the tail. There should be 4 layers of felt at this point. Sew through all 4 layers.
-
 Step 8
This is how it should look from the inside....
-
 Step 9
...and from the outside.
-
 Step 10
Now, you need to paint the "eye base" pieces and let them dry before you sew/glue them on. *NOTE* You may need several coats of paint.
I painted the "eye base" pieces first because I plan on gluing them on. If you want the eyes to be sewn on, sew the eyes to the front of the "basic body shape" piece (where the eyes would be on the face), and then paint them.
-
 Step 11
Set the eyes aside and take both sides of the "basic body shape" pieces. Sew them together almost all the way around, leaving one place open to put stuffing into.
-
 Step 12
Put stuffing into the body, and sew the opening shut.
-
 Step 13
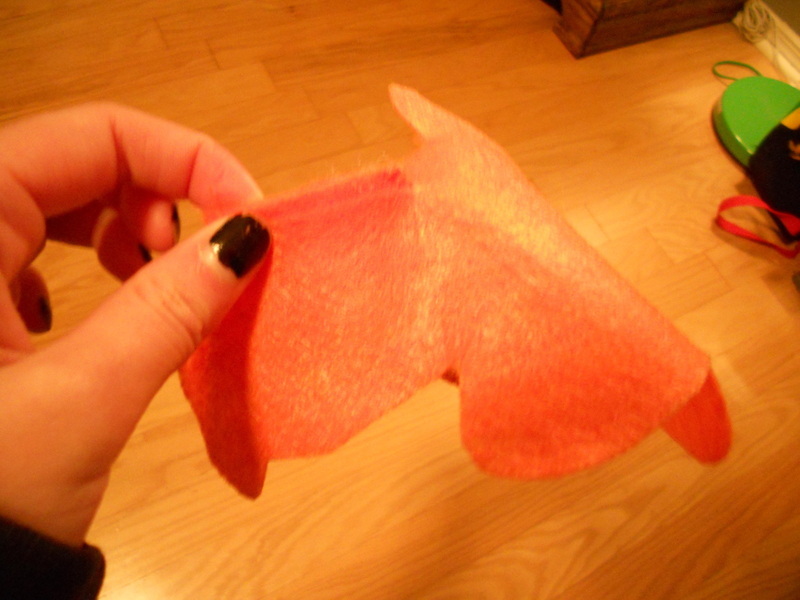
Cut out the flames for the tail. I free-handed these. I didn't have red, but I had extra orange so I substituted it for the red.
-
 Step 14
Sew or glue them onto the end of the tail.
-
 Step 15
Glue the eyes on and paint the face details. And you're done! :D


Comments


