About
Create chalkboard art!
This is a quick tutorial of how I create chalkboard lettering and the tools I use. I plan on doing a more in-depth tutorial at some point once my chalkboard wall in my apartment is done!
-
 Cake Eater Sarah added Chalkboard Lettering to Personalization
13 Oct 01:25
Cake Eater Sarah added Chalkboard Lettering to Personalization
13 Oct 01:25
-
 Duaa-e-Aamina favorited Chalkboard Lettering
09 Aug 07:31
Duaa-e-Aamina favorited Chalkboard Lettering
09 Aug 07:31
-
 Chudames favorited Chalkboard Lettering
27 Jul 08:10
Chudames favorited Chalkboard Lettering
27 Jul 08:10
-
 Erin M. published her project Chalkboard Lettering
28 Jun 06:00
Erin M. published her project Chalkboard Lettering
28 Jun 06:00
You Will Need
-
 Step 1
First, you will want to rub chalk all over the board. I like to do this to give it a more authentic chalk-y look.
-
 Step 2
Then you can rub this in using any cloth; I suggest not using your hand too much, though, because it can get the board oily.
-
Step 3
Here's my process! I start with a chalk sketch, editing sizing as I go. Exciting side note: you can sharpen chalk in a pencil sharpener! Or you can use a pre-sharpened soapstone pencil. Then I go over the sketch with a chalk pen, if you want it to stand out more, and wait for the pen to dry. Once the pen dries, you can wipe away the sketch with a normal cloth.
-
Step 4
Then I go over the sketch with a chalk pen, if you want it to stand out more, and wait for the pen to dry. Once the pen dries, you can wipe away the sketch with a normal cloth.
-
 Step 5
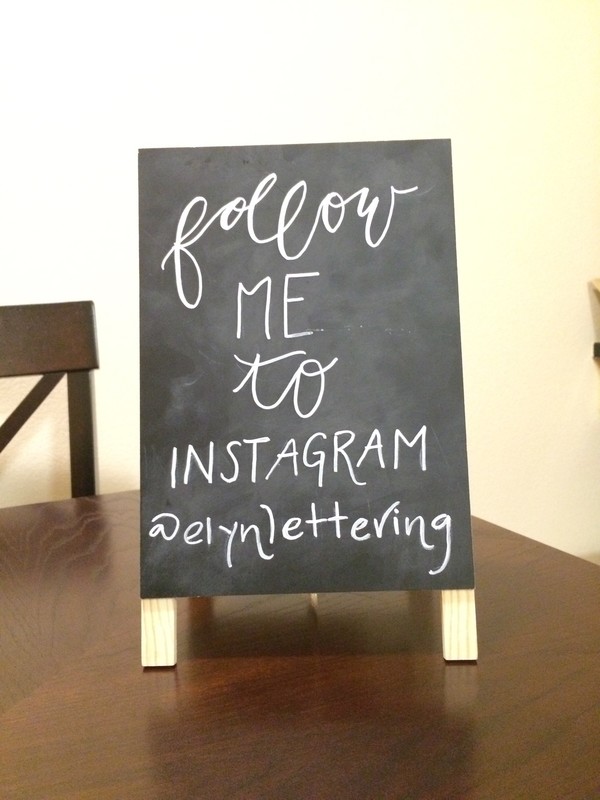
And you have the finished product! This is a pretty simple example with plain all-capital lettering, but you can get fancy with different typographies!