


About
Adorable Double Sided Pouch WITH IMAGE
****This tutorial focuses more on how to create double sided sewing projects rather than sewing.
***The cat image featured on this tutorial was created by me, originally with prismacolors colored pencils, gouache, and ink.
I have uploaded this image as a direct link for you to download and use for this project. It is not intended to be used or distributed in any other way please.
Image: http://i214.photobucket.com/albums/cc48/shaylafish/CUTOUTANDKEEP/Image7inter.jpg
Tags
Downloads
- Image7inter.jpg 79.8 KB [ Download ]
-
 Whitney I. favorited Cat Coin Purse
12 Aug 08:43
Whitney I. favorited Cat Coin Purse
12 Aug 08:43
-
 Shayla F. entered her project Cat Coin Purse to Secret Santa
15 Jan 18:57
Shayla F. entered her project Cat Coin Purse to Secret Santa
15 Jan 18:57
-
Shayla F. entered her project Cat Coin Purse to Singer Christmas Contest
08 Dec 07:46
-
 Tokki favorited Cat Coin Purse
25 Oct 14:31
Tokki favorited Cat Coin Purse
25 Oct 14:31
-
 joy.mardon.1 commented on Cat Coin Purse
13 Oct 10:45
joy.mardon.1 commented on Cat Coin Purse
13 Oct 10:45
-
joy.mardon.1 favorited Cat Coin Purse
13 Oct 10:42
-
 WisPa favorited Cat Coin Purse
13 Oct 06:33
WisPa favorited Cat Coin Purse
13 Oct 06:33
-
Shayla F. entered her project Cat Coin Purse to Kawaii Box
13 Oct 06:30
-
 Kichiru added Cat Coin Purse to Totoro, Pikatchu ~ kawaii animals 83
19 May 12:01
Kichiru added Cat Coin Purse to Totoro, Pikatchu ~ kawaii animals 83
19 May 12:01
-
Kichiru added Cat Coin Purse to Cosplay *Q* apd
18 May 19:01
You Will Need
-
 Step 1
The first step, is printing your image onto fabric.
Since we want to keep the entire form of this kitty, we will have to tweak both images before printing.
One side will be the original image. For the other side, you will have to "mirror" the image. You need to do this so both pieces will fit together perfectly when you sew them together.
In this example photo. My top cat is the original image and the bottom cat is the mirrored image.
You can choose the size you desire for this kitty!
Now, print your images onto the fabric transfer inkjet paper. (I used Avery transfer paper for light fabrics, you can find it at Walmart and it is CHEAP.)
-
 Step 2
Next you will need to cut out both cats and iron them onto your fabric. To do this without mishaps such as ripping the image, press down as hard as you can with your iron.
DO NOT USE STEAM for this project.
After you have ironed your image, CAREFULLY peel off the back paper.
-
 Step 3
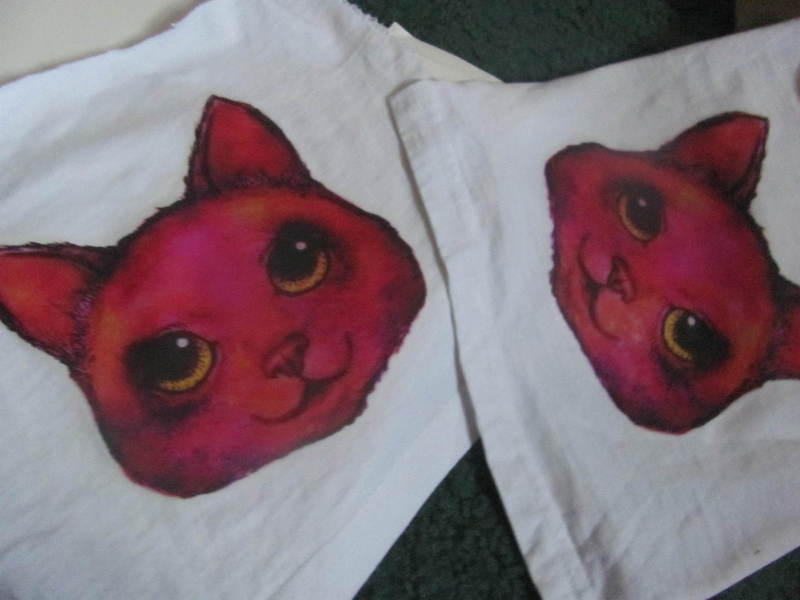
This is what your pieces should look like after transferring.
-
 Step 4
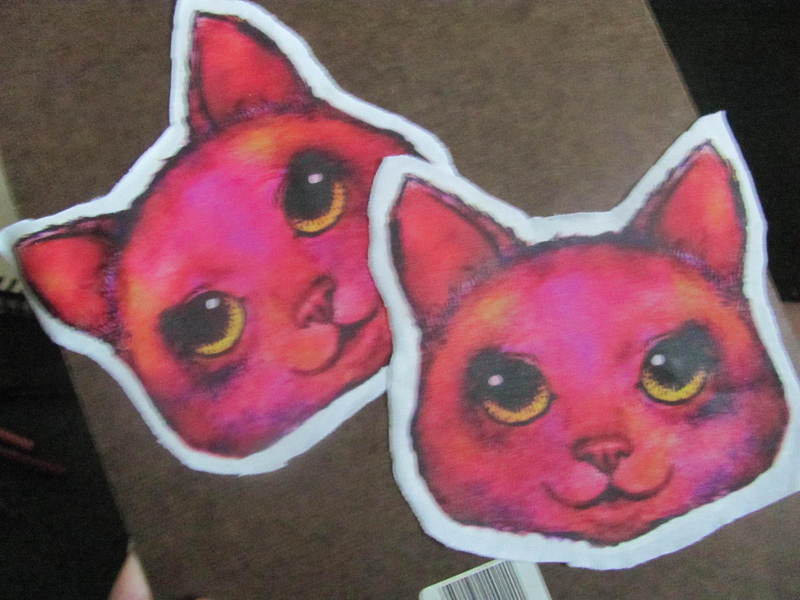
Cut out your fabric pieces leaving approximately 1/2 inch white border
-
 Step 5
My sewing machine hasn't been working so I actually hand sewed this project, and I am not very good at hand sewing.
The rest is simple really. First, sewed the zipper on to eliminate part of the complicated process. Watch your sewing in this step, we want to keep this kitty's entire form to resemble a sort of "die cut" feeling.
-
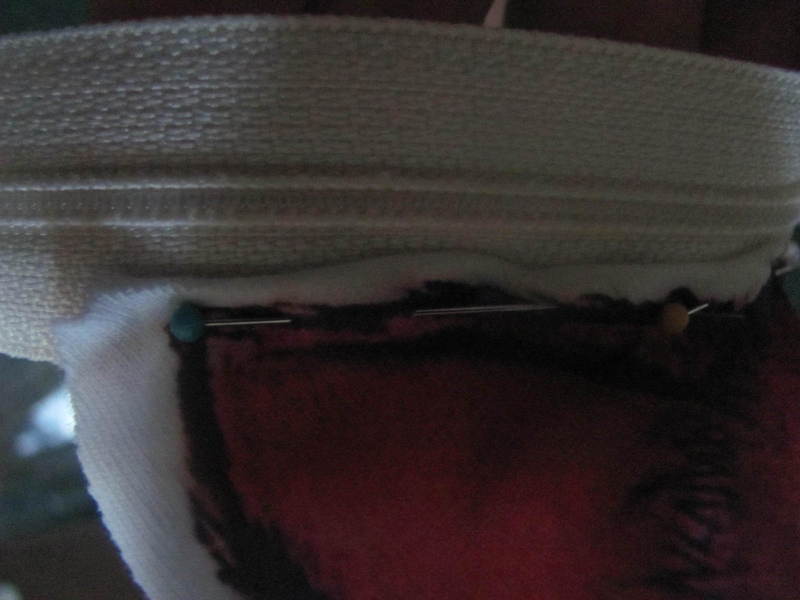
 Step 6
Pin Pin Pin
-
 Step 7
Sew fabric with the images FACING each other, then turn inside out.
This image shows the cat already turned inside out.
There are many tips available online if you need help with the zipper.
-
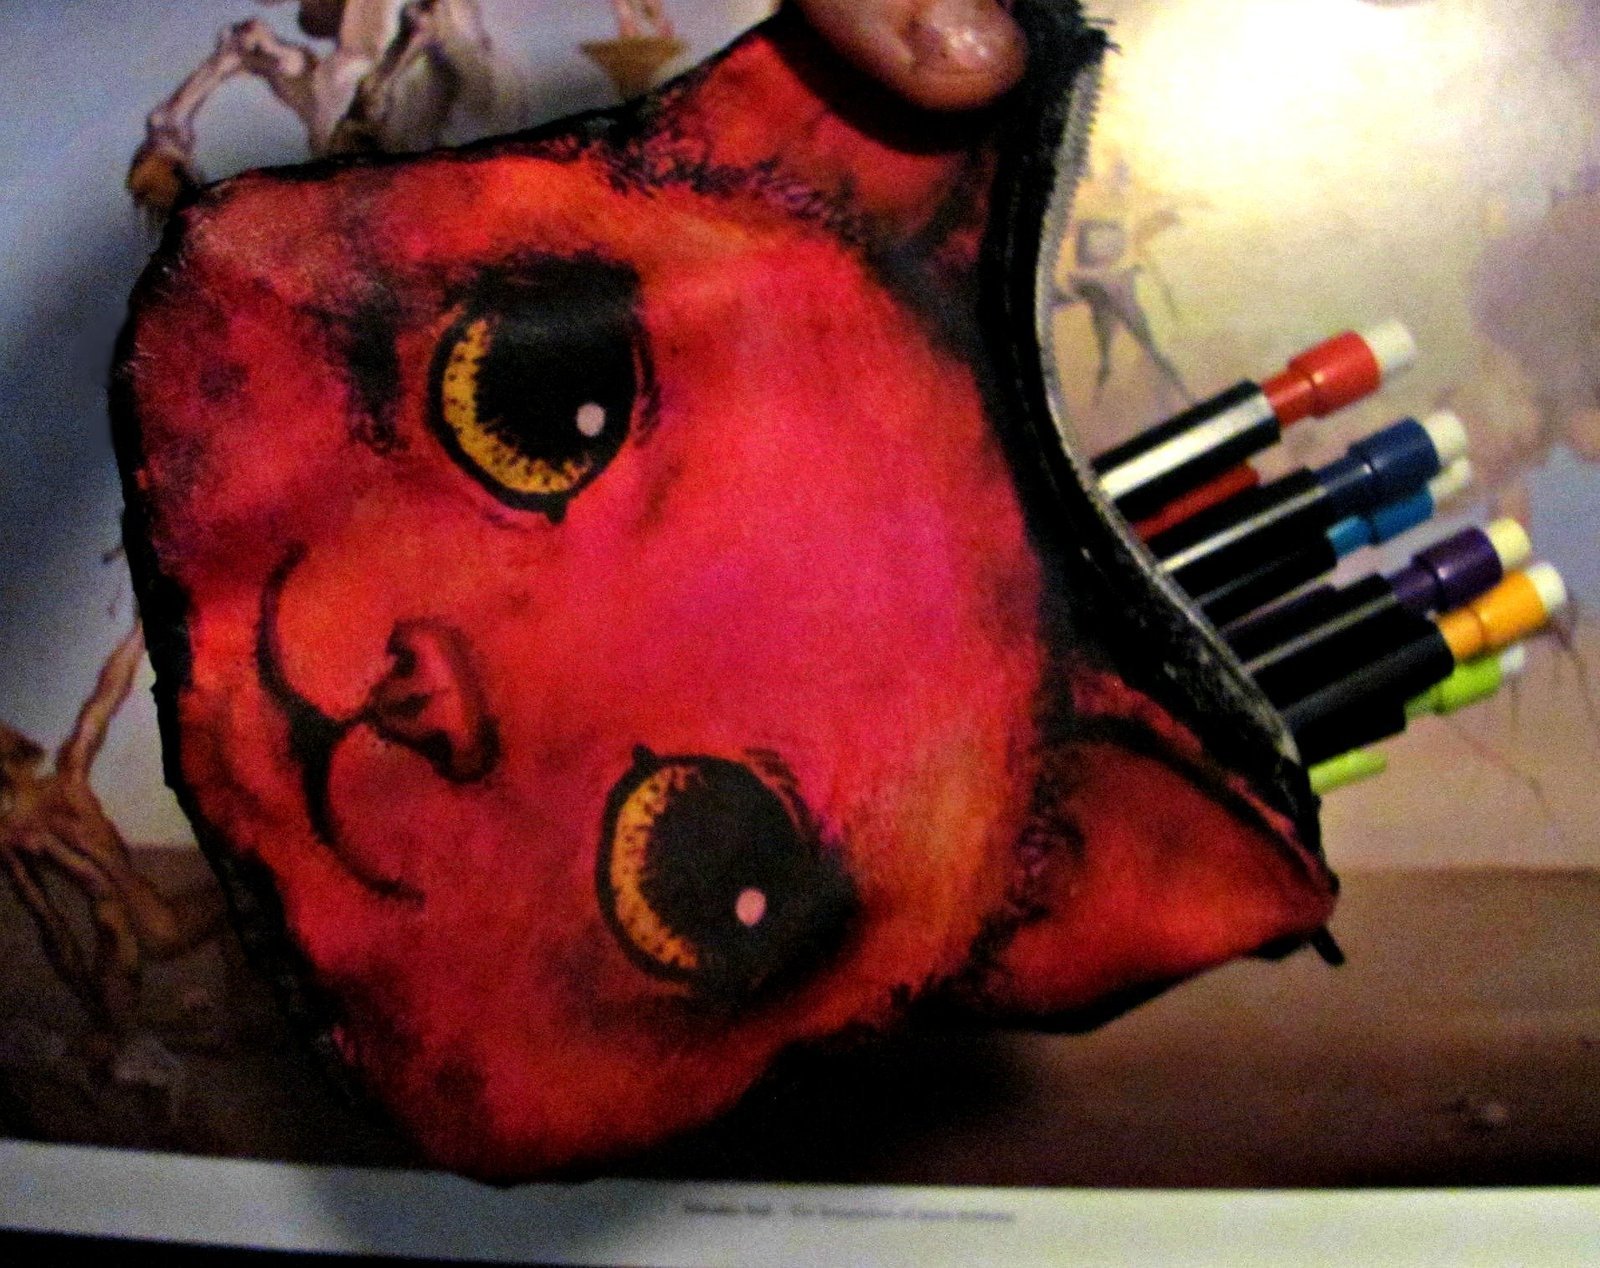
 Step 8
You are probably wondering how my zipper and fabric turned black. After I finished this project, I painted the zipper with black acrylic and the visible white border with fabric paint.
-
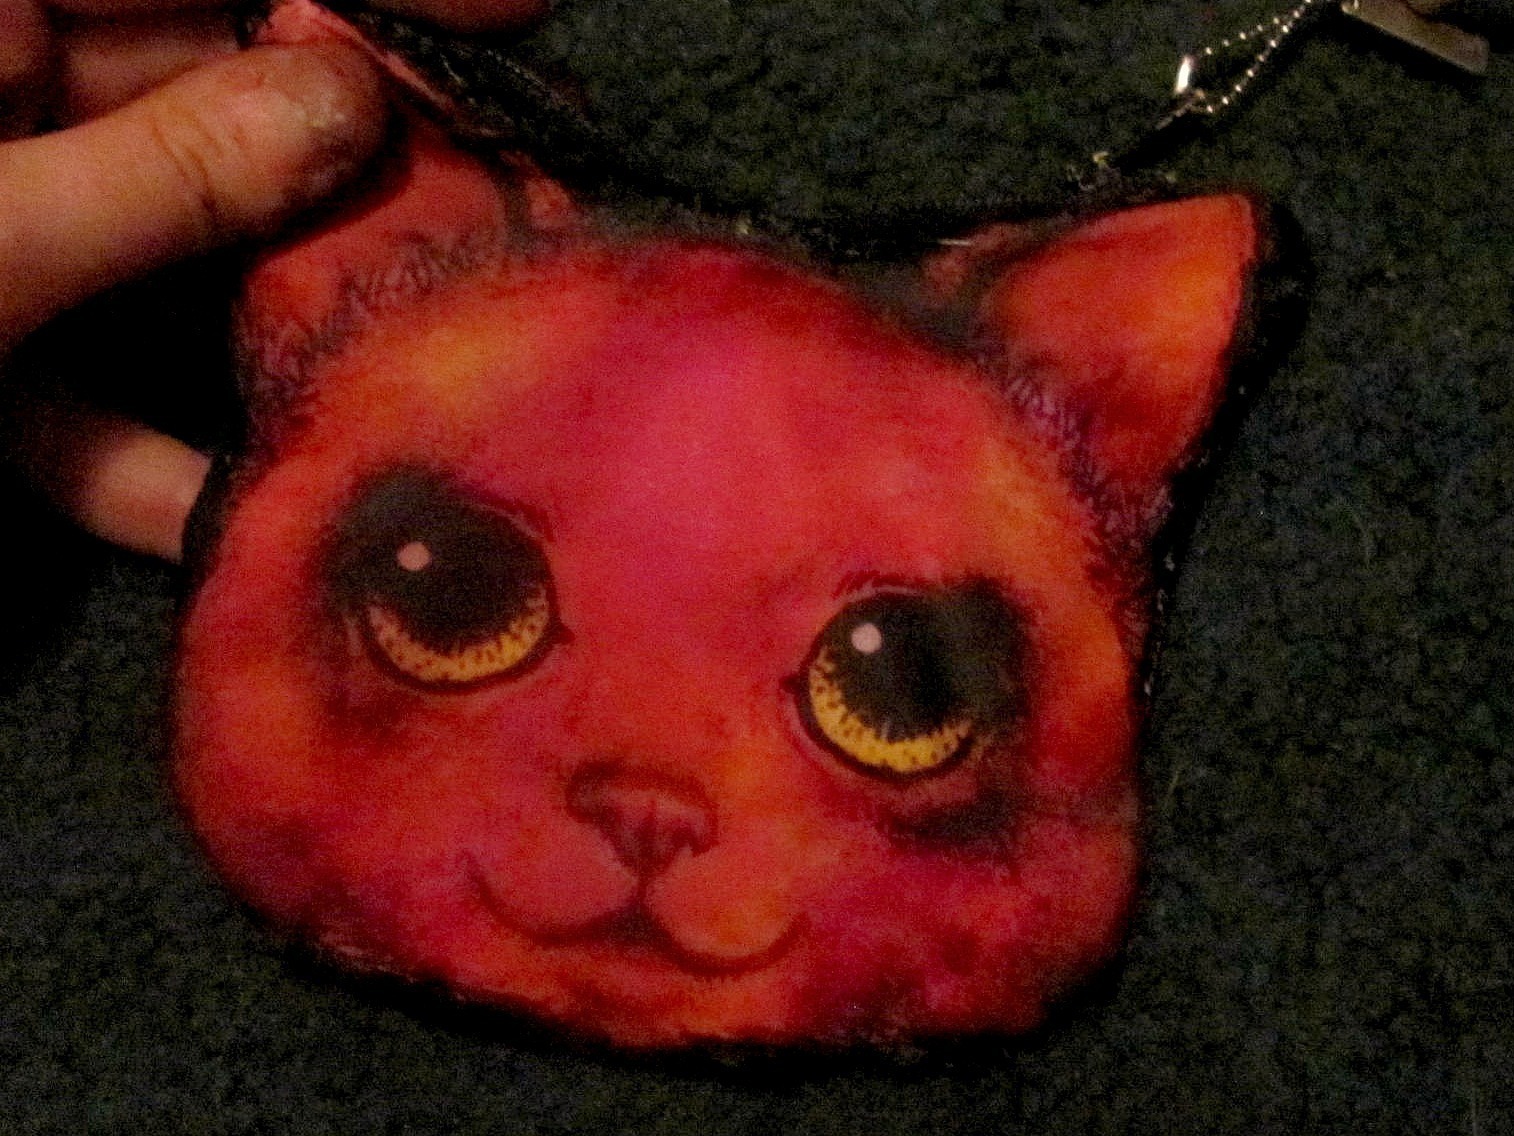
 Step 9
Now...you can STORE ITEMS IN THIS NEAT PURSE!


Comments


