


About
How to make a simple stripy-stamp out of a piece of cardboard.
Hello all!
This is my first how-to; a stamp made out of a piece of cardboard. Pointless, but when ALL of your craft supplies are thousands of miles away (like mine are :'( ) you need SOMETHING to keep you busy! (: Don't worry; I PROMISE my projects will only get better from hereon - that is, at Christmas when we are taking a trip to where my crafting supplies are!
-
 Step 1
Gather your materials; make sure to cover your workspace!
-
 Step 2
First, take your piece of cardboard and peel JUST the top layer of the cardboard off, so that you can see the ridges beneath it. Be careful not to cut the ridges, or you will end up with a sloppy end product.
Also, be sure that your cardboard isn't messy. In other words, make sure that there are no little pieces of shredded paper beneath the surface; that its neat and clean like in this picture. -
 Step 3
You may need to cut inbetween the ridges to help you peel the top layer off. Also note that this is an example of a BAD piece of cardboard. Unless you want to be picking little pieces of cardboard off, scrap it if you have a piece like this and just try for a better one.
-
 Step 4
This is what the cardboard should look like when you are done peeling.
-
 Step 5
Now comes the fun part... painting! Paint each of the ridges in a different color, or use all the same if you would like. (:
If you are using multiple colors, try to use a smaller paintbrush so that you do not end up mixing colors.
Also, don't be afraid to glob it on thick! It is necessary to do so unless you want all your paint to dry on the cardboard before you can stamp.
-
 Step 6
This is how it should look when you are finished painting the ridges.
-
 Step 7
Next, flip your stamp upside-down onto your sheet of paper or whatever else you would like to stamp.
-
Step 8
Carefully remove your stamp; I've found that the way that works best is to hold down on either side of the paper and lift up one side to another; left to right or vice versa.
I did not take a picture for this step: sorry!
-
 Step 9
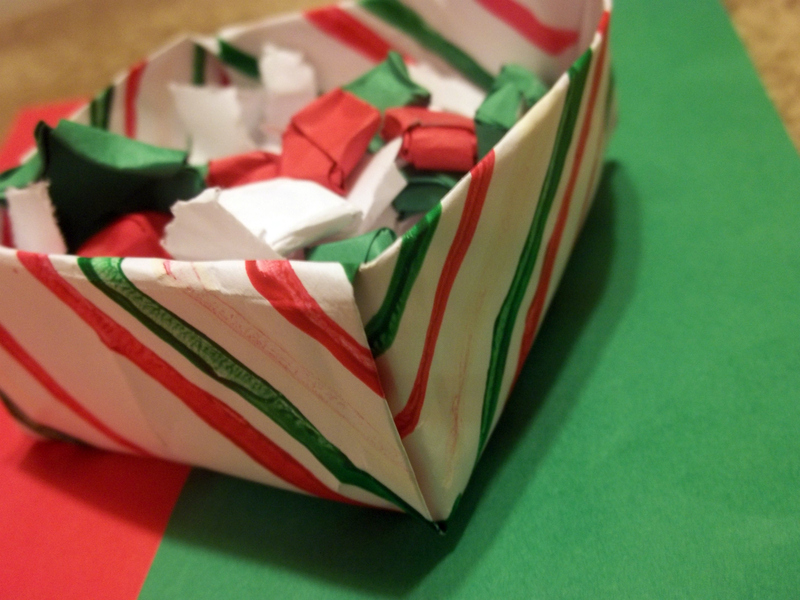
After drying, you should end up with a pattern that looks like this, depending on the way you stamped it.
I folded my sheet of paper into a little box that is currently housing my little origami stars. (: I used this tutorial here -http://www.youtube.com/watch?v=Dul_wi56Xa0 - to create it.
I hope you enjoyed, and please tell me how I did, as this is my first tutorial ever! (:


Comments


