About
coat rack distressed and accented with buttons.
I’ve been obsessed with buttons since I was little. I’m also obsessed with shopping bags, and so I decided to bring the two loves together in this button coat rack. Are you one of those people that has a healthy bag collection? Me too - and there’s nowhere for the bags to go except jammed into the bottom of my closet. I decided to remedy that situation by organizing my bags on a coat rack distressed and accented with buttons. Here’s how I did it.
-
 TheSewingMaven favorited Button Rack
04 May 00:13
TheSewingMaven favorited Button Rack
04 May 00:13
-
 J.N. Cahill added Button Rack to Home Decor
21 Sep 19:24
J.N. Cahill added Button Rack to Home Decor
21 Sep 19:24
-
 Step 1
Basecoat the rack with a color - I used a shade of pink. This color is only going to show through the overcoat slightly, so don’t worry about doing a bang-up job. I just painted two coats and I did NOT paint the hangers. Allow to dry.
Your next step is to rub the candle or piece of wax in certain areas on the rack that you would like distressed. I just picked random patches on the front of the rack and edges. Rub a little wax here and here.
-
 Step 2
Now that your coat rack has been waxed like a pair of skis, paint over it with another paint color. I chose a shade of white and so had to paint about three coats to fully cover the pink. This time I painted the hangers. Once you are satisfied with the coverage, allow to dry.
-
 Step 3
Take your rack outside and begin sanding with your paper. Check out the picture - do you see the pink starting to show through? Those are the areas I waxed! The paint just sands right off. Don’t sand too hard or you will sand down to the wood. Sand very lightly for less distressing and a little more for a more distressed look. Stop when you are happy with the effect. Wipe the sanding dust off of your rack.
-
 Step 4
I love stripes - did I mention that? I decided while doing this project that stripes would be a nice backdrop for my buttons. I used stencil tape to make stripes going in different directions. The thickness of the stencil tape doesn’t matter, you just need to space the pieces so that you have the thickness of stripes that you want. I wanted mine to be relatively thin, as you can see. Paint the stripes (I did three coats with a blue) and then remove the tape immediately. Allow to dry.
-
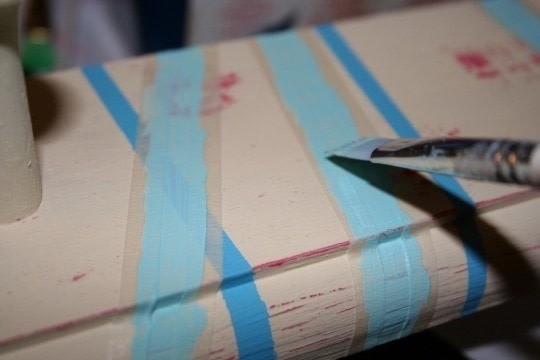
 Step 5
To jazz my rack up even further, I used more stencil tape and a lighter blue to make stripes going in other directions. Same applies as before - paint about three coats, and then remove the tape immediately. Allow to dry.
-
 Step 6
Finally, I added the buttons with craft glue. Before I glued anything down, I laid all of the buttons out to make sure that I was happy with the way they looked and the colors. I highly recommend ALWAYS doing this before you glue anything down.
Now my bags have a place to go and I have a crazy button rack like I’ve always wanted. The world is good.