


About
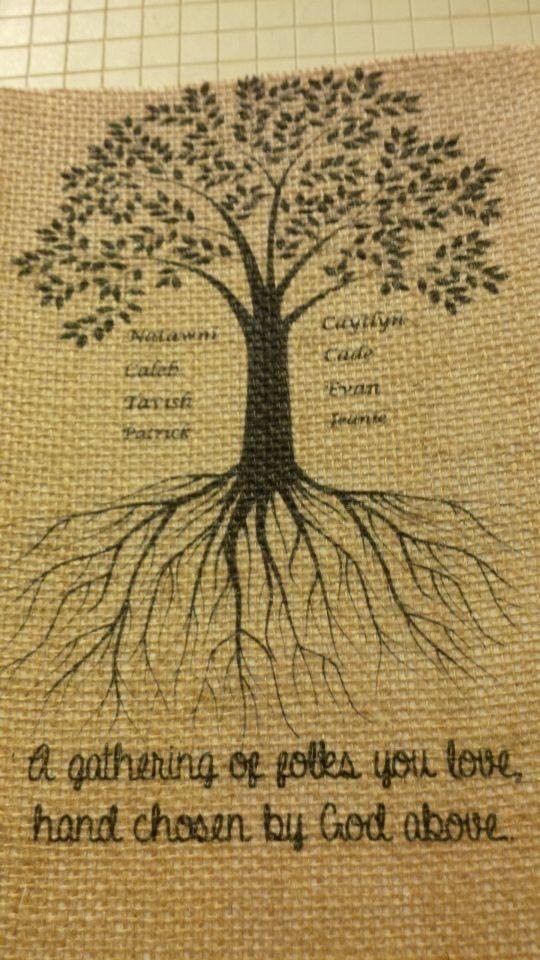
Unique personalized burlap wedding gift
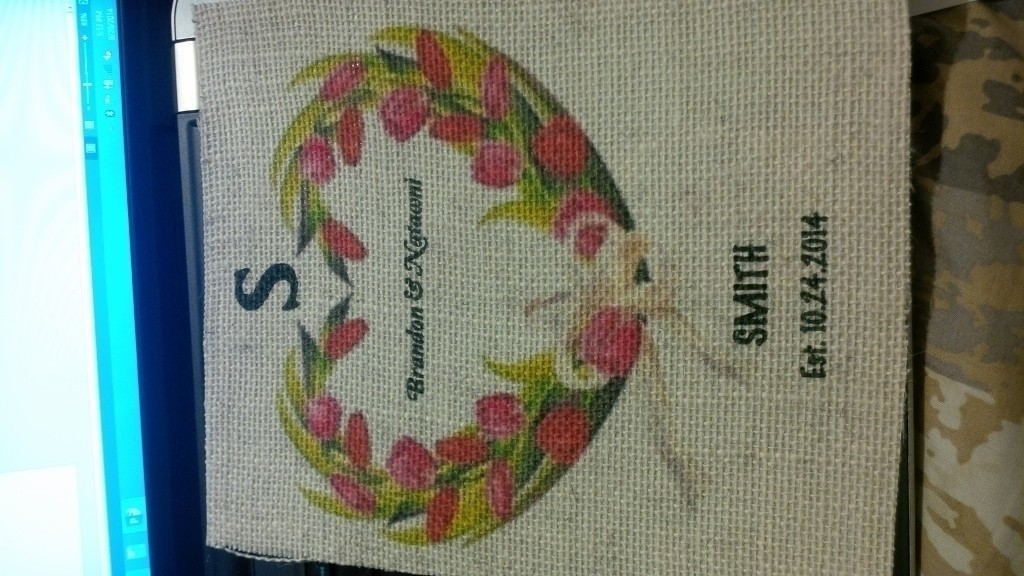
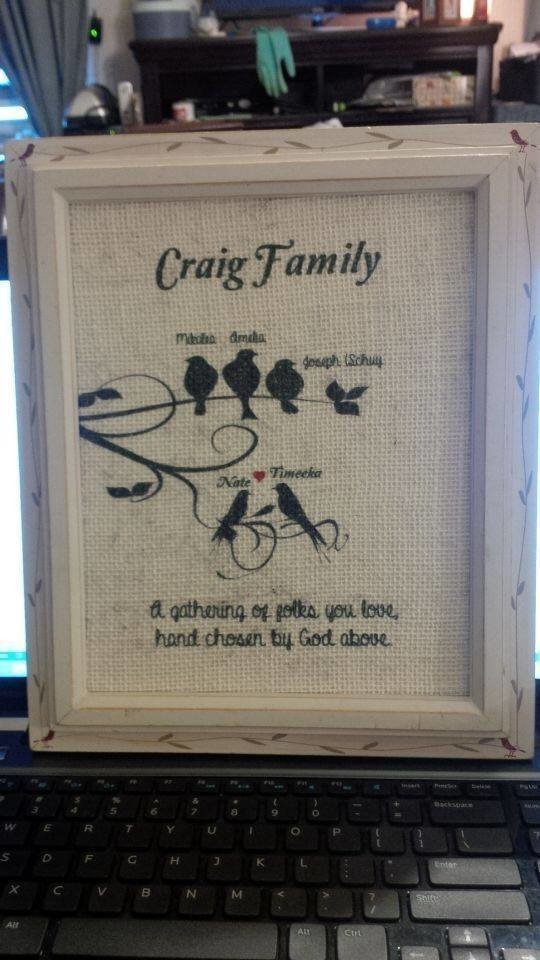
This was made for the first of our 6 children as a wedding gift. The theme for everything was kind of a rustic burlap with muted pastel colors. (I did frame this project, but don't have that photo uploaded yet.) This is the only burlap creation that I've made with color ink, for everything else black ink works best.
I had no problems using my printer with burlap, be mindful of the size you're cutting the burlap to, I suggest printing on plain paper and lining it up against the burlap. This way you can make any adjustments.
-
 Jeanie published her project Personalized Burlap Family Monogram
15 Nov 02:22
Jeanie published her project Personalized Burlap Family Monogram
15 Nov 02:22
-
Step 1
(I would suggest that you NOT cut your burlap first, this will absolutely save a lot of wasted material.)
Iron your burlap using the steam setting, set aside to allow any excess moisture to dry.
-
Step 2
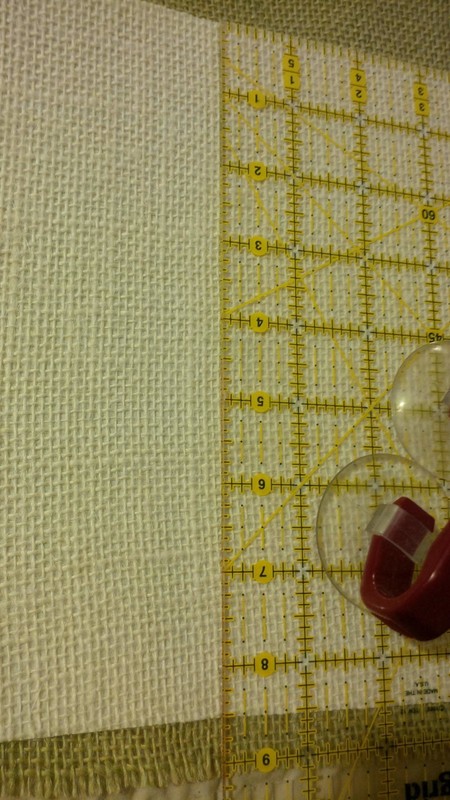
Cut the Heat n Bond to the paper size that will fit in your printer.
TIP: I found that using a basic paper size of 8 1/2" x 11" works best for alignment purposes until you feel comfortable. And printing the design on paper first, and holding it against the burlap under light gives you the chance to make any adjustments BEFORE you waste your burlap.
-
 Step 3
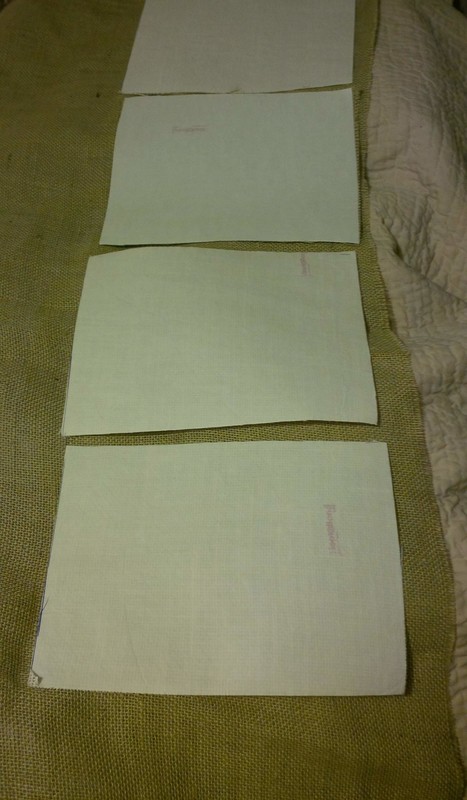
Iron the Heat n Bond onto the burlap. (For best use of burlap I use multiple cut pieces of Heat n Bond across so there is only one cut across and no odd pieces of burlap left attached.)
-
 Step 4
***DO NOT REMOVE Heat n Bond at all through this entire process.
Using rotary cutter trim burlap as close to the size of attached Heat n Bond. Remember this has got to be fed into your printer, there should be no frayed burlap edges.
-
 Step 5
I used Microsoft Word, 8 1/2" x 11" paper size with ZERO margins for the design. After double checking the alignment (step 2) load one of your burlap sheets at a time. I have a HP Deskjet 3520, and never had a problem printing on burlap. (And I have did A LOT in a short amount of time) You might want to use an spray air duster every so often just to ensure trouble free printing.
-
Step 6
AND BOB'S YOUR UNCLE....
uhhh, and there you go, you've printed on burlap! You can frame with or without glass (remember if you've used 8 1/2" x 11" and you are putting it in an 8" x 10" photo frame)
Oh, and I've left the paper backing from the Heat n Bond on, I didn't see any reason why to take it off for framing. But let your creativity go wild!
I would love to see your finished projects, hope this has helped, message me if you have questions...