Breadboard With Knife
Extract from Complete Guide to Woodworking • By Chris Tribe • Published by Search Press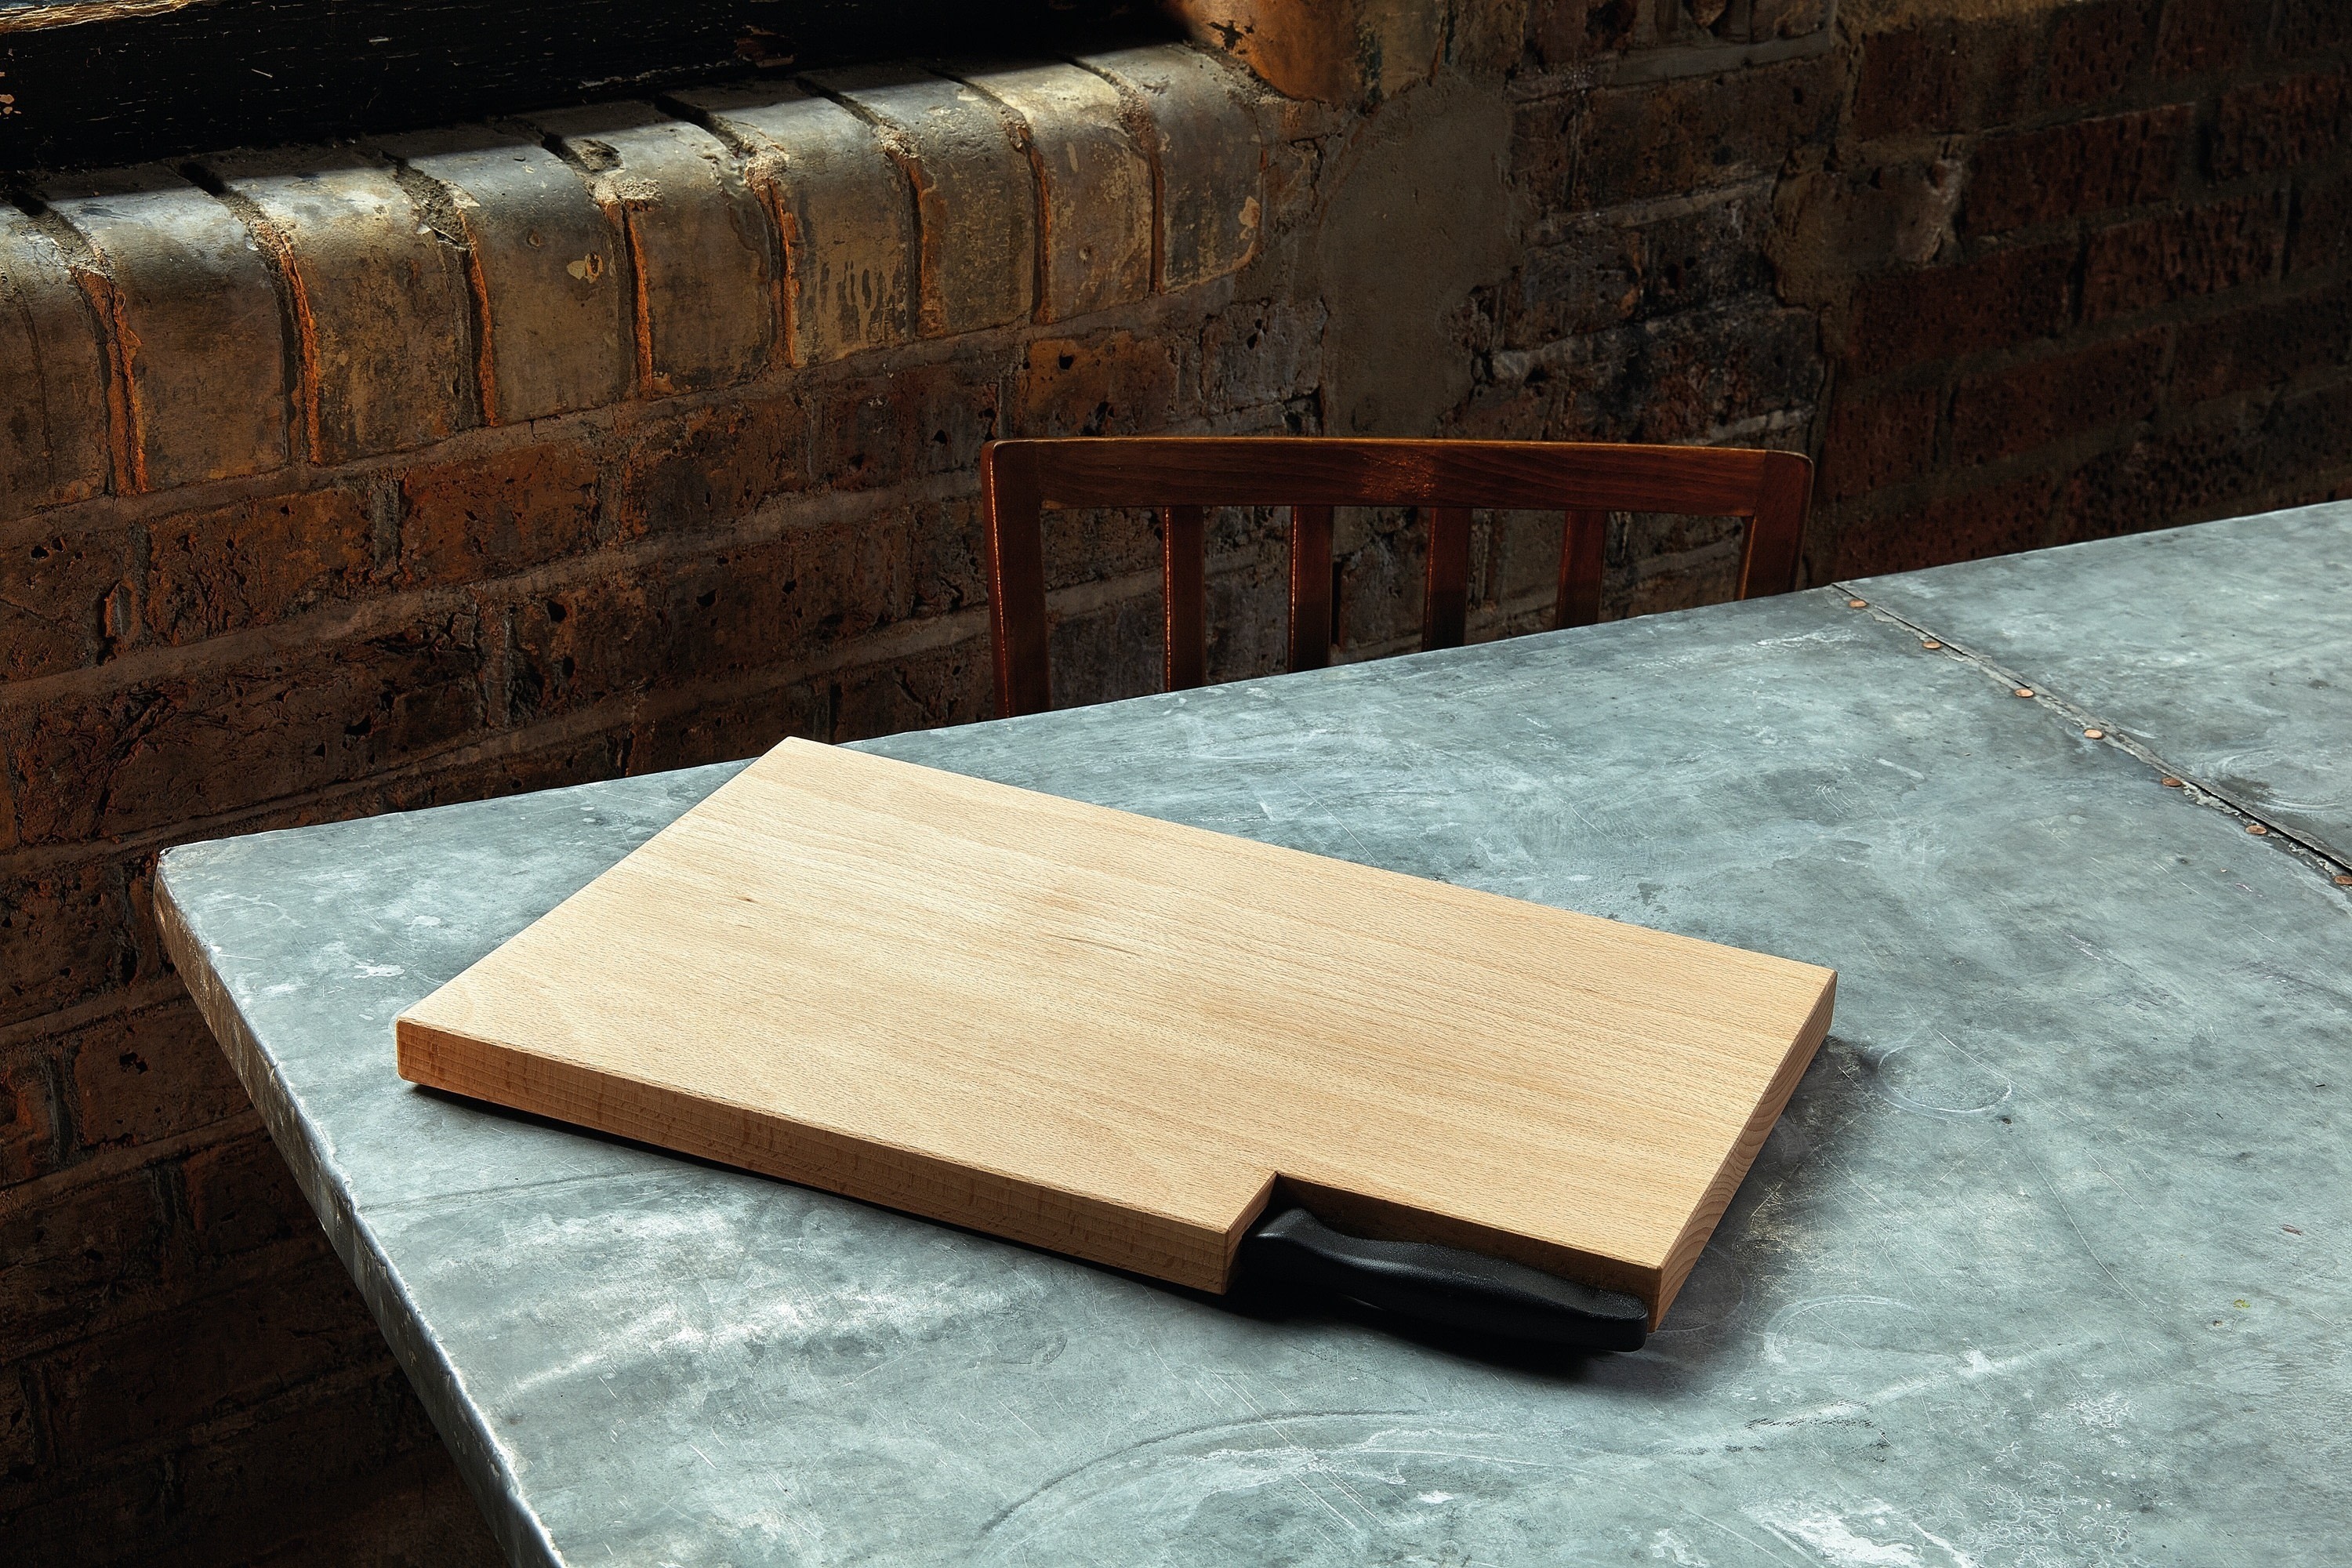


About
Complete Guide to Woodworking
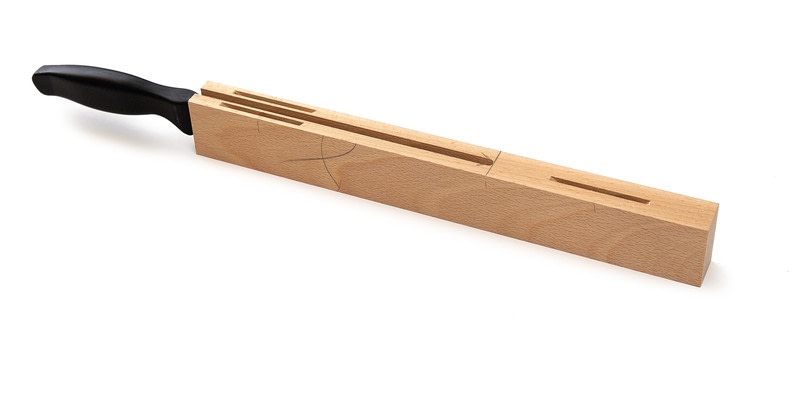
This project is a good test of your sawing and edge-jointing skills. This simple but striking design works best if there is a contrast between the board and the knife handle. Make the board from a close-grained wood to aid cleaning and hygiene. In this example, the bread knife has a black handle, so I would suggest using maple, sycamore or beech (beech is probably the easiest of the three to obtain), which are close- grained, light-coloured woods.
You may have to amend the dimensions to accommodate the knife you want to use. Here, the knife has a 130 mm (51⁄8 in.) long handle and a blade that is
210 mm (81⁄4 in.) long and 25 mm (1 in.) wide. The project can also be adapted for cheese or vegetable chopping boards.
-
 JadeSucksAtLife favorited Breadboard With Knife
25 Feb 19:08
JadeSucksAtLife favorited Breadboard With Knife
25 Feb 19:08
-
 Kimya J. favorited Breadboard With Knife
29 Oct 21:33
Kimya J. favorited Breadboard With Knife
29 Oct 21:33
-
 Search Press published her project Breadboard With Knife
06 Oct 09:00
Search Press published her project Breadboard With Knife
06 Oct 09:00
You Will Need
-
 Step 1
Cutting List:
-
Step 2
Plane the boards to thickness and width, then edge joint them.
-
Step 3
Biscuit the joint with centres 40 mm (19⁄16 in.) from the ends, and glue and clamp up.
-
Step 4
When the glue has set, clean up the surfaces. Check for flatness and establish face side and edge.
-
Step 5
Mark a gauge line all round, 47 mm (17⁄8 in.) from the face edge.
-
Step 6
Saw down the gauge line with a sharp hand saw, preferably sharpened rip style.
-
 Step 7
With a cross-cut backsaw or chop saw. cut a piece off the end of the cut piece that is the same length as the knife handle; in our example, this is 135 mm (51⁄8 in). If using a backsaw, you may need to clean up the end with a shooting board.
-
 Step 8
Plane the cut edges at and square to form an edge joint. Try to do this in as few shavings as possible. When the joint is glued, the cut line will be invisible.
-
Step 9
When the joint is true, mark centres 40 mm (19⁄16 in.) from the ends and use the biscuit jointer to cut for no. 10 biscuits. At the non-handle end, the biscuit can be in the centre. At the handle end have two biscuits with centres 5 mm (3⁄16 in.) from the top and bottom surfaces.
-
Step 10
Set up a hand-held router with a 6 mm ( ⁄4 in.) long shank. Use this to route a groove in the edge of the cut-off piece long enough and deep enough for the knife to t in. In the example, I made it 220 mm (811⁄16 in.) long and 35 mm (13⁄8 in.) deep;
the extra depth is to allow for the width
of the handle. -
 Step 11
To make the cut, mark a line across at the start position and, starting on the line, route the groove using progressively deeper cuts. Support will be needed at the handle end to stop the router from dropping off the end.
-
 Step 12
Glue and clamp the cut piece back onto the main board and check for flatness. Use a waterproof adhesive, as the board may be washed occasionally. Be sparing with the glue as you don’t want too much squeeze- out into the knife slot.
-
Step 13
The piece has been left overwidth while jointing – now you can cut it to final width. There should not be much to take off, so it may be easiest to do with a plane rather then saw a narrow piece. The ends can also be trued up, either by planing in the vice, working from the outside inwards to avoid break out, or on a shooting board.
-
Step 14
Round over or chamfer the corners slightly with a block plane.
-
 Step 15
Clean up with a jack plane and, possibly, a cabinet scraper. Sand down, then apply a finish. I would recommend a food-safe oil finish – those based on parafin oil are good.