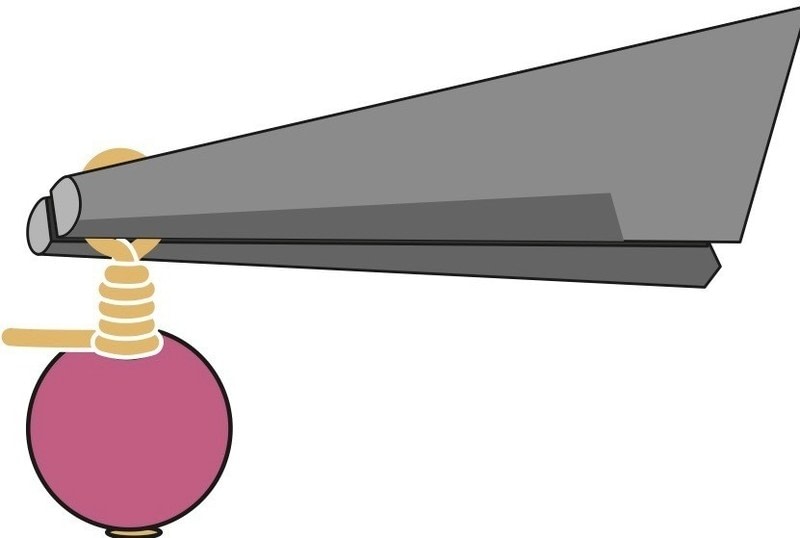
Bottle Cap Watch Necklace
Extract from Fanciful Findings • By Holly Witt-Allen • Published by GMC Publications

About
Fanciful Findings
Be sure to read the General Instructions before making your project.
Necklace Finished Length: About 23"
-
 Key West Witch added Bottle Cap Watch Necklace to Jewelry Necklaces
30 Jun 13:21
Key West Witch added Bottle Cap Watch Necklace to Jewelry Necklaces
30 Jun 13:21
-
Key West Witch added Bottle Cap Watch Necklace to Jewelry
30 Jun 01:18
-
 Kinhime Dragon favorited Bottle Cap Watch Necklace
28 Dec 17:55
Kinhime Dragon favorited Bottle Cap Watch Necklace
28 Dec 17:55
-
 Emma H. favorited Bottle Cap Watch Necklace
30 Mar 17:35
Emma H. favorited Bottle Cap Watch Necklace
30 Mar 17:35
-
 GMC Group published her project Bottle Cap Watch Necklace
30 Mar 09:00
GMC Group published her project Bottle Cap Watch Necklace
30 Mar 09:00
You Will Need
-
Step 1
Cut the leather cord in half. Lay the cord lengths side by side and attach a fold-over cord end to each set of leather cord ends.
-
Step 2
Punch a hole in the center of the bottle cap. Layer the watch face, gear, and game spinner in the bottle cap. Use the micro bolt assembly to secure the pieces in place.
-
Step 3
Punch a hole at the top edge and the bottom edge of the bottle cap. Use a 7mm jump ring to join one end of the leather cord to the top hole. Use a 7mm jump ring to join the remaining leather cord end to the 5mm jump ring. Join the toggle bar to the 5mm jump ring.
-
Step 4
Attach a 7mm jump ring to the bottom hole of the bottle cap; attach the remaining 7mm jump ring to the first jump ring. Use a crimp bead to join a 12" length of stringing wire to the this jump ring. Thread the cube beads on the wire. Use a crimp bead to attach the wire to the loop portion of the clasp.
-
Step 5
Use a 4mm antique brass jump ring to join one end of the antique brass chain to the jump ring with the cube beaded strand. Use the remaining 4mm antique brass jump ring to join the remaining end of the antique brass chain to the loop portion of the clasp.
-
Step 6
Join one end of the antique silver chain to the jump ring with the cube beaded strand and the antique brass chain. Join the remaining end of the antique silver chain to the loop portion of the clasp.
-
Step 7
General Instructions
TOOLS
Chain-nose pliers have rounded, tapered jaws and a flat interior surface that will not mar wire. These pliers are used for reaching into tight places, gripping objects, opening and closing jump rings, and bending wire.Round-nose pliers have round jaws that are useful for making loops and bending wire smoothly.
Wire cutters are used to cut small gauge wire, head pins, and eye pins.
A crimp tool (also known as crimping pliers) flattens and shapes the crimp bead or crimp tube.
Chain-nose pliers Round-nose pliers
Wire cutters Crimp Tool
-
 Step 8
Techniques
Opening and Closing Loops, Chain Links, or Jump Rings
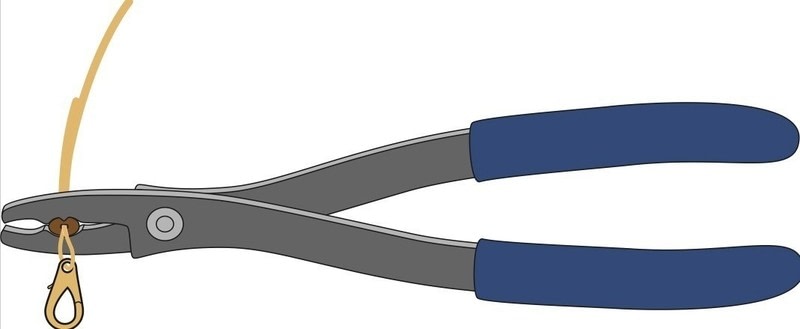
Hold one side of the loop, link, or jump ring with chain-nose pliers. With a second pair of chain-nose pliers, gently hold the other side of the loop. Open the loop by pulling one pair of pliers toward you while pushing the other away.Close the loop by pushing and pulling the pliers in opposite directions, bringing the loop ends back together.
-
 Step 9
Making Bead Dangles and Bead Connectors
To make a bead dangle, slide the bead(s) on a head pin. Leaving about 1/2", cut off the excess wire. Using chain-nose pliers, bend the wire at a 90° angle. -
 Step 10
Grasp the wire end with the round-nose pliers. Turn the pliers and bend the wire into a loop.
-
 Step 11
Release the pliers. Straighten or twist the loop further if necessary.
To make a bead connector, slide the bead(s) on an eye pin. Follow bead dangle instructions, above, to make a loop on the end of an eye pin.
-
 Step 12
Making a Wrapped Loop on a Head Pin, Eye Pin, or Wire End
Slide the bead(s) on a head pin, eye pin, or wire end. Using chain-nose pliers, bend the wire at a 90° angle about 1/8" above the bead. -
 Step 13
Grasp the wire with the round-nose pliers at the 90° bend. Use your finger to push the wire around the barrel of the pliers.
-
 Step 14
Remove the pliers. Now is the time to slide the loop onto your project or to add something to the wrapped loop. Holding the loop with the chain-nose pliers, use a second pair of chain-nose pliers to wrap the wire end around itself above the bead 3-5 times.
-
Step 15
Trim the excess wire and tuck the wire end into the wraps with the chain-nose pliers.
-
 Step 16
Using Crimp Beads
To finish a wire end, thread a crimp bead and the clasp or jump ring on the wire. Run the wire back through the crimp bead; use a pair of chain-nose pliers to pull and tighten the wire. -
 Step 17
Place the crimp bead on the inner groove of the crimp tool and squeeze.
-
 Step 18
Release the tool, turn the crimp bead a quarter turn, and place it in the outer groove.
-
 Step 19
Squeeze the tool to round out the crimp bead. Trim the wire end or if the design calls for beads, thread the beads over the wire to cover the end.
-
 Step 20
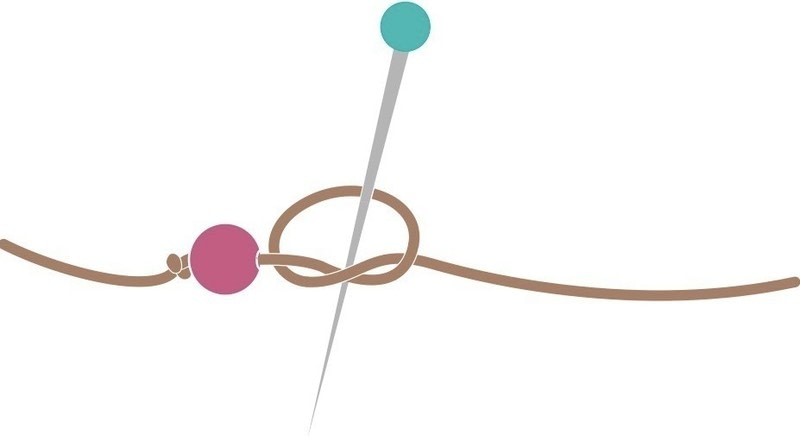
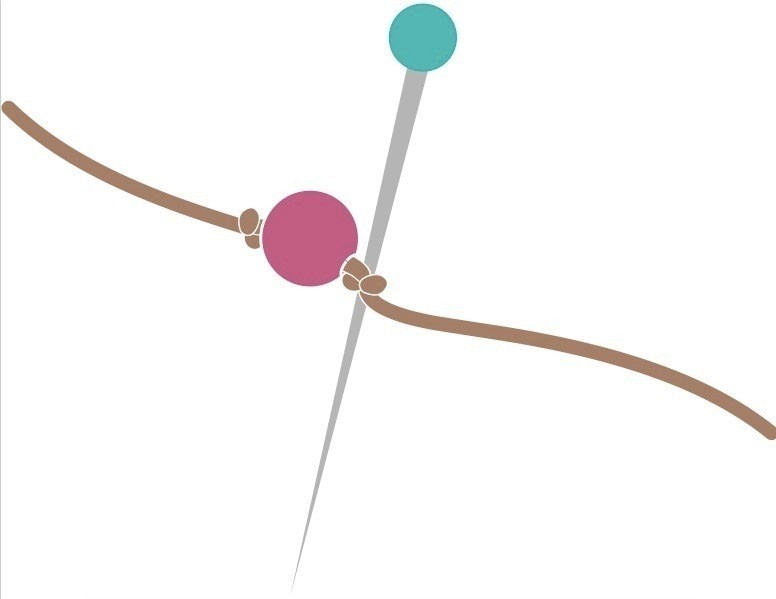
Tying Knots Between Beads
As you tie an overhand knot, slip a straight pin in the knot loop and... -
 Step 21
guide the knot as close to the bead as possible near one end.
-
 Step 22
Attaching Fold-over Cord Ends
Place end(s) of the suede or cord in a fold-over cord end. Apply a drop of craft glue and use the chain-nose pliers to fold the ends over the suede or cord.