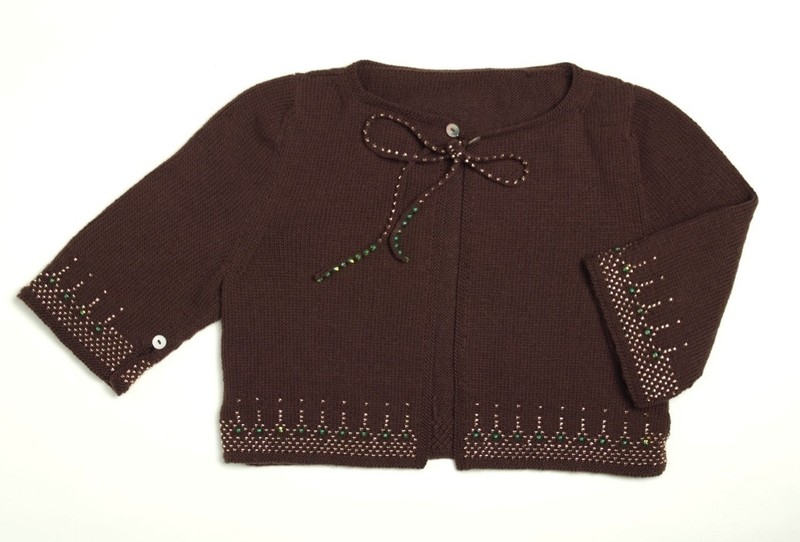
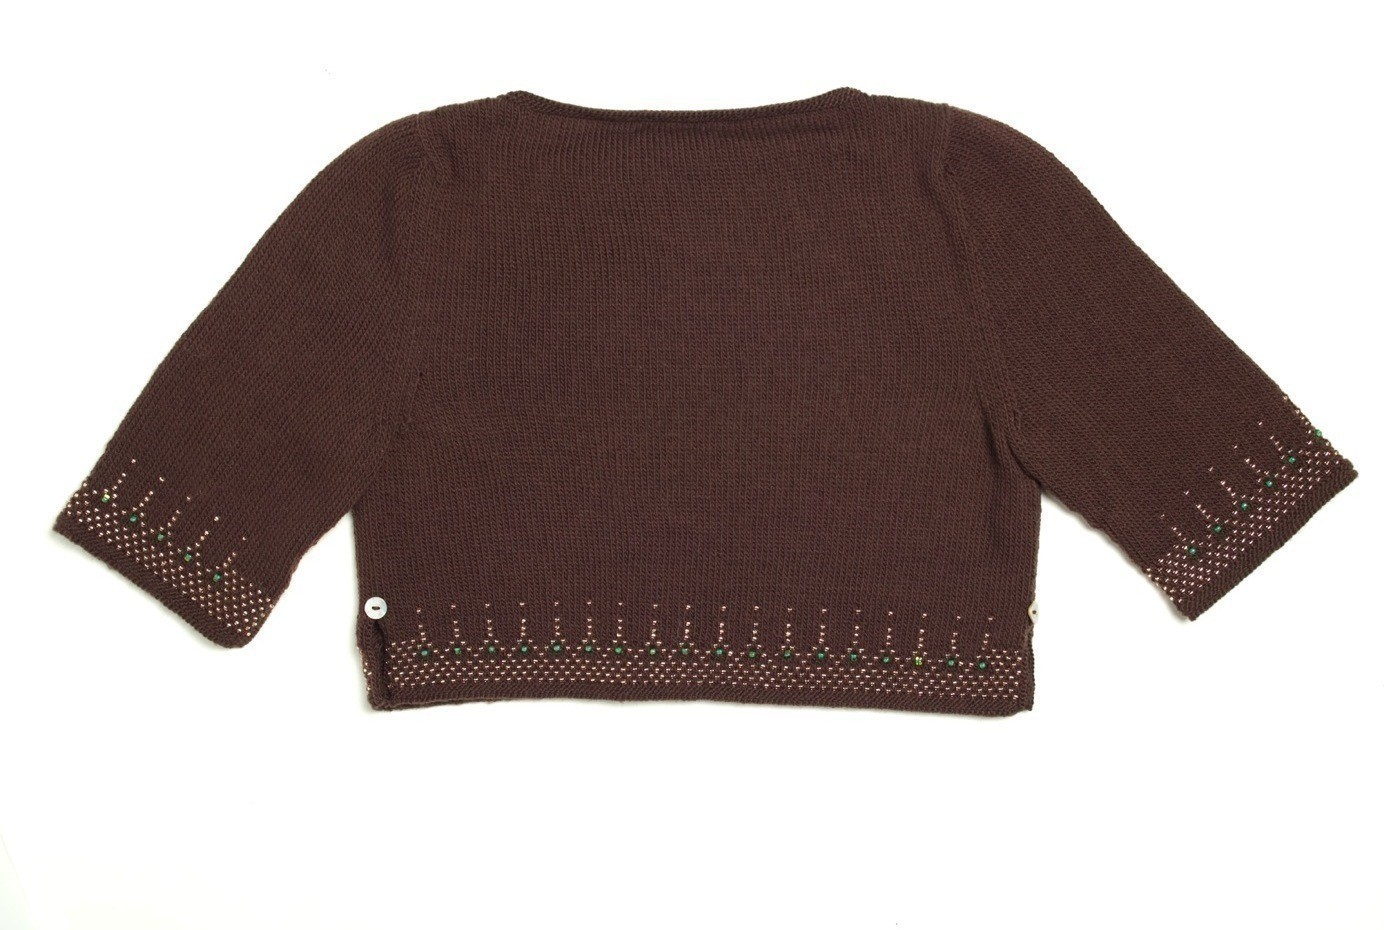
Bolero Jacket
Extract from 25 Beaded Knits: Beautiful Beaded Knits in Stylish Colours • By Debbie Abrahams • Published by Pavilion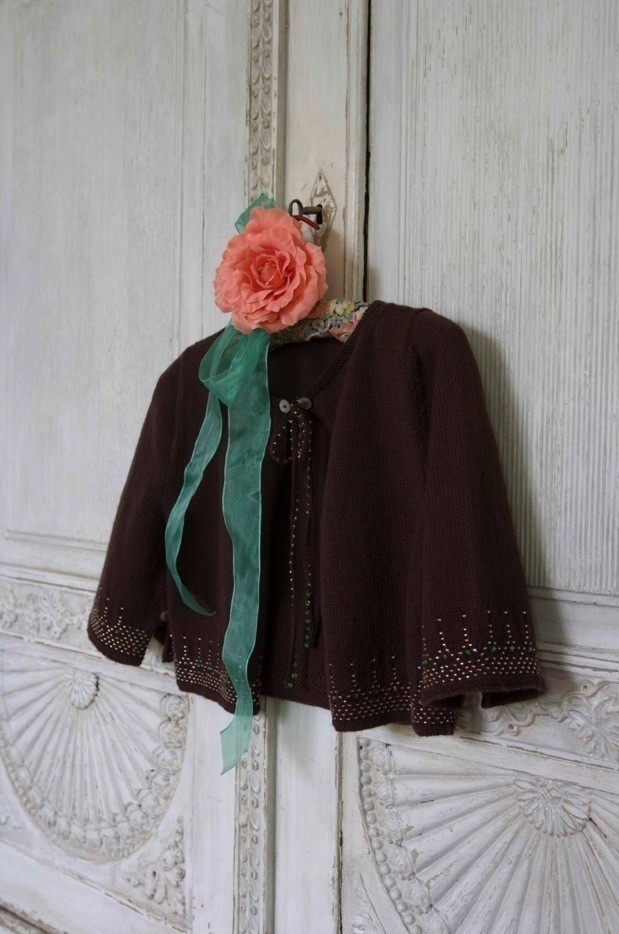


About
This handsome bolero jacket boasts an Inca-inspired two-colour beaded edging.
This handsome bolero jacket boasts an Inca-inspired two-colour beaded edging. A fancy tie detail spruces up the neckline and the simple box shape married short sleeves and decorative buttons give it a special finish that’s simply to die for!
SIZE
To fit bust
XS S M L XL
81 86 91 97 102 cm
32 34 36 38 40 in
Actual width
42.5 44.5 47.5 49.5 52.5 cm
161⁄2 171⁄2 181⁄2 191⁄2 201⁄2 in
Length to shoulder
35 35 36 36 37 cm
131⁄2 131⁄2 14 14 141⁄2 in
Sleeve length
16 16 16 16 16 cm
61⁄2 61⁄2 61⁄2 61⁄2 61⁄2 in
MATERIALS
Pair 3.25mm (US 3) needles
Pair 2.75mm (US 2) needles
One 2.75mm (US 2) circular needle 40cm (16in) long
Yarn
Rowan 4-ply Soft
50g (13⁄4oz) per ball
389 Expresso
XS S M L XL
6 6 6 7 7
Extras
Beads (1⁄16in/2mm), gold: XS = 1,550, S = 1,600, M = 1,650,
L = 1, 700, XL = 1,750
Beads (3⁄16in/5mm), triangular, green: XS = 56, S = 56, M = 56, l = 56, XL = 56
Round shell buttons: XS = 6,
S = 6, M = 6, L = 6, XL = 6
TENSION (gAUGE)
28 sts and 36 rows to 10cm (4in) measured over stocking (stockinette) stitch using 3.25mm (US 3) needles
From the book, 25 Beaded Knits by Debbie Abrahams. Published by Collins & Brown. Read our review.
-
 ElizabethJuddTaylor added Bolero Jacket to Blythe
04 Nov 17:07
ElizabethJuddTaylor added Bolero Jacket to Blythe
04 Nov 17:07
-
 Imke S. favorited Bolero Jacket
20 Jan 20:14
Imke S. favorited Bolero Jacket
20 Jan 20:14
-
 Alecia B. favorited Bolero Jacket
01 Aug 16:56
Alecia B. favorited Bolero Jacket
01 Aug 16:56
-
Kathy S. favorited Bolero Jacket
22 Jul 00:43
-
Step 1
Back panel
*NOTE: Omit beads on the first and last sts of rows throughout the beaded pattern.
Thread beads onto yarn in the correct sequence, reading beads from chart for back panel as foll: beg at the top of the chart (chart Row 24) on the left-hand side, and starting and finishing between the correct lines for your size, read across the row from left to right. Move to the next row down on the chart (chart Row 22) and read across chart as before from left to right. Cont to read the chart in this way, threading beads onto yarn in the correct order.*Cast on 119 (125: 133: 139: 147) sts using 2.75mm (US 2) needles.
Next row (RS): Knit.
Next row (WS): Knit.
Rep the last 2 rows once more.
Change to 3.25mm (US 3) needles.
Beg with a RS row and Row 1 of the chart for back panel, work until chart Row 24 completed.
Cont to work straight in stocking (stockinette) stitch (knit on RS rows; purl on WS rows), until back panel measures 16cm (61⁄2in) from
cast-on edge. -
Step 2
SHAPE ARMHOLES
Cast (bind) off 5 (6: 6: 7: 7) sts at beg of next 2 rows.
[109 (113: 121: 125: 133) sts]
Next row (RS) (decrease): K3,
sl 2, k1, p2sso, K to last 6 sts, k3tog, k3.
Next row (WS): Purl.
Rep the last 2 rows 1 (1: 2: 2: 3) times more.
Next row (RS) (decrease): K3, sl 1, k1, psso, K to last 5 sts, k2tog, k3.
Next row (WS): Purl.
Rep the last 2 rows 3 (4: 4: 5: 5) times more.
Work 2 rows in stocking (stockinette) stitch, ending with a WS row.
Next row (RS) (decrease): K3, sl 1, k1, psso, K to last 5 sts, k2tog, k3.
[91 (93: 97: 99: 103) sts]
Cont straight until armhole measures 19 (19: 20: 20: 21) cm, ending with a WS row. -
Step 3
SHAPE SHOULDERS AND BACK NECK
Cast off 5 (5: 6: 6: 6) sts at beg of next 2 rows.
[81 (83: 85: 87: 91) sts]
Next row (RS): Cast off 5 (5: 6: 6: 6) sts, knit until there are 9 (9: 9: 9: 11) sts on right needle and turn, leaving rem sts on a holder.
Work each side of neck separately.
Cast off 4 sts at beg of next row.
Cast off rem 5 (5: 5: 5: 7) sts.
With RS facing rejoin yarn to rem sts, bind off centre 53 (55: 55: 57: 57) sts, knit to end.
Complete to match first side, reversing shapings.
Left front
Rep instructions for threading beads for back panel from * to *, but work from chart for left front.
Cast on 59 (62: 66: 69: 73) sts using 2.75mm (US 2) needles.
Next row (RS): Knit.
Next row (WS): Knit.
Rep the last 2 rows once more.
Change to 3.25mm (US 3) needles.
Beg with a RS row and Row 1 of the chart for left front, work until chart Row 24 completed.
Cont to work straight in stocking (stockinette) stitch (knit on RS rows; purl on WS rows), until left front matches back panel to beg armhole shaping. -
Step 4
SHAPE ARMHOLE
Cast (bind) off 5 (6: 6: 7: 7) sts at beg of next row.
[54 (56: 60: 62: 66) sts]
Next row (WS): Purl.
Next row (RS) (decrease): K3, sl 2, k1, p2sso, K to end.
Next row (WS): Purl.
Rep the last 2 rows 1 (1: 2: 2: 3) times more.
Next row (RS) (decrease): K3,
sl 1, k1, psso, K to end.
Next row (WS): Purl.
Rep the last 2 rows 3 (4: 4: 5: 5) times more.
Work 2 rows in stocking (stockinette) stitch, ending with a WS row.
Next row (RS) (decrease): K3,
sl 1, k1, psso, K to end.
[45 (46: 48: 49: 51) sts]
Cont straight until 13 (13: 13: 15: 15) rows less have been worked than on back to beg of shoulder shaping, ending with a RS row. -
Step 5
Shape front neck
Cast (bind) off 11 (12: 12: 12: 12) sts at beg of next row and 7 sts at beg of foll 2 alt rows.
[20 (20: 22: 23: 25) sts]
Next row (RS) (decrease): K to last 6 sts, k3tog, k3.
Next row (WS): Purl.
Next row (RS) (decrease): K to last 5 sts, k2tog, k3.
Next row (WS): Purl.
Rep the last 2 rows 2 (2: 2: 3: 3) times more, ending with a WS row.
[15 (15: 17: 17: 19) sts] -
Step 6
Shape shoulder
Cast (bind) off 5 (5: 6: 6: 6) sts at beg of next and foll alt row.
Work 1 row.
Cast (bind) off rem 5 (5: 5: 5: 7) sts.
Right front
Rep instructions for threading beads for back panel from * to *, but work from chart for right front.
Cast on 59 (62: 66: 69: 73) sts using 2.75mm (US 2) needles.
Next row (RS): Knit.
Next row (WS): Knit.
Rep the last 2 rows once more.
Change to 3.25mm (US 3) needles.
Beg with a RS row and Row 1 of the chart for right front, work until chart Row 24 completed.
Complete to match left front, reversing shapings. -
Step 7
Sleeves (make 2)
Rep instructions for threading beads for back panel from * to *, but work from chart for sleeve.
Cast on 79 (81: 85: 87: 91) sts using 2.75mm (US 2) needles.
Next row (RS): Knit.
Next row (WS): Knit.
Rep the last 2 rows once more.
Change to 3.25mm (US 3) needles.
Beg with a RS row and row 1 of the chart for sleeve, work until chart Row 18 completed.
Chart row 19 (RS) (increase): K3, M1, patt across chart to last 3 sts, M1, k3.
Cont to work chart rows 20–24, ending with a WS row.
Next row (RS) (increase): K3, M1, knit to last 3 sts, M1.
[83 (85: 89: 91: 95) sts]
Next row (WS): Purl.
Cont to work in stocking (stockinette) stitch (knit on RS rows; purl on WS rows), inc 1 st as before at each side of 5th and every foll 6th row until there are 91 (93: 97: 99: 103) sts.
Cont straight until sleeve measures 16cm (61⁄2in), ending with a WS row. -
Step 8
SHAPE TOP
Cast (bind) off 5 (6: 6: 7: 7) sts at beg of next 2 rows.
[81 (81: 85: 85: 89) sts]
Next row (RS) (decrease): K3,
sl 2, k1, p2sso, K to last 6 sts, k3tog, k3.
Next row (WS): Purl.
Rep the last 2 rows once more.
Next row (RS) (decrease): K3, sl 1, k1, psso, K to last 5 sts, k2tog, k3.
Next row (WS): Purl.
Rep the last 2 rows, 4 times more.
Work 2 rows.
Next row (RS) (decrease): K3,
sl 1, k1, psso, K to last 5 sts, k2tog, k3.
Work 3 rows.
Rep the last 4 rows, 4 times more.
Next row (RS) (decrease): K3,
sl 1, k1, psso, K to last 5 sts, k2tog, k3.
Work 1 row.
[51 (51: 55: 55: 59) sts]
Rep the last 2 rows until 43 sts rem.
Next row (RS) (decrease): K3,
sl 2, k1, psso, K to last 6 sts, k3tog, k3.
Next row (WS): Purl.
Rep the last 2 rows twice more.
Next row (RS) (decrease): K3,
sl 1, k1, psso, K to last 5 sts, k2tog, k3.
Work 1 row.
Cast (bind) off rem 29 sts. -
 Step 9
FINISHING
Sew in any loose ends on the WS of the work.
With WS facing and using a pressing cloth, lightly press the panels.
Join both shoulder seams.
Left front band
With RS facing and using 2.75mm (US 2) needles, pick up and knit 93 (93: 96: 96: 99) sts down left front opening edge between neck shaping and lower edge of body, or as many sts are required for the sts to sit evenly.
Beg with a WS row, knit 3 rows (garter stitch).
With WS facing, cast (bind) off sts knitwise.
Right front band
Rep instructions for left front band but pick up sts up right front opening between lower edge of body and neck shaping.
Neckband
With RS facing and using 2.75mm (US 2) needles, and starting and ending at front opening edges, pick up and knit 4 sts across top of right front band, 36 (37: 37: 39: 39) sts up right side of neck, 61 (63: 63: 65: 65) sts from back, 36 (37: 37: 39: 39) sts down left side of neck and 4 sts across top of left front band.
[141 (145: 145: 151: 151) sts, or as many sts are required for the sts to sit evenly.]
Beg with a WS row, knit 3 rows (garter stitch).
With WS facing, cast (bind) off sts knitwise.
Join side seams of back and front panels, starting at top of beaded edging (chart Row 24) to form vents.
Join sleeve seams starting at top of beaded edging (chart Row 24), to form vents.
Set sleeves into armholes, matching the centre of cast-off edge to shoulder seams.
Vent edgings on body
(same on both sides)
*With RS facing and using 2.75mm (US 2) circular needle, pick up and knit 21 sts up one side of vent and 21 sts down other side of vent, or as many sts are required for the sts to sit evenly.
Cast (bind) off sts knitwise.*
Vent edgings on sleeve
(same on both sides)
Rep instructions for vent edgings on body from * to *.
Beaded tie 1
Thread beads on yarn as foll:
40 gold,
8 green.
*Using 2.75mm (US 2) needles and thumb method, work beaded cast-on as foll: cast on 2 sts leaving beads at ball side of these sts, **slide bead up yarn so that it is sitting against the needle, cast on another st making sure that the bead is pushed to the RS of the work (facing away from you) as you put the loop onto the needle, cast on 2 sts without beads** rep from ** to **, until 1 bead rems.
Slide last bead up yarn so that it is sitting against the needle, cast on another st making sure that the bead is pushed to the RS of the work (facing away from you) as you put the loop onto the needle.
With WS facing, cast (bind) off sts knitwise.*
Beaded tie 2
Thread beads onto yarn as foll:
8 green,
40 gold.
Rep instructions for beaded tie 1 from * to *.
Sew ties to neck edge at front opening – one at each side with the gold beads closest to neck edge.
Using photograph as a guide, sew buttons to the body and sleeves, positioning one at the top of each of the vents and one at each side of the neck edge where the ties are attached.