

About
Organize your beads into a colourful bead gallery!
I've been looking for a great way to organize my beads ever since I started my collection as a kid and when my friends were selling off some furniture from their craft store, I picked up a giant frame which gave me the idea to create a bead gallery for the wall.
It's so much better than rummaging through drawers of beads and looks so inspiring next to my craft desk!
Tags
-
 Sarah Sylvia S. favorited Bead Gallery
18 Jul 04:18
Sarah Sylvia S. favorited Bead Gallery
18 Jul 04:18
-
 Melissa Beth A. favorited Bead Gallery
05 Nov 23:40
Melissa Beth A. favorited Bead Gallery
05 Nov 23:40
-
 Josep H. favorited Bead Gallery
26 May 04:28
Josep H. favorited Bead Gallery
26 May 04:28
-
 Raul C. favorited Bead Gallery
25 May 05:11
Raul C. favorited Bead Gallery
25 May 05:11
-
 Tim O. favorited Bead Gallery
11 May 05:45
Tim O. favorited Bead Gallery
11 May 05:45
-
 Pam favorited Bead Gallery
26 Mar 03:43
Pam favorited Bead Gallery
26 Mar 03:43
-
 elisabeth.wittmeyergrey favorited Bead Gallery
23 Mar 13:44
elisabeth.wittmeyergrey favorited Bead Gallery
23 Mar 13:44
-
 Cat Morley published her project Bead Gallery
23 Mar 11:26
Cat Morley published her project Bead Gallery
23 Mar 11:26
-
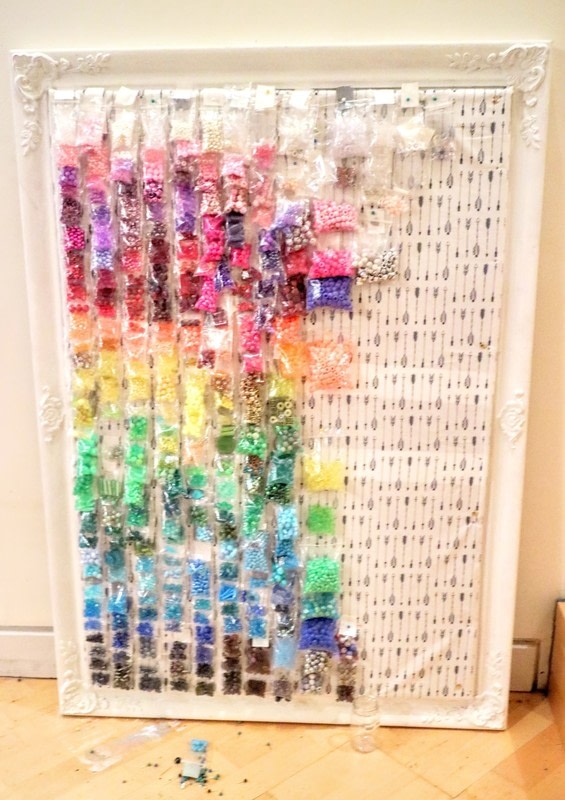
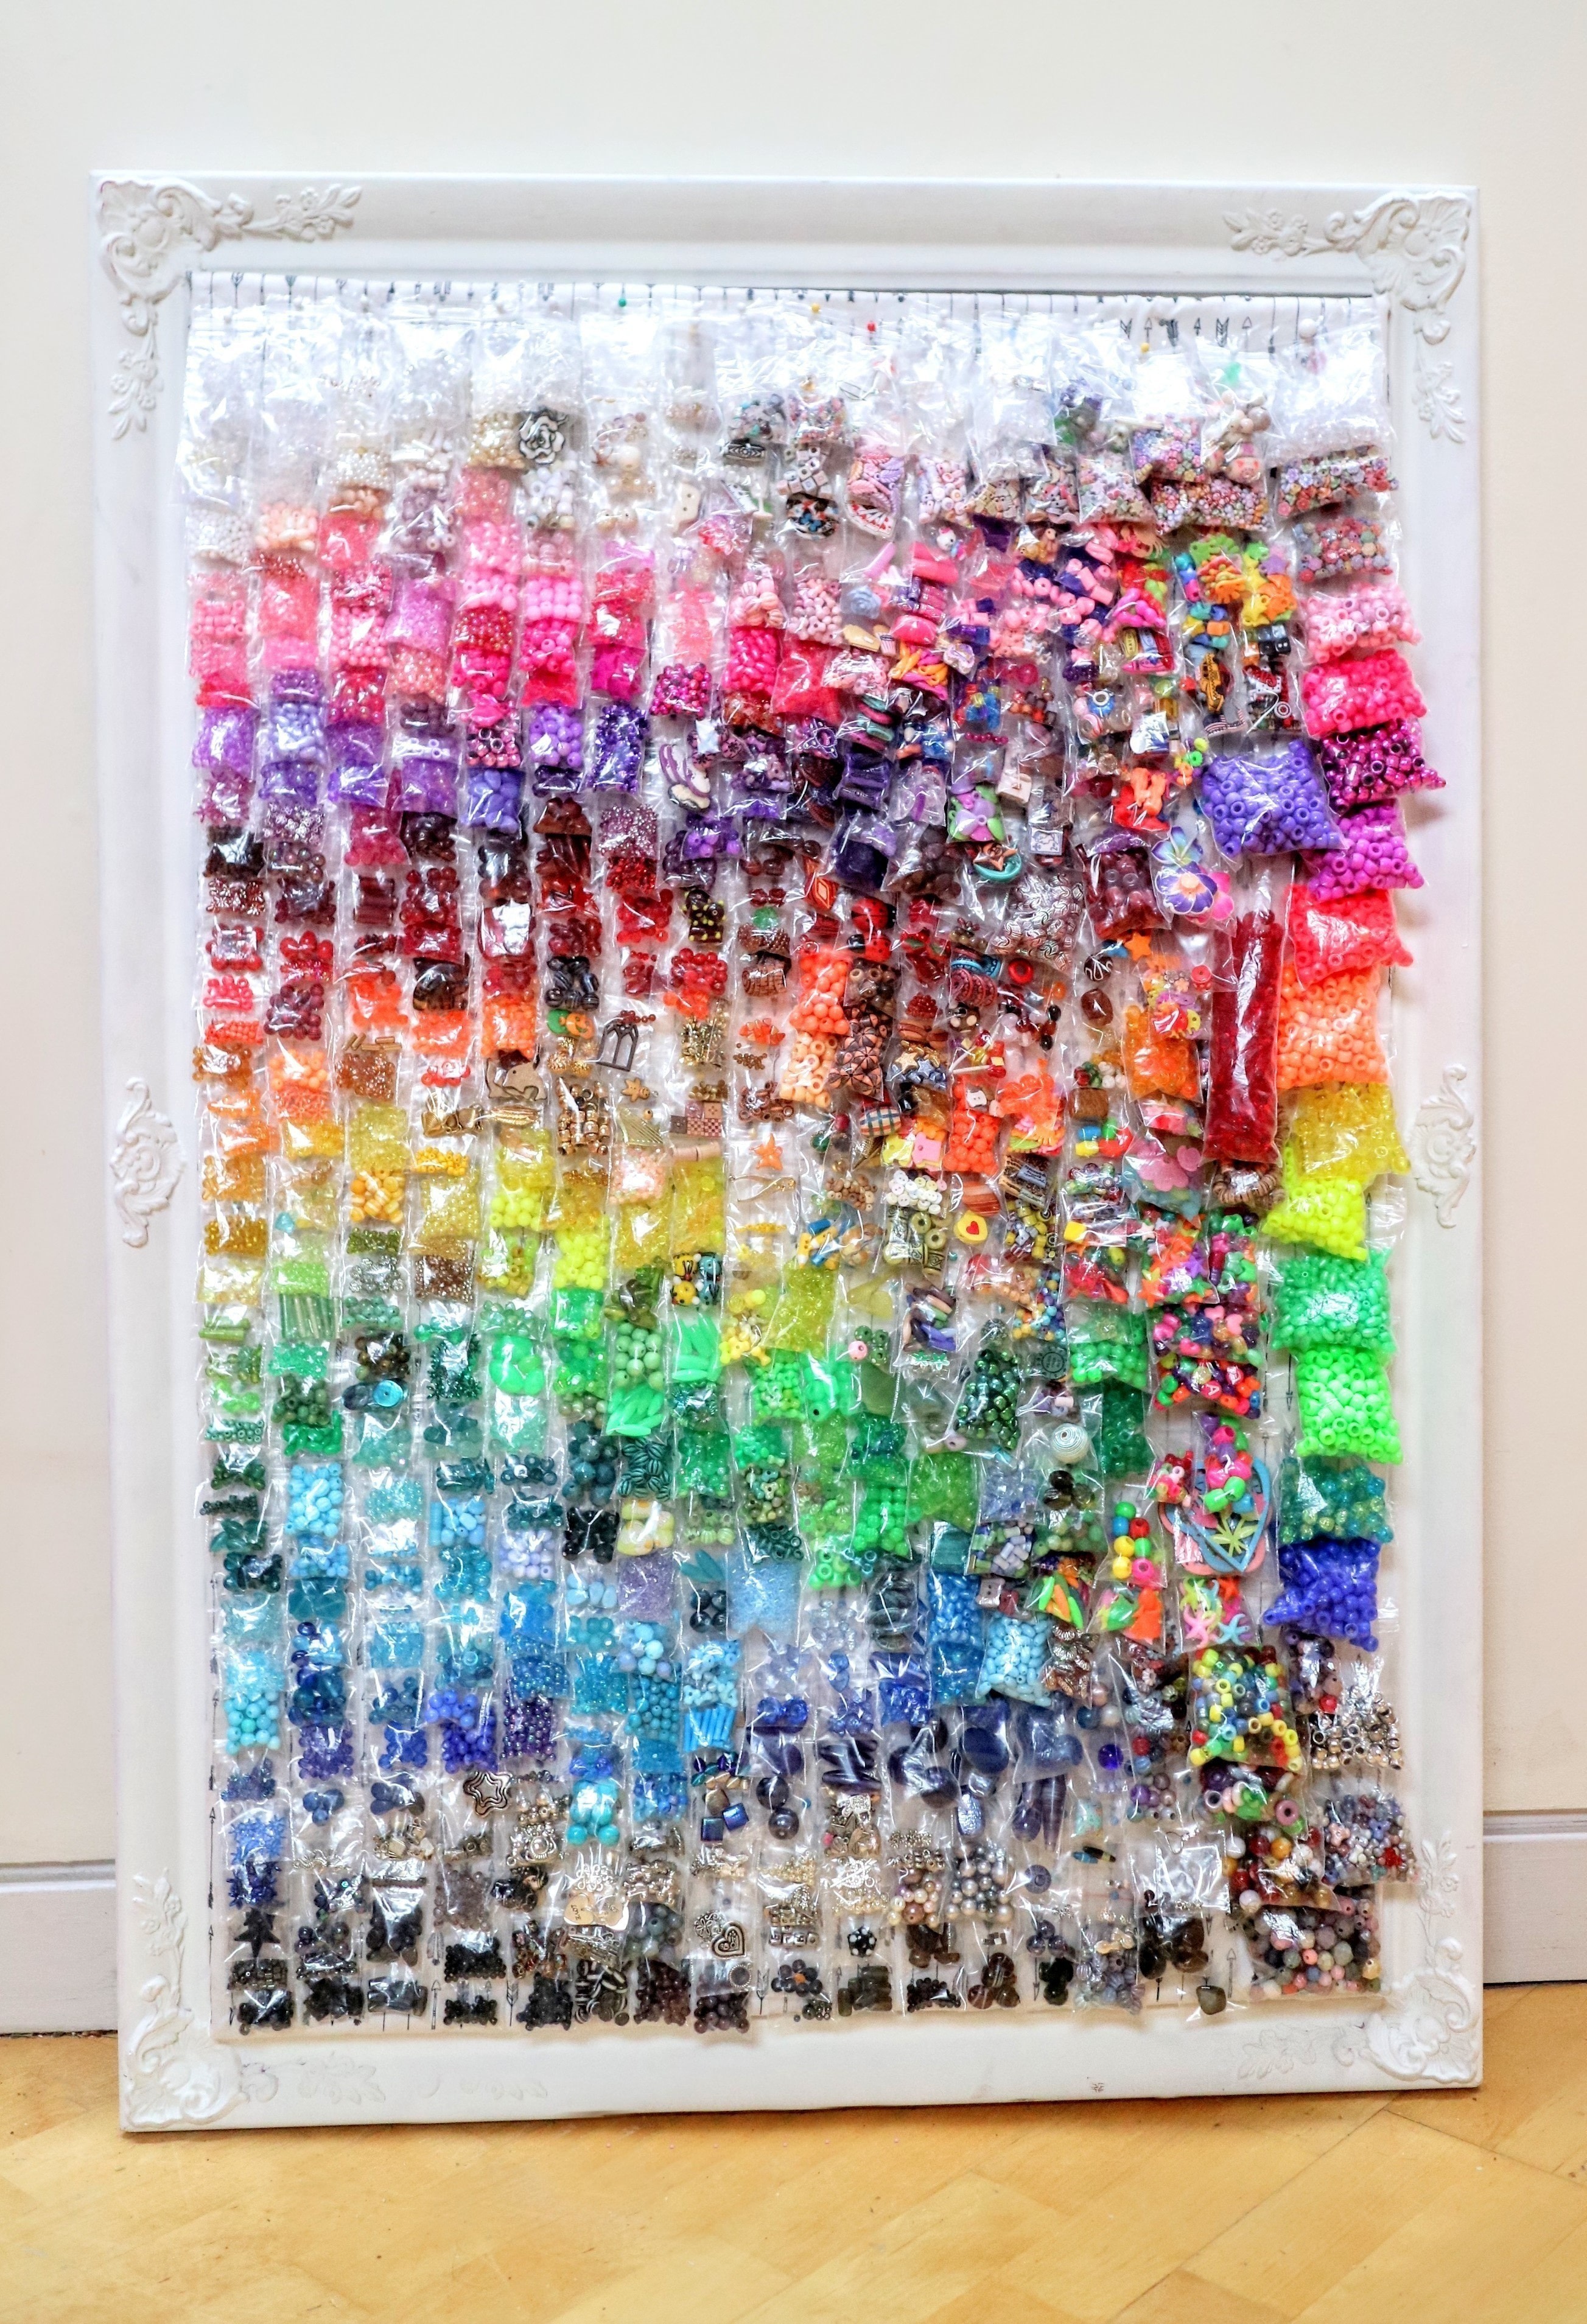
 Step 1
Find a frame large enough to hold your bead collection. I have a lot of beads so I had to buy a massive frame.
-
 Step 2
You'll also need some cork tiles for the backing. If you're lucky, these will fit first time.
-
 Step 3
If not, you can cut them to the right size by marking a line where the tile meets the edge of your frame.
-
 Step 4
Carefully saw the cork tile with a hack saw.
-
 Step 5
Check the fit of your cut tile and repeat with the remaining tiles.
-
 Step 6
Stick the tiles together around the edges with a hot glue gun and tape over the cracks with duct tape for extra security.
-
 Step 7
Wrap the covering fabric around the front of the cork, folding the rough edges neatly around the back. You can use thumb tacks to hold the fabric in place while you work.
-
 Step 8
Place the covered cork on your frame and hammer nails around the edge of the cork to secure it to the frame.
-
 Step 9
Now it's time to organize your beads into little ziplock bags.
-
 Step 10
I grouped mine by colour, then shape, then size and arranged them in a rainbow on the side of my desk.
-
 Step 11
Transfer the beads onto your board, starting at the bottom with the darkest colours.
-
 Step 12
Pin the first bag in place at the top with a map pin and then overlap the bag on top so that you can see about an inch of the bag underneath. Work your way up the board getting lighter in shade.
-
 Step 13
You're all done - now look how easy it is to the fine the bead you need!