


About
A sweet keepsake that mom's will love you for!
I paint baby letters for all of the new babies born to friends and family. (You can see some of the other themes I've done <a href="http://www.flickr.com/photos/jmgallo/sets/72157594421212938/">here</a>, if you need some inspiration!) My matron of honor just had a baby girl, literally 11 days after my wedding! I wanted to make this name set really special for her, since she had to walk down the aisle with her huge belly. Instead of hanging alone on a wall or shelf, I mounted them on an art canvas. Now the baby will never forget her name :P
* This project has lots of steps, but it will be so worth it!
Tags
-
 Stephanie M. favorited Baby Name Art Canvas
17 Sep 21:00
Stephanie M. favorited Baby Name Art Canvas
17 Sep 21:00
-
 Rebecca M. favorited Baby Name Art Canvas
10 Jun 14:48
Rebecca M. favorited Baby Name Art Canvas
10 Jun 14:48
-
 Charyawn221 favorited Baby Name Art Canvas
16 Oct 03:24
Charyawn221 favorited Baby Name Art Canvas
16 Oct 03:24
-
 njsnyder62 favorited Baby Name Art Canvas
13 Feb 11:55
njsnyder62 favorited Baby Name Art Canvas
13 Feb 11:55
-
 jojobeandesigns entered their project Baby Name Art Canvas to Glue Contest
18 Apr 20:08
jojobeandesigns entered their project Baby Name Art Canvas to Glue Contest
18 Apr 20:08
-
 Step 1
Gather your ingredients!
-
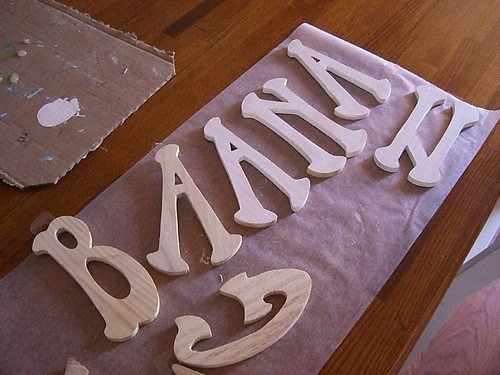
 Step 2
Begin by prepping your wooden letters. They may require a quick sanding so get them smooth. Then apply a coat of white acrylic paint as your base. Set aside on a sheet of wax paper or a baking rack to dry.
-
 Step 3
While the letters dry, get to work on your canvas. You'll need two pieces of scrapbook paper to cover the front. Trim one piece to fit the canvas, leaving a 1/2 inch border of white around the edge. If your paper has a pattern, line up the second piece of paper with the edge of the cut side to be sure your pattern matches. Trim the second piece of paper to fit the remaining bit of exposed canvas.
-
Step 4
Make sure your work area is well ventilated and covered with newsprint before using spray adhesive!
Make a tiny mark at each corner of your paper with a pencil. This will help you line it up correctly. Spray adhesive bonds immediately, so you won't get a chance to reposition it if you mess up!
Spray the back of one sheet of paper with spray adhesive. Line it up with your pencil marks and rub over entire surface. Repeat with the other piece, making sure to line up your pattern.
-
 Step 5
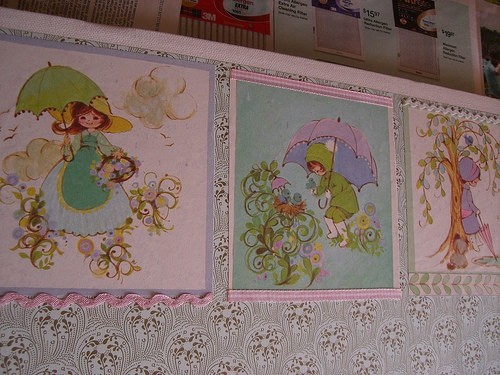
Cut out the scenes from your gift wrap. Once you settle on placement, mark the corners again with a pencil. Spray the back of each scene lightly with spray adhesive and line them up with your pencil marks. Rub over the entire surface, making sure edges are sealed.
*If you can't find vintage gift wrap, click <a href="http://www.flickr.com/photos/jmgallo/sets/72157603366084103/">here</a> to borrow some of mine! You can print them for your own work if you wish.
-
 Step 6
By now your base coat should be dry. Time to apply a coat of color to your wooden letters with acrylic paint! Set them aside to dry again!
-
 Step 7
Once they dry you can embellish them if you wish. Here I sponged a lighter pink over the first coat, then created a dot border in green.
Once this dries you can seal them with glossy Mod Podge or any other sealant if you want to!
-
 Step 8
Meanwhile, start embellishing your canvas. I trimmed each scene with a bit of ribbon and rick rack using white glue. I also added brads and little paper flowers.
* A little tip: To keep the edges of ribbon or rick rack from fraying, dip them in a bit of clear nail polish.
-
 Step 9
Once everything is dry, you can attach your letters to the canvas. Any strong craft adhesive will do, but I love E6000.
Now just sit back and watch the Baby's Mama cry over it!


Comments


