


About
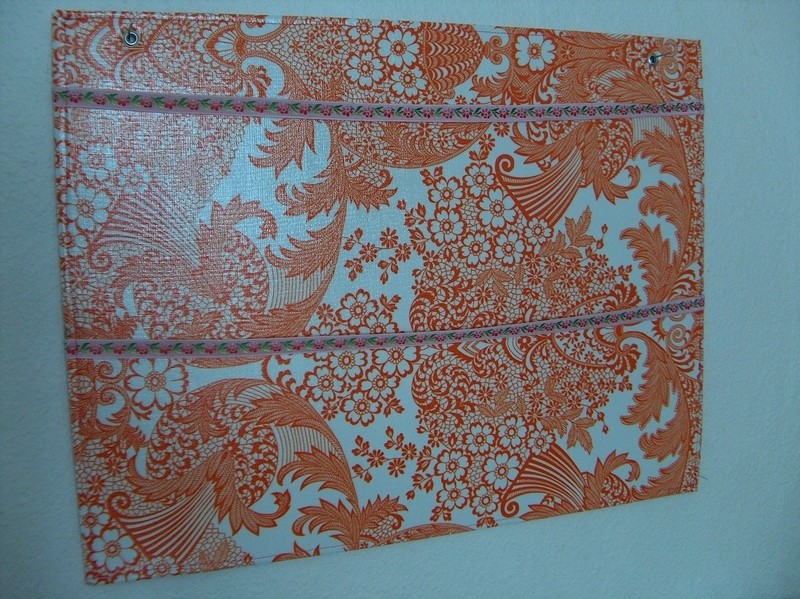
a fun way to display pictures, cards etc.
-
 Kinhime Dragon favorited Alternative Pin Up Board
22 Aug 23:40
Kinhime Dragon favorited Alternative Pin Up Board
22 Aug 23:40
-
 PunkyFunk added Alternative Pin Up Board to DIY the Room
22 Jun 20:38
PunkyFunk added Alternative Pin Up Board to DIY the Room
22 Jun 20:38
-
Kinhime Dragon added Alternative Pin Up Board to alter
07 May 20:16
-
 Crystal M. favorited Alternative Pin Up Board
28 Jun 15:40
Crystal M. favorited Alternative Pin Up Board
28 Jun 15:40
-
Lalainia R. favorited Alternative Pin Up Board
02 Jun 03:11
-
 Birgit added Alternative Pin Up Board to Wall decor
06 Apr 17:27
Birgit added Alternative Pin Up Board to Wall decor
06 Apr 17:27
-
 Sara S. favorited Alternative Pin Up Board
23 Jul 12:30
Sara S. favorited Alternative Pin Up Board
23 Jul 12:30
You Will Need
-
 Step 1
Find a piece of cardboard (or millboard, it has to be rather thick) the size that you want the pin up board to be.
Then you find the material that you want to cover it with. I used oilcloth for this, but I'm sure it would work out really well with fabric too. Cut out the material and add 2-3 inches on all sides so that the cover is big enough to go around the edges of the cardboard.
Use tape on the backside to prevent the cover from falling off. Make sure you stretch the covermaterial so that it's all smooth and flat.
-
 Step 2
Find 2 pieces of ribbon long enough to go from one side to the other and also around the edge to the backside.
Now here's the hard part: See if you can fit the hole thing in your sewing machine and sew all the way around the edges. If you use oilcloth put a thin piece of paper on top otherwise the machine won't go anywhere!
When you pass the ribbon make sure you stretch it out really well, it has to be REALLY tight. Otherwise it will be too loose when you start hanging stuff on it.
-
 Step 3
Now your pin-up board is almost ready. All you need is to make 2 holes in it so that you can hang it on your wall.
I have no idea what these little metal things are called in English, but they are easy to use and give the whole thing a more "professional look", but if you can't find them or something similar, don't worry: You can just ram a hole in it with a nail.
-
 Step 4
Hang it on the wall and start decorating it with pictures, postcards, and all sorts of funny stuff and use small wooden pegs to make the things hang on to the ribbons.
Enjoy :o)


Comments

