

Al Fresco Placemat
Extract from Fun with Fat Quarters • By Wendy Gardiner • Published by Search Press


About
Fun with Fat Quarters
34cm (13¼in) diameter
Make placemats with cutlery catchers for outdoor dining. Using strips that are sewn at angles gives the circular mats a crazy-patch appeal.
Preparation for each placemat
Cut four strips of 7 x 35cm (2¾ x 13½in) from one
fat quarter and five strips of 7 x 35cm (2¾ x 13½in) from the other
Cut two small strips of 12 x 7cm
(4¾ x 2¾in) for the cutlery catchers
-
 Betty M. favorited Al Fresco Placemat
08 Jun 12:48
Betty M. favorited Al Fresco Placemat
08 Jun 12:48
-
 Miss_Fit favorited Al Fresco Placemat
07 Jul 13:59
Miss_Fit favorited Al Fresco Placemat
07 Jul 13:59
-
 Jenee Nicole added Al Fresco Placemat to Home Decor
28 Apr 06:15
Jenee Nicole added Al Fresco Placemat to Home Decor
28 Apr 06:15
-
Alecia B. favorited Al Fresco Placemat
03 Oct 07:04
-
 Lorraine M. favorited Al Fresco Placemat
14 Sep 02:17
Lorraine M. favorited Al Fresco Placemat
14 Sep 02:17
-
 Angelshimmery favorited Al Fresco Placemat
10 Sep 19:40
Angelshimmery favorited Al Fresco Placemat
10 Sep 19:40
-
Sal M. added Al Fresco Placemat to Sewing
07 Sep 15:05
-
 Search Press published her project Al Fresco Placemat
07 Sep 06:00
Search Press published her project Al Fresco Placemat
07 Sep 06:00
You Will Need
-
 Step 1
Lay two contrasting strips right sides together. Keeping the top-left edges together, swing the bottom of the upper layer to the right, so that the bottom-left edge of the upper layer is 1cm (3/8in) from the right-hand edge of the lower layer. Pin the two pieces together then stitch with a 5mm (¼in) seam. Cut off the excess underlayer.
-
Step 2
Flip the top layer over and add another strip, this time, with top-right edges together and the bottom-right edge moved diagonally across to the left. Again stitch with a 5mm (¼in) seam. Flip and continue adding contrasting strips at angles until all nine are used. Press all the seams.
-
Step 3
On the reverse of the fabric, draw around the bowl or plate with a disappearing or fadeaway marking pen. Cut out 1cm (½in)outside the marked line; the marked line will be your stitching line.
-
Step 4
Cut the same size circles from backing fabric and wadding (batting). Use two layers of insulated wadding (batting) to protect your surfaces from hot plates.
-
Step 5
Place the wadding (batting) on a flat surface, then the backing fabric right side up, followed by the front panel right side down. Pin around the edges.
-
Step 6
Increase your stitch length to 3.5 and stitch through all the layers around your marked circular line, leaving a turning gap of approximately 12cm (4¾in). Trim the seams and snip into the seam allowance at an angle – this will help to produce a smooth curved outline when the mat is turned through. Turn through. Press so that the seam is on the edge, tucking the raw edges of the turning gap inside. Slip stitch the gap closed.
Tip
Use two layers of insulated wadding (batting), which will help to protect your surfaces from heat. -
Step 7
Fold one of the small strips right sides together, so that it measures 12 x 3.5cm (4¾ x 13/8in), and stitch along the two short ends, taking a 5mm (¼in) seam allowance. Clip away the excess fabric at the corners and turn the piece through. Press.
-
Step 8
Cut a length of bias binding 14cm (5½in) long. Tuck the short ends under and press. Wrap the bias binding around the long raw edge of the strip created in step 7. Pin and stitch the binding in place, close to the edge. Repeat steps 7 and 8 with the other small strip. These strips will hold your cutlery in place.
-
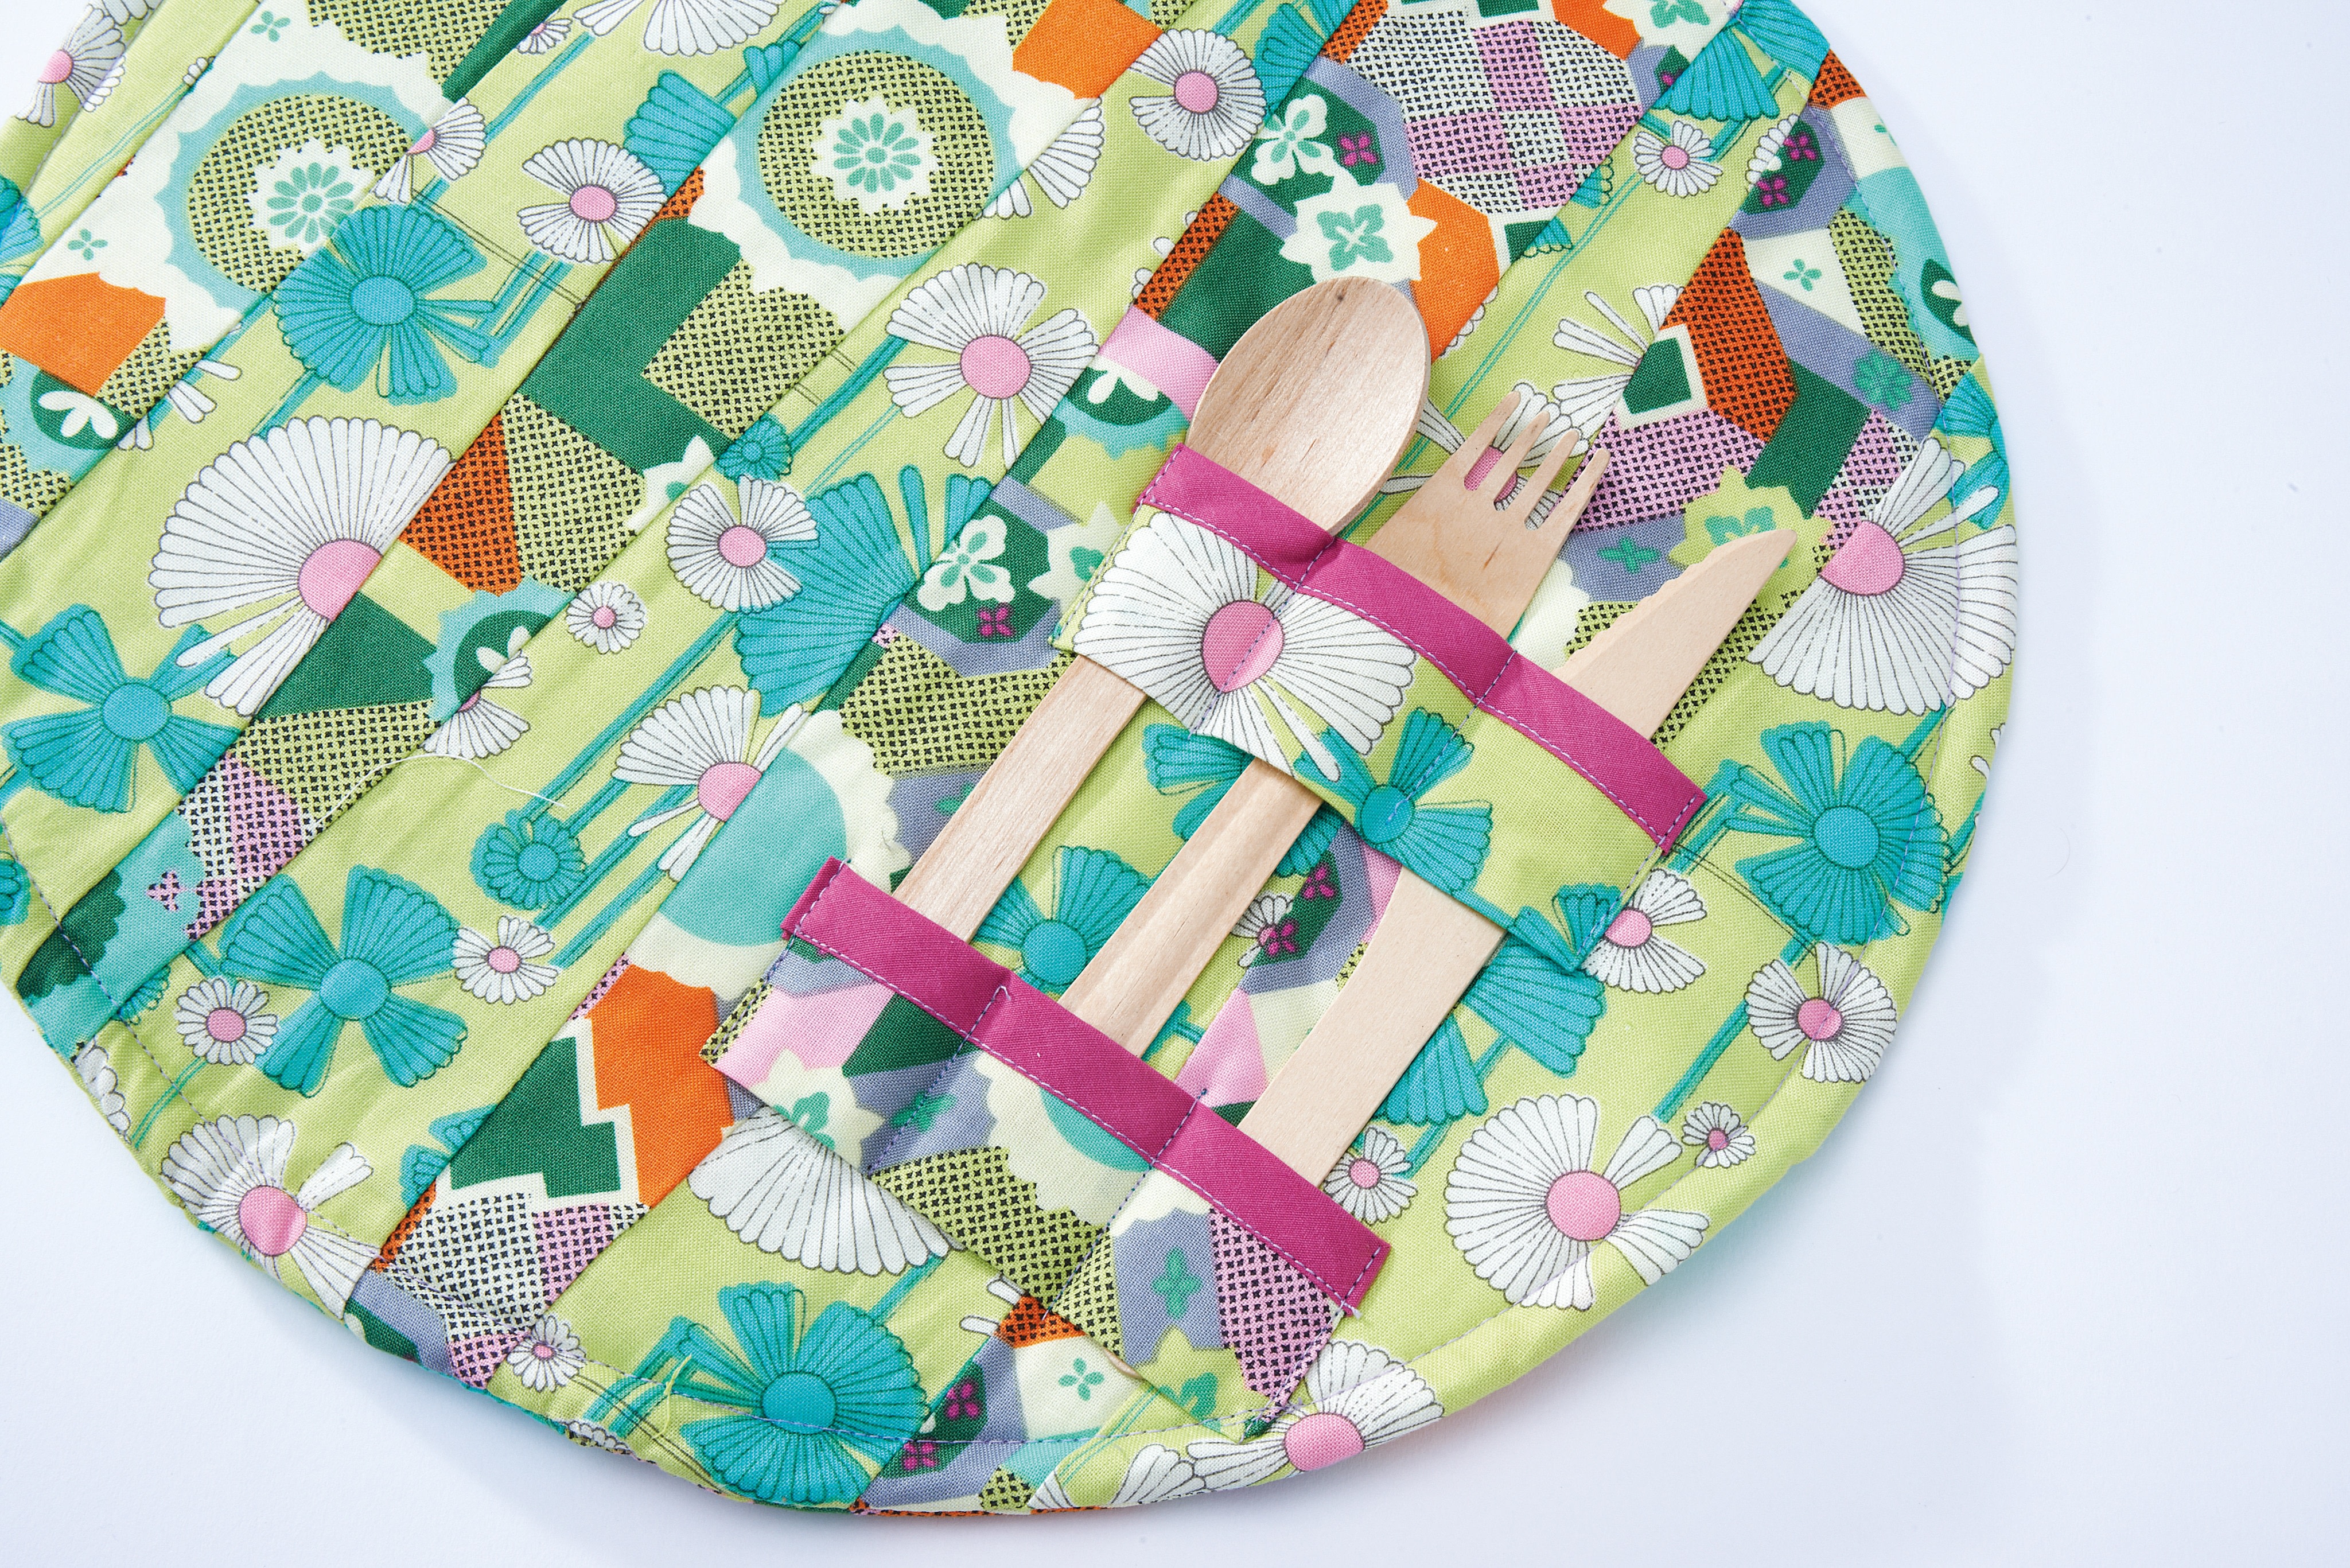
 Step 9
Lay a knife, fork and spoon to the right-hand side of the mat to determine the position of the strips. Start with the lower strip: place it over the cutlery, about 2.5cm (1in) from the bottom. Pin at the side edges and between each item of cutlery to create three channels. Repeat with the other strip at the top of the cutlery handles. Remove the cutlery and stitch down the pinned lines.
-
Step 10
Finish by stitching around the outside edge of the mat, 1cm (½in) from the edge and using a 3.5 stitch length.


