


About
Geeky Chic
I'll admit it: I'm addicted to my computer. I rely on it for so many things in my life, from drawing to gaming to communication. So when I'm not happily clacking away at my keyboard, I sometimes feel a bit out of my element.
But now, with this upcycled necklace, you too declare to the world that you are apart from your beloved!
As always, check my blog for more projects. Link at the top :)
Tags
-
 DinjaDONUT commented on Afk Necklace
18 May 09:12
DinjaDONUT commented on Afk Necklace
18 May 09:12
-
 WaterAngel added Afk Necklace to Jewelry
01 May 03:07
WaterAngel added Afk Necklace to Jewelry
01 May 03:07
-
 Fatbarbiee favorited Afk Necklace
02 Mar 22:54
Fatbarbiee favorited Afk Necklace
02 Mar 22:54
-
 LyricLoserCameron favorited Afk Necklace
30 Jan 02:45
LyricLoserCameron favorited Afk Necklace
30 Jan 02:45
-
 marilynmunster favorited Afk Necklace
30 Jun 15:27
marilynmunster favorited Afk Necklace
30 Jun 15:27
You Will Need
-
 Step 1
Start out with some keyboard keys, eye pins, and jump rings. Removing keys is relatively easy; just slip something thin and sturdy (I used the tip of my flat nosed pliers) under the edge of the key and apply leverage.
-
 Step 2
Take your eye pins and cut them down to size.
-
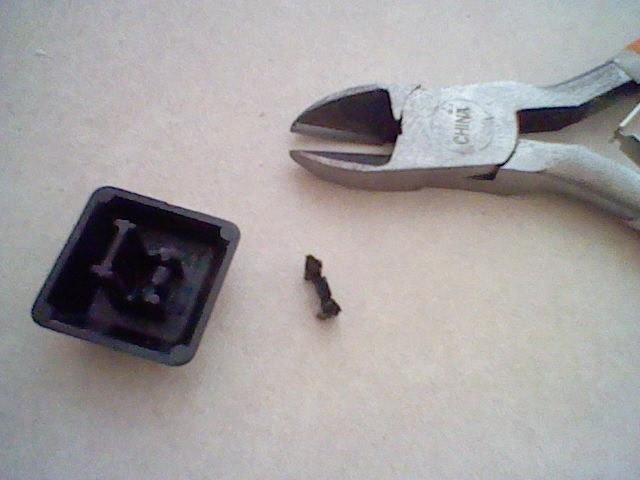
 Step 3
If you have these nubby things on the backs of your keys where they attached to the keyboard, clip them off with wire cutters.
-
 Step 4
Use a generous amount of hot glue to attach the eye pins, making sure to cover any sharp edges left from the wire cutters.
-
 Step 5
When that's dry, attach the jump rings...
-
 Step 6
...and string your keys onto waxed cord with some beads. I'm using faux pearls here.
-
 Step 7
Tie on some clasps with square knots. This is the time to make sure your necklace is the right length.
I usually apply 3-5 coats of clear nail polish onto my knots to make sure they don't come undone. -
 Step 8
If you had planned ahead, you could use crimps to keep your beads in place.
But if you're in the same boat as me, make sure the beads are centered and then knot the cord.


I love your idea!