About
Like the ones you can buy from the shops, only personal and you can fit more chocolate in!
There are so many different ways to count down to Christmas, and so many different types of advent calendars to make. Here is one idea for how to make a simple-ish box advent calendar. You don't have to fill it with chocolate - you could make some jewellery or little ornaments to put in - you are only limited by your imagination (and the size of the spaces!)
Tags
-
 nina.eriksen.90834 added Advent Calendar to Christmas
19 Sep 00:28
nina.eriksen.90834 added Advent Calendar to Christmas
19 Sep 00:28
-
nina.eriksen.90834 added Advent Calendar to Gift ideas
19 Sep 00:28
-
 Katrina P. favorited Advent Calendar
02 May 02:18
Katrina P. favorited Advent Calendar
02 May 02:18
-
 Pimke favorited Advent Calendar
21 Jan 10:25
Pimke favorited Advent Calendar
21 Jan 10:25
-
nina.eriksen.90834 added Advent Calendar to To-make
29 Nov 20:41
-
 artiTan published her project Advent Calendar
22 Nov 17:14
artiTan published her project Advent Calendar
22 Nov 17:14
-
 Step 1
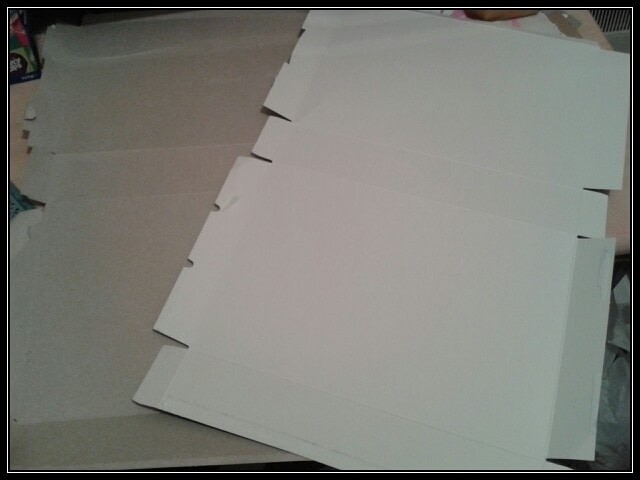
Open up both boxes at the joins so they are flat.
-
 Step 2
On the printed side of one of the boxes, you want to be marking out 24 boxes each on what was the front and back. As cereal boxes come in different sizes, so you will want to measure across and divide by 4, and measure the height to divide by 6.
TIP: To give yourself nicer numbers to divide, you may find it easier to leave a border around the outside. You do not need to fully mark out your border as long as you remember to consider it when making further measurements later. -
 Step 3
Choose which side you wish to be the front and mark your doors on. You can make your doors any size and shape within each of your 24 marked squares. Remember you need to be able to get the treats out so don't make them too small, and you want to make sure that you are leaving enough space between each door so the front remains sturdy when you start to open them. Obviously, straight lines are easier to cut, so keep that in mind when marking them out.
-
 Step 4
Carefully cut your doors with a craft knife ensuring to leave little gaps in your cuts so that the doors are not completely open, but make sure they will be openable. Also ensure that you are leaving a side uncut to be the 'hinge' of each door.
TIP: You will want to use the sharpest craft knife you have to make it neater - as you are cutting from the back, if you use a blunt knife it can push the card from behind and give you an untidy edge. -
Step 5
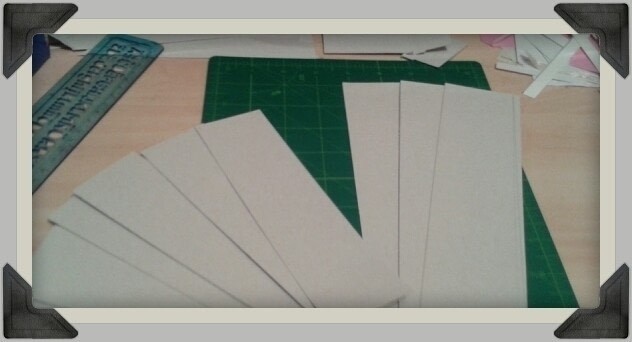
Take your second flattened box - you can work on the blank side of this for ease. This box is going to make the grid inside to make the little compartments. As it will follow the grid you marked out on the first box, this is why your boxes should be the same size. Cut off all the flaps and along either side of each fold. You should be left with completely flat pieces of card - these will be easier to measure and cut.
-
 Step 6
You need 5 pieces the same width and depth as the box you have been working on, and 3 pieces the same height and depth Grab your first box again for a sec and measure how deep it is going to be when closed. (the thinner bit between where you have cut doors and marked out squares - an average cereal box is about 5cm) Use this measurement to mark and cut out all 8 pieces. On the 3 longer ones though, you will need to add about half a centimetre for gluing later. E.g. If the box you are working on is 18cm x 30cm x 5cm, you want 5 pieces 18cm x 5cm and 3 pieces 30cm x 5.5cm.
-
 Step 7
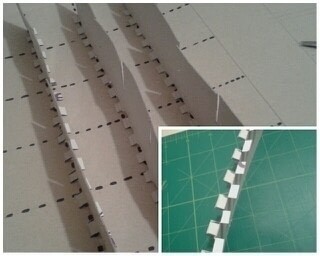
With your 3 longer pieces, make small cuts of half a centimetre every centimetre or so down one of the long edges.
TIP: It doesn't matter so much if the distance between the cuts is very uniform, but you will benefit from having the cuts the exact same size, so you could draw a line and cut to that or mark your scissors and line it up each cut. -
 Step 8
You now need to mark out on all 8 pieces where to cut them so they fit together (and then actually cut them). Use the same measurements as when you drew the grid on your first box, and make the cuts halfway down the card. You should be left with 5 cuts on each of the long ones (on the opposite side to the many little cuts), and 3 cuts on each of the smaller pieces.
TIP: When marking out, remember to allow for any borders you left when marking out the first box, and you can refer back to it before making any cuts to make sure they are all in line with your grid. -
 Step 9
Back to your 3 long pieces - fold out the little flaps created by your half centimetre cuts to alternating sides. Then glue them onto your first box along the 3 long lines marked out in your grid (not the side you cut your doors in) making sure that the 5 cuts on the top are lining up with your lines across.
-
Step 10
When the glue is dry (so they don’t slide around) slot in the remaining 5 pieces into the cuts on now secure spines. If the card is not very thick then you may want to add a bit of tape or extra card for sturdiness, as you don’t want all of your treats falling into the bottom.
-
 Step 11
Fill each space with treats. You can use anything that fits in the spaces and will fit through your doors - Other handmade items, jewellery, ornaments, decorations, chocolate… Just don't leave any spaces!
-
 Step 12
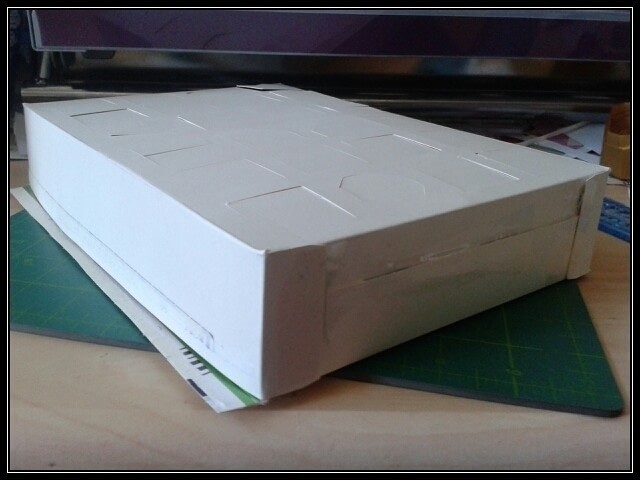
If you want to paint the insides of your doors so that you cannot see the print from the cereal box, then do this now. I personally do not mind and leave it how it is. Now everything's in and sturdy, your doors are cut and everything is how you'd like it - it's time to re-seal the box. You want to do this fairly carefully and flat so your treats don't fall out or into a different compartment. If you opened the box quite neatly, then you should just be able to glue the original flaps.
-
 Step 13
Now decorate! You need to number your doors, and you may want to draw round them or find some way to make them stand out, but other than that - it's up to you. Tinsel, glitter, ribbon, buttons, paper, anything you like. Anything that you have that is small enough and looks good! If you have a favourite trinket - don't be afraid to use it - you can always take it off again after Christmas. They can be as simple or as glitzy as you wish.
-
Step 14
Well done! You should now have a completely personal Advent Calendar ready to count down to Christmas (if my instructions were good enough).
Now you just need to find a place for it, or gift it to whoever you made it for. If you are worried about the treats falling around, you can always display it flat so they definitely wont move around.Thank you for reading my tutorial xx