

About
How to make a wonderful Advent Calendar to allow your children to countdown to Christmas…
Want to make your children a beautiful wooden Advent Calendar? Every day from the 1st December to Christmas Day, your children will rush to open the next door and find the sweet or little toy behind it. Simply take your Dremel Moto-Saw and Dremel 3000 and follow our step-by-step guide below!
Cutting list :
73 cms x 50 cms piece of 18mm MDF for the front of the Xmas tree
Two 45mm x 70 cms strips of 9mm MDF to cut:
· 25 45mm x 45mm 9mm MDF for the little advent calendar doors
· 73cms x 50cms piece of 3mm MDF for the backing board
· 8cm x 50cms piece of 9mm MDF for the strut
Difficulty rating : two/three stars – intermediate
You can check out more fantastic projects on the Dremel website.
Tags
-
 Frances G. favorited Advent Calendar
28 Apr 16:42
Frances G. favorited Advent Calendar
28 Apr 16:42
-
Larissa W. favorited Advent Calendar
12 Aug 05:39
-
 PJJazzyJess favorited Advent Calendar
26 Dec 20:34
PJJazzyJess favorited Advent Calendar
26 Dec 20:34
-
 mamibunny favorited Advent Calendar
07 Nov 16:52
mamibunny favorited Advent Calendar
07 Nov 16:52
-
 Anna S. favorited Advent Calendar
06 Nov 11:35
Anna S. favorited Advent Calendar
06 Nov 11:35
-
Alissa B. favorited Advent Calendar
05 Nov 23:23
-
 Ichigo M. favorited Advent Calendar
05 Nov 22:22
Ichigo M. favorited Advent Calendar
05 Nov 22:22
You Will Need
-
 Step 1
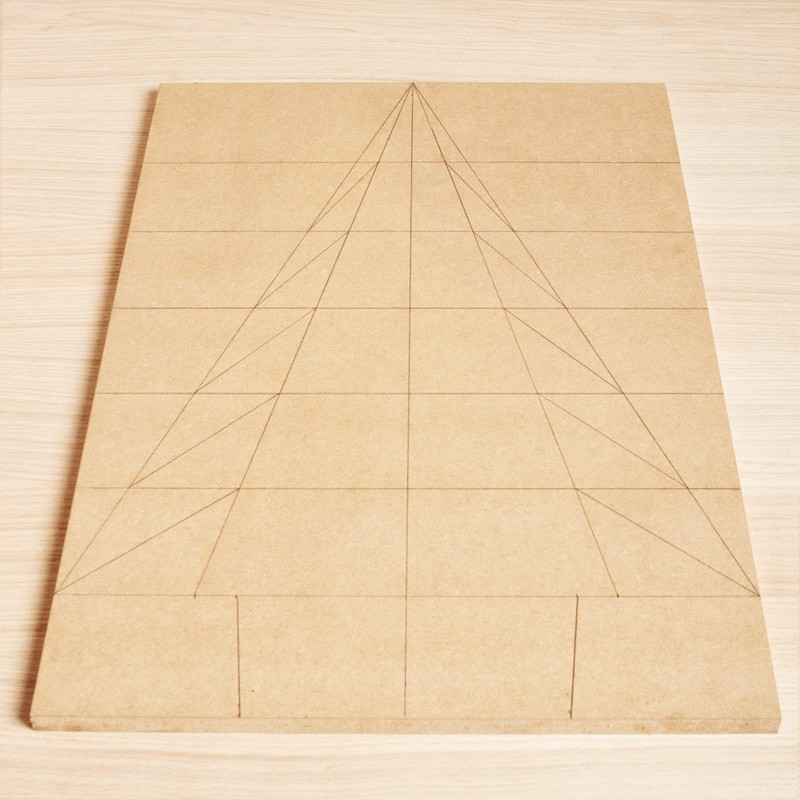
First go to your local DIY store and get the lengths of MDF cut for you as in the cutting list.
Then, draw a basic Xmas tree shape on your 73 cms high x 50 cms piece of MDF. Here’s how. Start by drawing a vertical line down the centre of the board and then measure and mark at each 10 centimetre point from the bottom to the top on the centre line. Go back to the bottom and this time make a mark 10 centimetres in from each edge. Now, follow the drawing as shown and make sure that your tree branches extend out to roughly the following measurements: 50cms at the bottom, 41.5 cms, 33.7 cms, 25.5 cms, 17.8cms, 9.8cms. -
 Step 2
Now that you have your Xmas tree drawn out on the MDF board, cut out the outline of the Xmas tree using your Dremel Moto-Saw and the fine wood cutting blade MS52. This will become the front of your advent calendar.
-
 Step 3
Once you’ve done that, use your cut out Xmas tree as a template for the backing board of your advent calendar. Do this by placing it on top of the 73cms x 50cms 3mm piece of MDF and draw around it. Cut it out using your Dremel Moto-Saw as before. Now you should have two Xmas tree shapes cut out.
-
 Step 4
Next, create the doors for your advent calendar. Using your Dremel Moto-Saw, cut your two 45mm x 70 cms strips of 9mm MDF into 25 45mm squares.
-
 Step 5
Place your cut out doors onto the 18mm Xmas tree shape board in the following configuration: from bottom to top – 3, 5, 3, 4, 3, 3, 2, 1, 1 – equally spaced apart. Then, draw around each door. When you’ve done this, draw a parallel line 2mm or 3mm inside the line you’ve just drawn onto the board. This will give you a plan for plunge cutting out the centre of each square to provide a cavity for the chocolate or sweet to be hidden behind each door.
-
 Step 6
To plunge cut out the centre of each square, use your Dremel 3000 and the Dremel Multipurpose Spiral Cutting Bit 561 to make an access hole and cut through to the part you will be removing. Now, pass the Dremel Moto-Saw and its fine wood blade through the cut you’ve made and cut one side. Continue in this manner until all four sides are cut and the piece ofwood falls out.
-
 Step 7
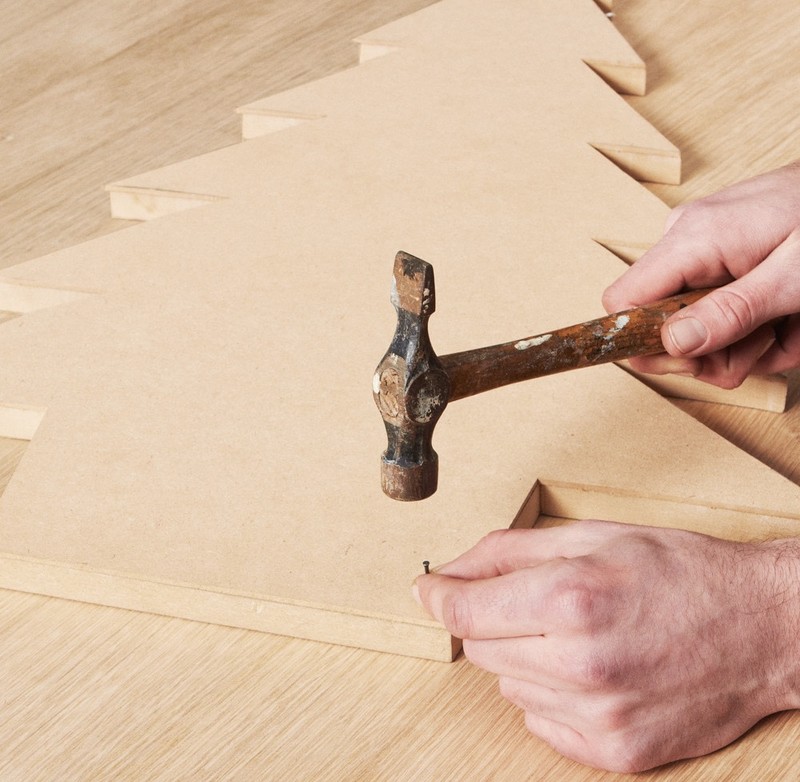
Take your Xmas tree shaped backing board in 3mm MDF and pin it to the 18mm MDF front board. Use a pin gun or hammer in panel pins around the edges and a few up the middle. Alternatively use PVA wood glue, apply an even pressure and allow to dry.
-
 Step 8
Now, fix your doors onto your advent calendar. First, screw a hinge onto the edge of each door using your precision screwdriver no 0. Then, using your Dremel 3000, drill a pilot hole for each screw using the Dremel Precision Drill Bit 1,2mm from the 628 set. Drive in the screws using the precision screwdriver. Then affix the other side of the hinge to the face of the advent calendar.
-
 Step 9
Finally, affix the 64mm brass butt hinge to one end of your piece of 50cms x 8cms 9mm MDF by drilling a pilot hole with the Dremel 2.0 Precision Drill Bit from the 628 set. Then by using screws and a precision screwdriver affix to the centre of the back of the advent calendar to make a strut. The strut should allow the advent calendar to stand up at roughly a 10 degree angle.
-
 Step 10
Prime and paint with decorative pattern.