


About
3-D Maiden, Mother, Crone Wall Plaque
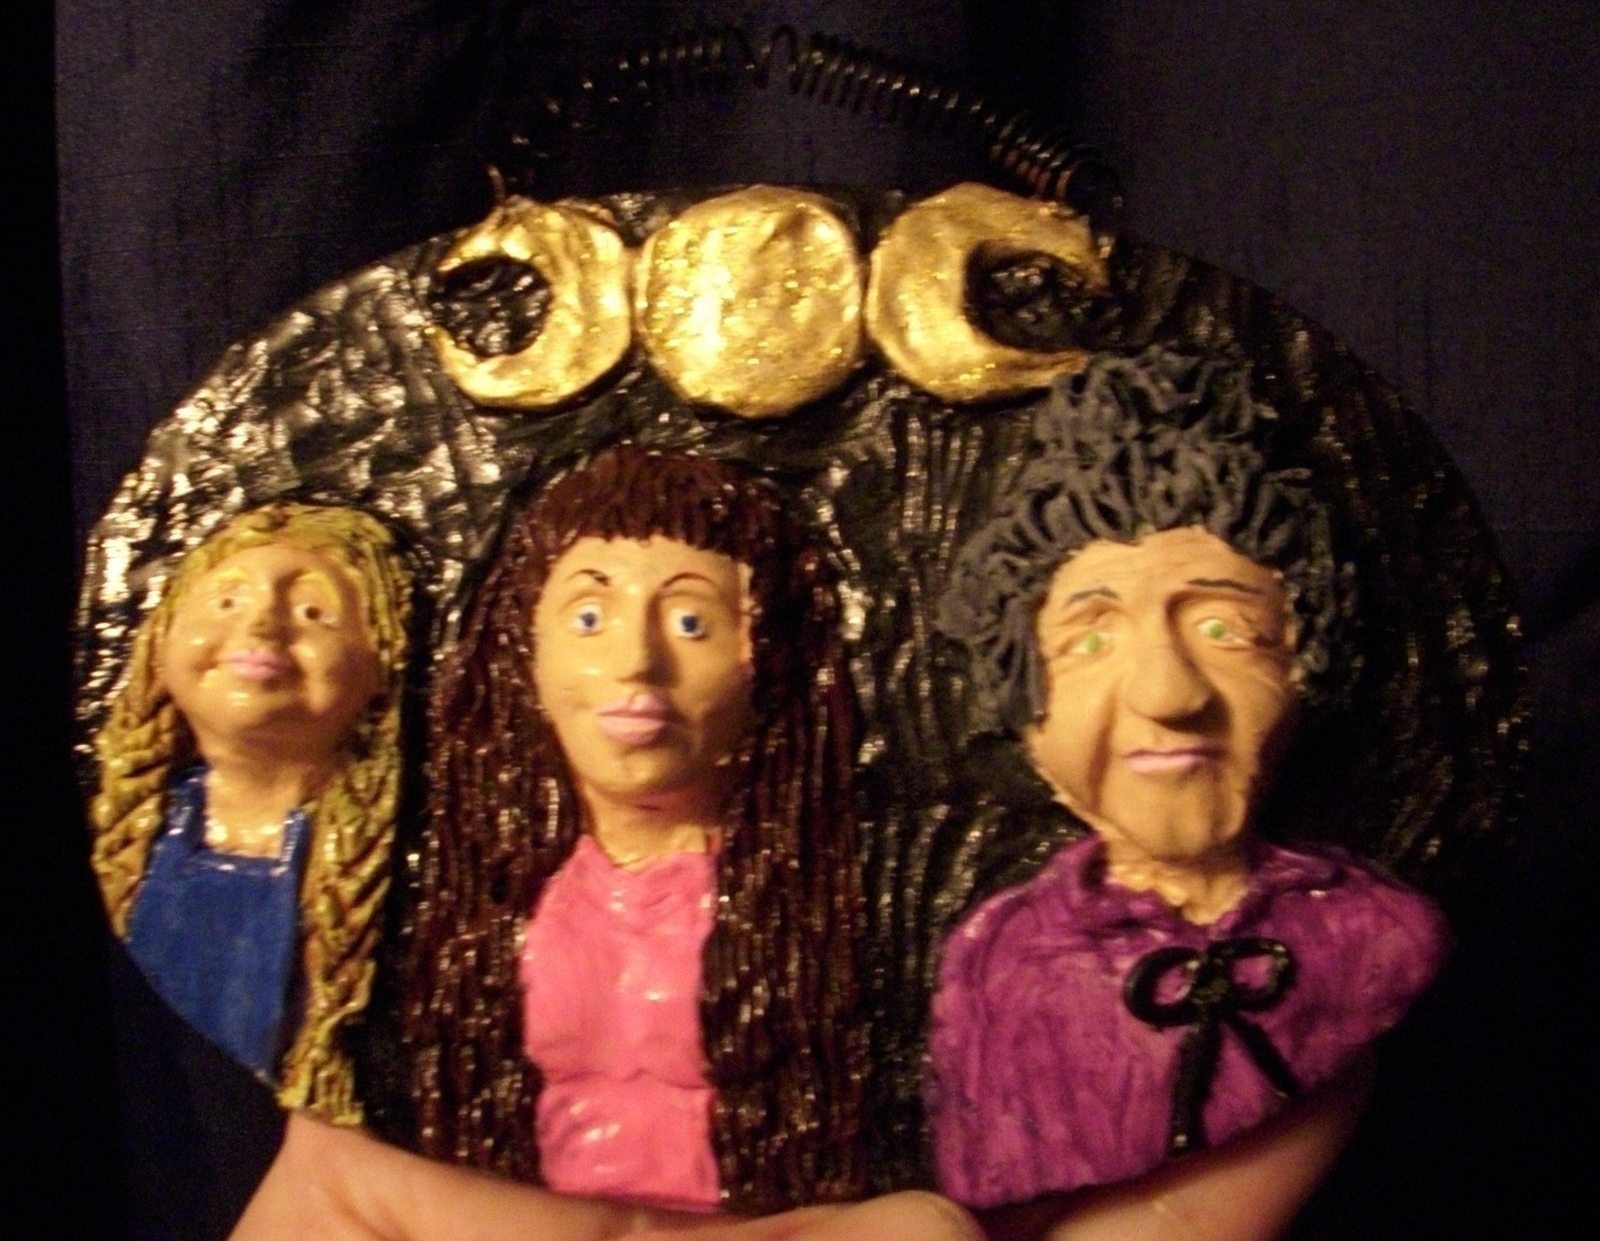
In pagan cultures, the "Triple Goddess" or "Triple Moon Goddess" is revered. This plaque is inspired from that. I decided to break it down into a modern day "Maiden, Mother, & Crone", which symbolizes the 3 main phases of the moon (waning, waxing, and full).
The time involved in this process was mostly the "sculpting" part, and then of course the baking and allowing all the coats of paint to dry. :)
I can't sculpt well, and sure as heck can't do faces, so I cheated and used face molds that I purchased at Michael's Craft Store in their sculpting section.
Tags
-
Step 1
I took a plain wooden plaque with a metal wire hanger attached and spray painted it black on both sides and around the edges. Allow paint to dry thoroughly.
-
Step 2
I smoothed sculpy across the front face of the plaque. I then used face molds for sculpy, which I purchased at Michael's Craft Store, to create the faces. I did 3 different ones to show the age difference between the three "facets".
-
Step 3
I placed the face I wanted in the middle in the relative center of the plaque. I then rolled a small amount of sculpy between my hands to create a small "tube" and draped it above and around the sides of the first "face", and used a sculpting tool to smooth the two pieces together, as well as to create the "hair" for the "mother".
-
Step 4
I repeated step 3 for the "maiden" figure, and the "crone" figure.
-
Step 5
I then molded and shaped the "clothing" pieces onto the plaque below each "face".
-
Step 6
I then created the moon phase shapes and added them to the plaque, gently using a sculpting tool to blend the shapes to the main plaque.
I then smoothed the surrounding "flat" surfaces of the plaque (non-sculpted area) as best I could. I then ran a butter knife around the edge to clean up any excess clay that had gone past the edge.
-
Step 7
When finished sculpting, place plaque on a cookie sheet into a pre-heated oven (at 275 degrees) and bake for about 15 minutes.
When finished, remove from the oven and allow to cool completely.
-
Step 8
Paint the plaque as desired. What I did with the "hair" of each face, was I determined what "hair color" I wanted each to have, then blended colors together to create a much DARKER color. I used this to thoroughly paint the "hair", making sure to get all the textures nooks and crannies. After allowing to dry, I then used the lighter color to "fan" lightly across to give a 2-tone color to "hair", which provides more "depth".
-
Step 9
After painting the moon phases in gold, and allowing to dry, I then re-covered the gold shapes with gold glitter glue. Allow to dry completely.
When finished painting, allow to dry thoroughly. Add a light coat of clear spray paint to seal the plaque.


Such a great idea i'm gonna do this soon.
Blessed Be!
)O(