
Features


 By
Pam A.
By
Pam A.

Learn how-to stitch a running stitch in #TechniqueTuesday with Pam from Pam Ash Designs and then make an Easter card.
-
 Step 1
Let's start by using your sewing pin to poke holes in a straight line in the piece of practice paper. While you could use a ruler and pencil to make a straight line and measure the space between the holes. I prefer the slightly imperfect home made look and just estimated. They are probably around 1/4 inch apart.
-
 Step 2
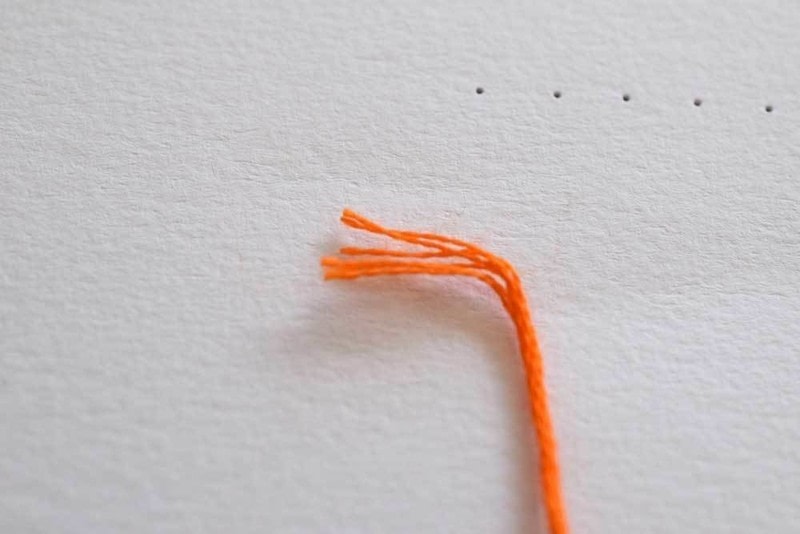
Cut a piece of embroidery floss that is about 18 inches long. If you have not worked with embroidery floss before, it comes bunched together as six strands. For this example, I used all six. You can split and separate them for finer work.
-
 Step 3
Thread one end of the piece of floss you cut through the eye of the needle.
-
 Step 4
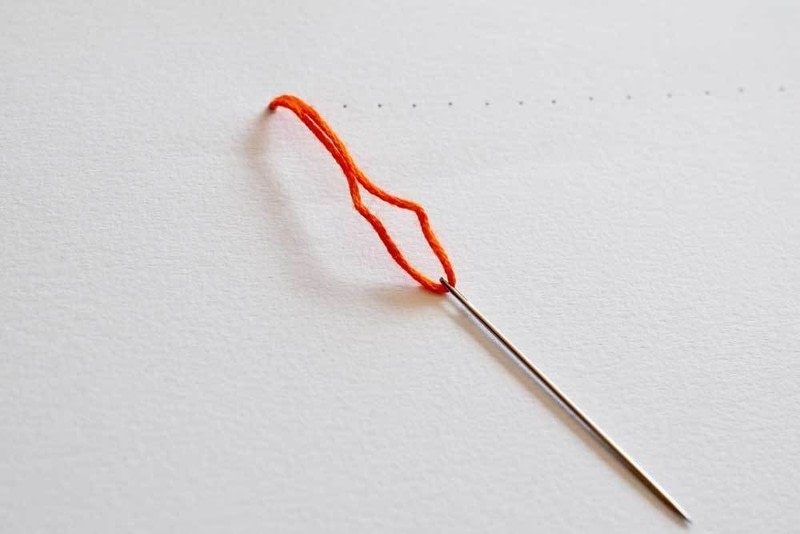
Make a double knot on the other end of the floss. You make a double knot by tying a knot, then making another knot directly on top of the first knot. The goal is to make the knot thick enough so that it will not pull through the paper.
-
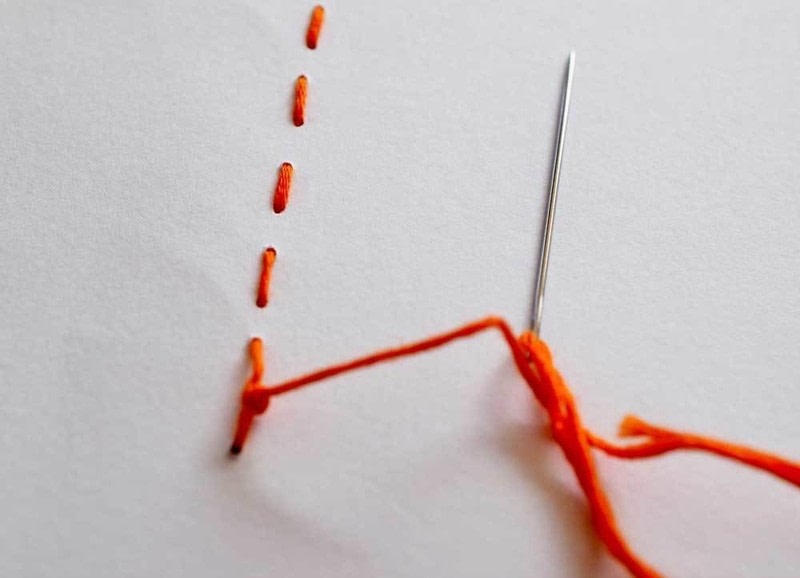
 Step 5
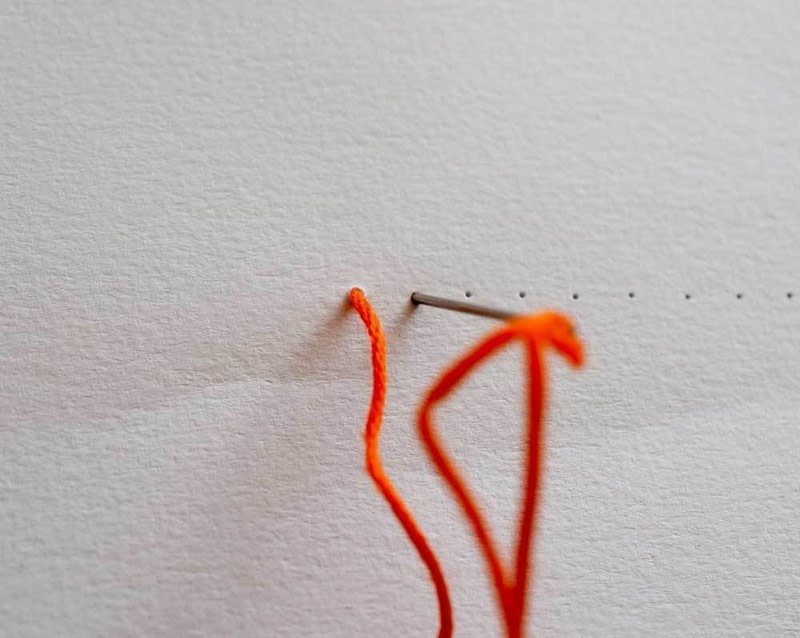
Now you want to take your needle and push it through the first hole from the back of the paper to the front and pull all the way through until the knot catches at the back.
-
 Step 6
Keep pulling!
-
 Step 7
If you turn the paper around, this is what the knot in the back looks like.
-
 Step 8
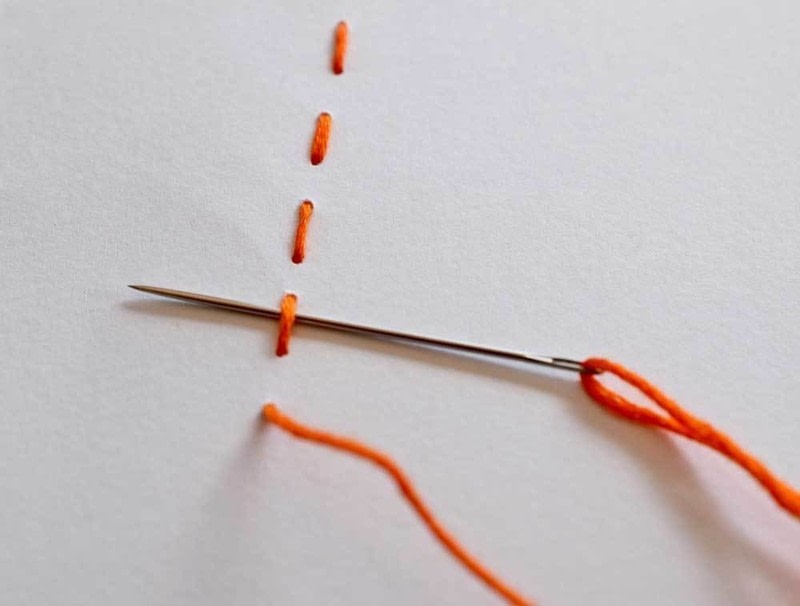
Once you have pulled the needle all the way through, push it down into the hole directly to the right of the one it just came up through.
-
 Step 9
Pull it all the way through and you have your very first stitch.
Now you will repeat the process. Come from the back of the paper and bring the needle up through the hole next to the one the needle just went down in. -
 Step 10
This is what is called the running stitch!
-
 Step 11
Your last stitch should be into the back of the paper. To finish, you will secure the end by making a knot. Slide the needle under one of the stitches you already made. When you pull it through, you will notice a little loop has formed. Put the needle through the loop and complete your knot. I like to make another knot to tighten it.
-
 Step 12
Once you have completed your knot, snip the remainder with your embroidery scissors
-
 Step 13
Snip, snip and there you go! You can now make the running stitch! Congratulations!


Got the hang of this technique?
Put your new skill to the test with this tutorial:
Is there a certain technique you'd love to learn or one that you could teach us? Send us a message!
Share
Follow


