
Features


 By
Pam A.
By
Pam A.

Learn how-to use stippling to create value in #TechniqueTuesday with Pam from Pam Ash Designs.
-
 Step 1
Let's start out with a simple explanation about stippling. This is a technique in which you use a pen to make small dots to create value. Stippling can also include making lines and but for this technique we are only going to use dots. A broad term for this is called pointillism. Pointillism was made famous by George Seurat who used overlapping dots of primary colors to create an optical illusion. The overlapping colors blended from far away to create an image. In this example we will just be working with black and white to create value. Value is simply the lightness or darkness of a color. It is what makes your image have dimension and is very important in both drawing and painting.
-
 Step 2
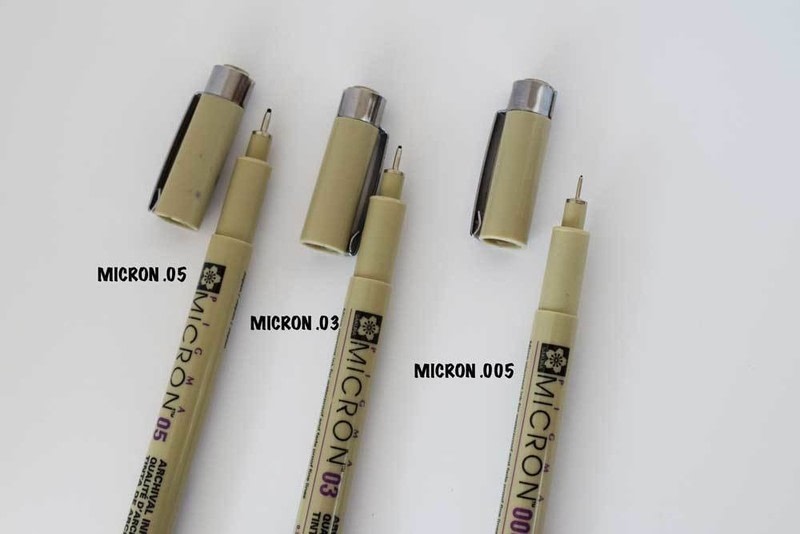
You will need pen, paper, a pencil and an eraser for this project. I like to use micron pens. They are cost effective to start out and also waterproof in case you are planning to use watercolor on top of them. They come in different colors and sizes. For this example I used the color black in three different sizes .03, .05. and .005. One thing to be careful of when using the micron pen is to be gentle with the tips as you can easily ruin them by pressing too hard. You will need some paper on which to draw. I recommend Bristol for this project because it is very smooth and does not bleed. I have also used 90lb mixed media paper, and even drawing paper. You are just looking for untextured paper. A pencil is optional for sketching. I love a mechanical pencil for this job.
-
 Step 3
Some other pens to consider are the copic multiliner. This is a really nice mid priced pen. It is a little more than the microns but there are replaceable nibs and they last a really long time. Lastly, I thought I would mention the rapidograph pen. It is what a lot of professionals use. I could not find it locally and it is quite expensive compared to the micron and copic. It had a replaceable ink cartridge, which is nice but the ink was not waterproof in the one I purchased. There are many more wonderful pens. These are just the ones I have tried out and had success with. Many stores have sample pens set out for you to try before buying so you can experiment.
-
 Step 4
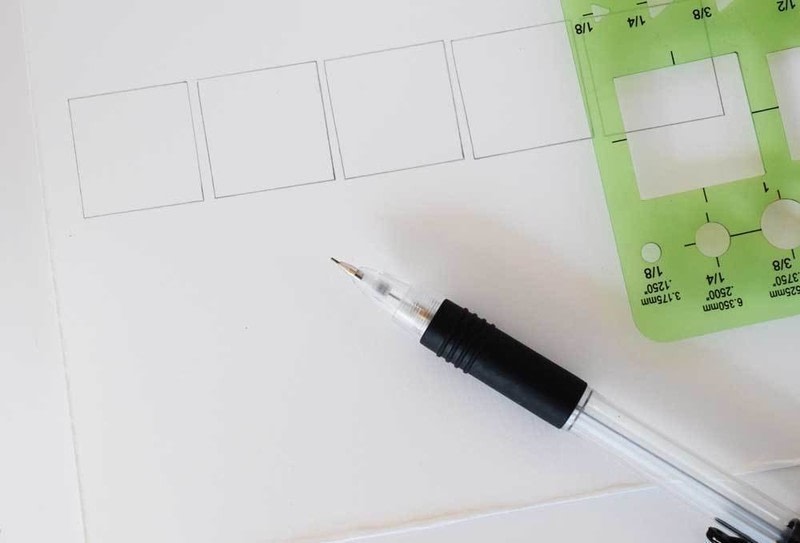
Start by creating some small squares. I used a stencil and my mechanical pencil to create five squares next to each other.
-
 Step 5
Here is the fun part! Start with your finest lined marker and make some dots spread pretty far apart from one another. That will represent your lightest value. In the next square make your dots closer to one another.
-
 Step 6
You can stay with the same marker for the whole exercise just making the dots closer together in each box. In this example, I switched to a bigger tipped marker for the middle box then an even bigger tip for the last two boxes. I labeled them to show you the difference. You have just created a value chart. You can use this as a reference tool the same way you would use a paint chart.
-
 Step 7
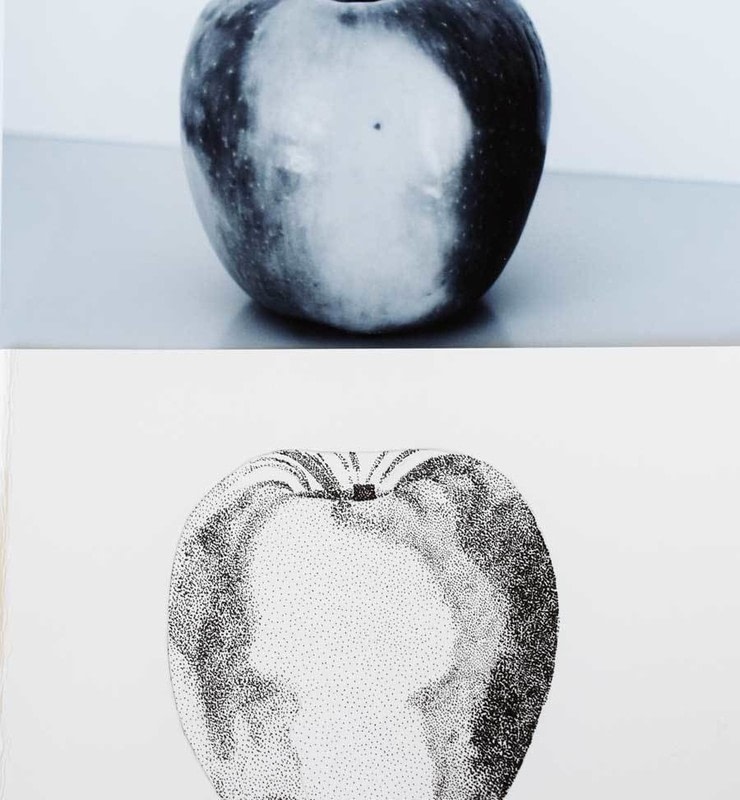
Now let's put your new skill to work! Start by getting a reference photo. I chose this apple because it had nice color variation to it. Your goal is to make a light pencil sketch. You can do this by sight or you may tape your photo onto a sunny window and tape your drawing paper over it to trace the shape (If you choose to trace you may want to consider a 90lb mixed media paper that would be easy to see through. The bristol is quite thick.
-
 Step 8
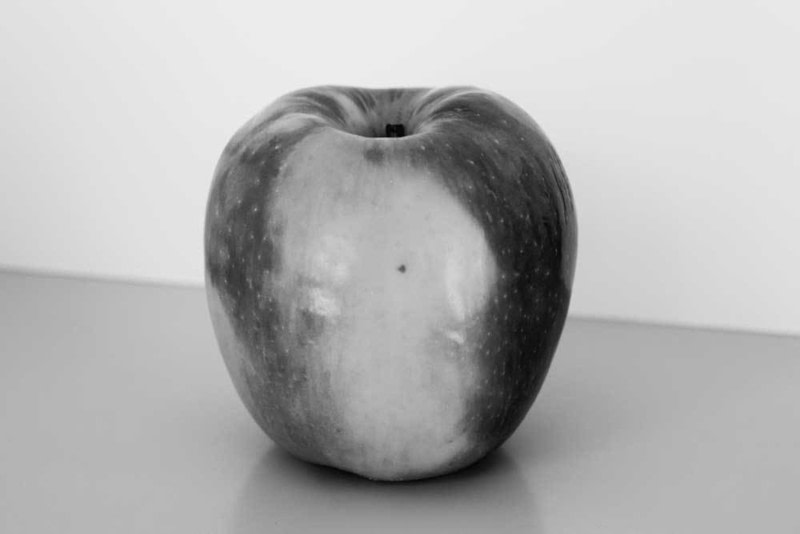
After making a very light sketch of the outline, you may block off some of the darker areas. There are two great tips for seeing value. The first is to squint your eyes. I know it sounds silly but it works. It can really help you discern the darker values. Another great tip is to print your reference picture in black and white.
-
 Step 9
I used some photo editing to 'up' the contrast to help further. This is a great way of helping to better see and understand value and makes a really great reference guide to use your new technique.
-
 Step 10
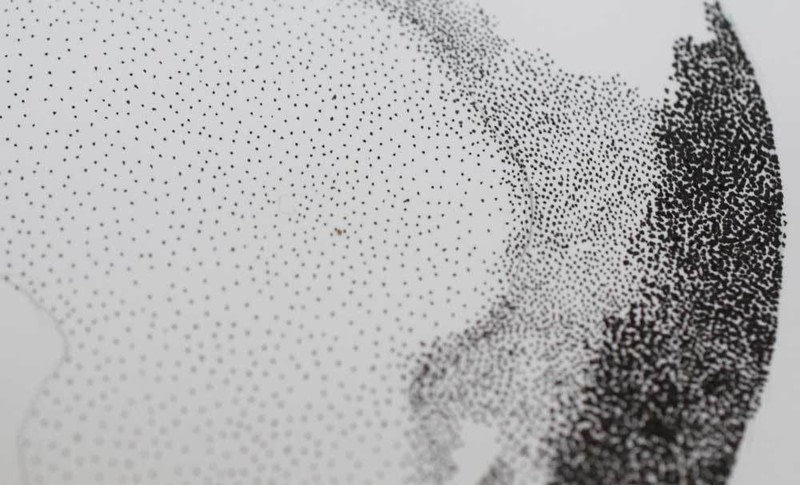
Now using your black and white reference photo and/or your value chart, locate the darkest dark. The lightest light or darkest dark is a great way to start so you will have that as a reference to compare and contrast to. I've identified the stem first and filled that with my darkest value.
-
 Step 11
In transition areas, try to do some overlapping to make the dots blend for a more natural look.
-
 Step 12
Keep using your reference. It can help to walk away and come back to get a new perspective. Another great way of getting a new perspective is to take a picture. Sometimes you notice things in a picture that you don't see in person.
-
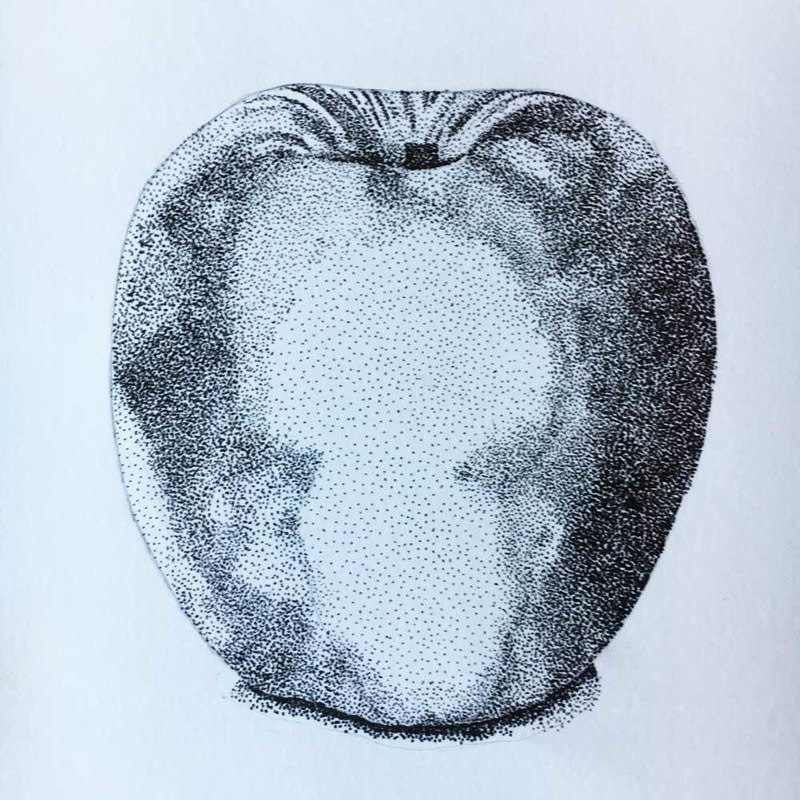
 Step 13
That's all there is to it! While it can be a time consuming technique, it is quite forgiving and can also be very relaxing, much like adult coloring. Put on your favorite music or a great podcast and take your time. It is a great way to learn value and at the end you have an elegant piece to impress your friends.


Got the hang of this technique?
Put your new skill to the test with this tutorial:
Is there a certain technique you'd love to learn or one that you could teach us? Send us a message!
Share
Follow


