

About
Sew a zippered / piped pillow with Kreatelier, in Providence, Rhode Island.
NOTE: Most home décor fabrics come 54”-60” wide (selvage to selvage); meaning if you were to make a standard 18”x18” throw pillow, you would only need between 1⁄2 to 3⁄4 of a yard at most, not including piping. For piping, you only need a 1⁄4 of a yard of coordinating fabric at most.
-
 Beth E. added Zippered/Piped Pillow Tutorial to You've Got Mail Inspired Room
24 Feb 22:39
Beth E. added Zippered/Piped Pillow Tutorial to You've Got Mail Inspired Room
24 Feb 22:39
-
 Shop Showcase published her project Zippered/Piped Pillow Tutorial
09 Oct 06:00
Shop Showcase published her project Zippered/Piped Pillow Tutorial
09 Oct 06:00
You Will Need
-
 Step 1
So you’ve measured your pillow top and know how much fabric you will need.
First things first, cut your strips for the piping. Fabric cut on the bias (diagonal to the straight weave of the fabric) has stretch or give to it, allowing it to lay smoothly when sewn around curves or corners. Tip: When you cut striped fabric on the bias, it gives you a neat candy cane stripe.You will likely need more than one strip to make up the length you need to go around your pillow. Once you have all the strips cut, sew them together, but not end to end.
-
 Step 2
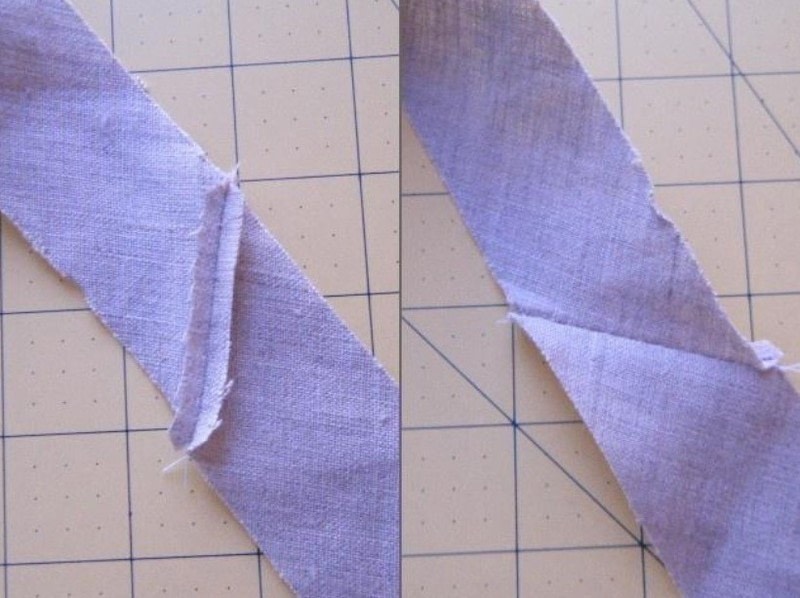
Lay your strips perpendicular to each other and sew along a 45 degree angle (right sides together), as shown in purple line above. These diagonal seams will be less bulky for sewing and will be less detectable to the eye in your completed project.
-
 Step 3
Begin stitching a couple inches from the folded end. With the zipper foot attached, cozy right up next to the cording and stitch away.
-
 Step 4
Trim the seam to 1/4′′ and press open.
-
 Step 5
On one short end, turn under and press about an inch. Fold the cording inside the fabric, the end of the cording about an inch away from the folded end. Continue to fold the fabric around the cording, placing pins every couple of inches. You don’t have to go crazy with pins, but having the cording secured in the fabric will make the sewing part go much faster.
-
 Step 6
Before you know it, you’ll have your contrast piping!
-
 Step 7
Now attaching it on the pillow top:
Begin pinning the piping to your pillow top (say that three times fast), leaving the folded end free about 1”. Pin all the way around.
Begin stitching where you started pinning, remember, leaving the folded end free about 1” and stitch as close as you can to that cording. -
 Step 8
At the corners, clip the seam allowance of the piping. Look...smooth corners (pic on left)! This is the result of bias cut fabric.
-
 Step 9
Cutting straight grain strips for piping results in wrinkled corners (right pic)..booo!
-
 Step 10
When you are a few inches away from the beginning, line up the end with the beginning and clip the end even with the cording (less bulk). Place the end inside the beginning you left free; folding back over the piping and finish stitching it down.
-
 Step 11
See, nicely lined up. Go ahead, admire your piped pillow top for a moment!
-
 Step 12
Now inserting the zipper (dun...dun...dun!!) No worries...easy peasy!:
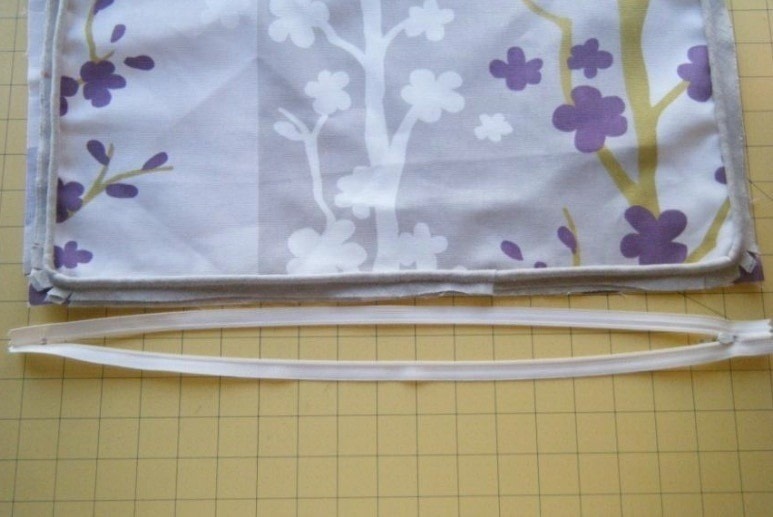
Zipper length should be a maximum 2” shorter than pillow, preferably as long or longer than pillow bottom, we use a 20” zipper for a finished 18”x18” pillow.
Open Zipper the full length: -
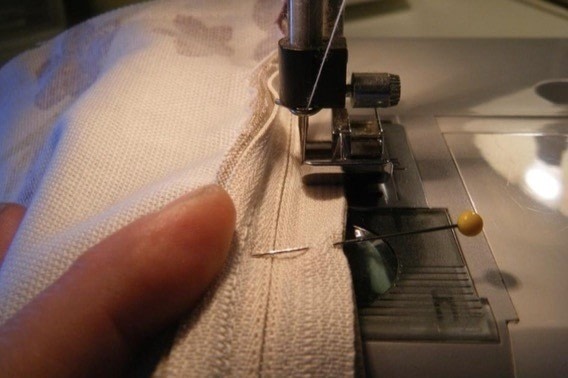
 Step 13
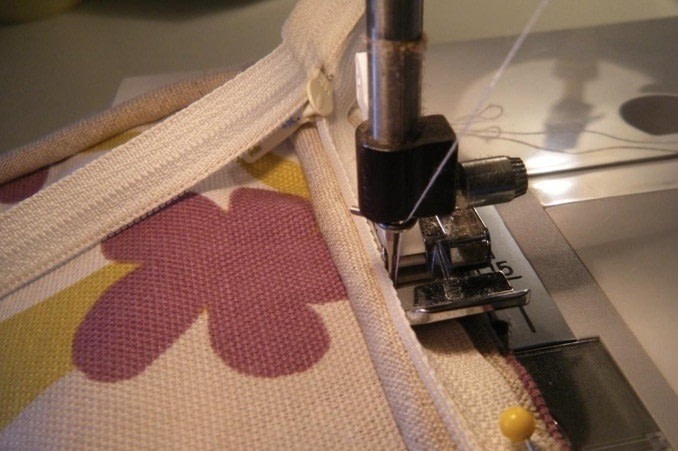
Place zipper teeth next to piping/welt cord UPSIDE DOWN, zipper pull should be facing piping & zipper tape should line up with selvage edge of pillow. Stitch zipper to fabric with a stay stitch:
-
 Step 14
Backstitch at the beginning and end of zipper length:
-
 Step 15
...
-
 Step 16
Close the zipper, this will help match the side edges of the pillow
-
 Step 17
With right sides together pin zipper in place at the bottom of the pillow back matching outside edges of the pillow. (Make sure the fabric’s prints are facing the same direction; it’s easy to overlook this when all the sides are the exact same size)
-
 Step 18
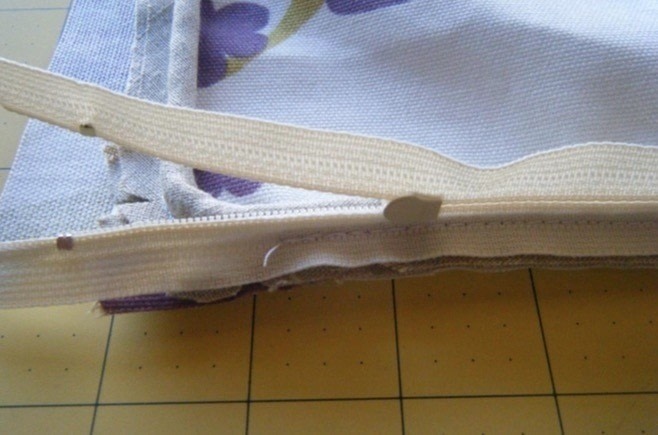
Stitch the zipper in place with the tape of zipper lined up with the selvage bottom edge of the fabric back. NOTE: you can open the zipper at this point to sew a straight line down the free side of the zipper, but not necessary if you just go slow, careful not to sew over the zipper teeth.
-
 Step 19
Open the two flaps to check your work, making sure you didn’t sew over any zipper teeth. If you opened the zipper in the previous step, you now need to close it partially to sew the two panels together (leaving a space zipped open allows you NOT to sew the pillowcase permanently shut):
-
 Step 20
If all sides line up and zipper is intact, now you are ready to close the pillow at the zipper ends:
Lay pillow with piping facing up (so you can feel it as you go along it). Start at the slightly open end of the zipper and stitch around the right/outside of the piping on all three sides meeting up to the other side of the zipper. Be sure to back stitch these seams at both zipper points.
-
 Step 21
Serge or Zig-zig stitch both edges of the zipper tape and the three sides of the pillow for a clean finished look on the inside:
-
 Step 22
Trim the zipper length if it exceeds the sides of the pillow, turn right side out, insert your pillow form (poke out those corners) and ta-da!
-
 Step 23
You’re done!