About
An easy to make zip case
The finished item makes either a great pencil case, cosmetic bag or zip case for other small items. Its perfect as a gift too.
-
 Sarah Sylvia S. favorited Zip Pencil Case
25 Jul 03:28
Sarah Sylvia S. favorited Zip Pencil Case
25 Jul 03:28
-
 Conner W. added Zip Pencil Case to Office/school supplies
06 Feb 18:55
Conner W. added Zip Pencil Case to Office/school supplies
06 Feb 18:55
-
Conner W. added Zip Pencil Case to gift ideas
26 Jul 16:26
-
Conner W. added Zip Pencil Case to craft ideas
26 Jul 16:26
-
Conner W. added Zip Pencil Case to fashion
26 Jul 16:25
-
 dommie added Zip Pencil Case to gonna do this
05 Apr 18:03
dommie added Zip Pencil Case to gonna do this
05 Apr 18:03
You Will Need
-
 Step 1
Cut out the 2 pattern pieces from the provided pattern.
-
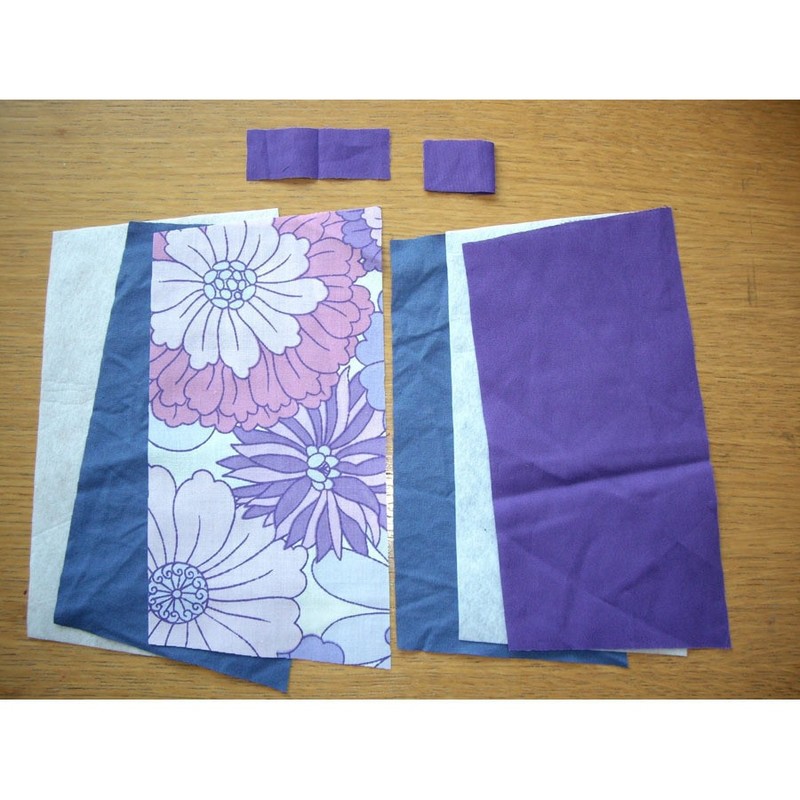
 Step 2
From the pencil case pattern pieces cut a total of 6 pieces of fabric - 2 pieces of fabric for the front and back (i’ve used two different fabrics one patterned and one plain for contrasning effect); 2 of the lining fabric; and 2 of the interfacing. I cut 3 pieces at same time - so the 3 pieces that form the front section and 3 pieces that form the back section.
From the zip sides pattern piece cut 2 pieces from your main outer fabric . I have used the back outer plain purple fabric.
The 2 pieces need to be folded in half so they’re doubled over.Once all the pieces cut you’ll end up with 8 pieces in total (see photo).
-
 Step 3
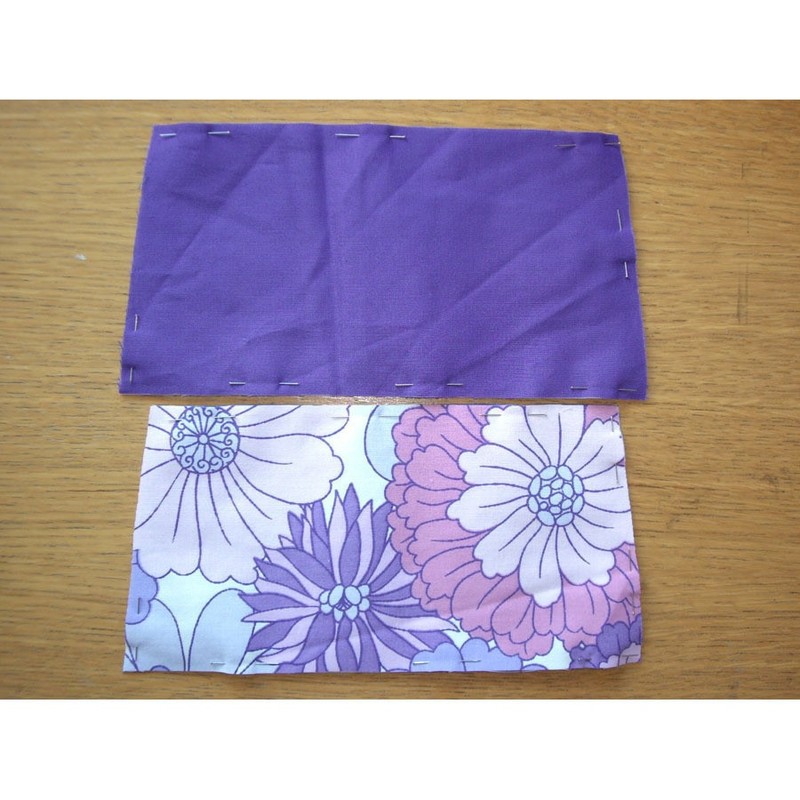
Pin together front pieces of fabric with interfacing sandwiched between outer fabric (which is right side up) and the plain lining fabric. Then do the same with the 3 back pieces so interfacing is sandwiched between outer back material and lining.
-
 Step 4
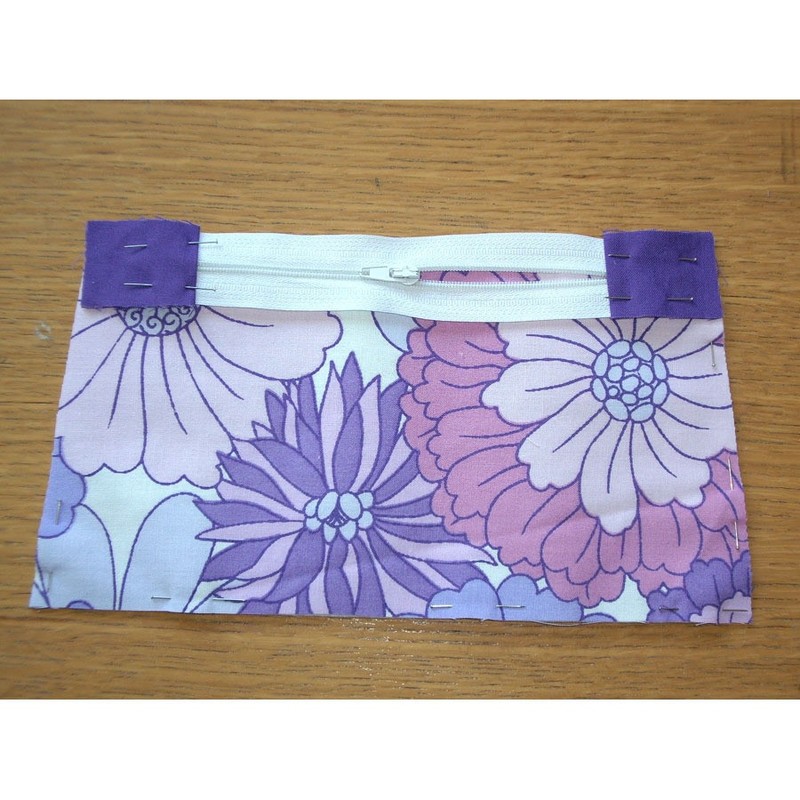
Using the folded zip side pieces place these on either end of zip so the folded cleaner edges face into the zip. When you do this you use the top of the main case section to ensure that the zip with side pieces attached is the same length as the top of the case, i.e. where top of case is 22cm the zip with attached sides is also 22cm.
Using these side pieces will give you a nice tidy finish at end.
Pin the sides to zip. See photo.Tip: trim the zip, so metal end is cut off. This will ensures it will not get in the way when you sew the sides and will mean the top of case is flat and nice and even.
-
 Step 5
Pin the zip and attached sides along top edge of font section of case. Make sure the zip is pinned with the wrong side facing up as seen in photo.
-
 Step 6
This is a tricky bit. Do the same as previous step but instead with the back pieces of fabric, so zip is pinned along top edge of back section. Once done you will end up with the front and back sections with the lining side facing up and the two main case sections (front and back) mirroring each other with zip pinned in the middle wrong side facing up.
-
 Step 7
At this stage turn the fabric over just so you check if everything is correct and you can see how the sections have now come together. You should see everything with the right sides facing up see photo for reference.
-
 Step 8
If everything is as it should be then turn back over so wrong sides up.
Roughly sew the zip to the back and front in place of the pins as this will make it much easier to sew on the machine. Remove pins once the zip has been temporarily sewn into place. -
 Step 9
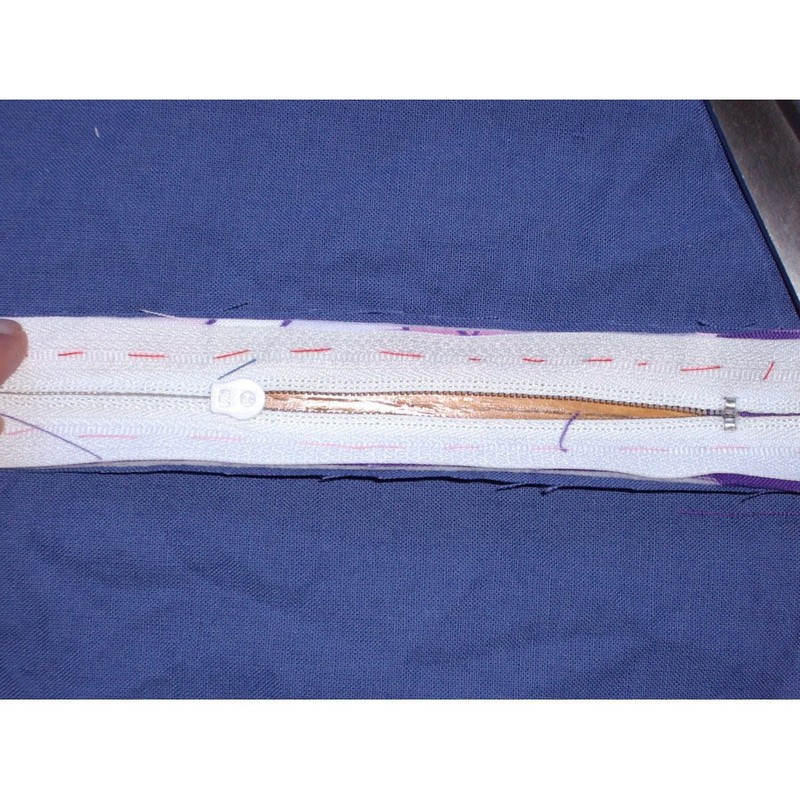
Use the zipper foot on the sewing machine and sew zip to the front and back sections - 1cm from zip outer edge as illustrated in photo.
If you have pinking shears use these to trim untidy edges of fabric under the zip for cleaner finish and to help stop fraying. -
 Step 10
The fun bit. You can of course leave your case plain, but i have embelished mine with my own Russian Doll design. I’ve cut out my design and sewn to the front of case. You could make your own motif or embroidered design to add interest to the front of your case. Make sue the design is at least 2 cm from bottom edge and sides so that you leave space when sewing the case together.
-
 Step 11
Pin together the front and back sections along sides and bottom edge. The outer fabric of case faces inward so you will see lining side up use photo for reference.
Make sure when you do this the zip is folded downward towards bottom of case.
Once pinned machine sew along sides and bottom 1cm from edge. Again if you have pinking shears trim untidy sides.Tip: Clip corner edges diagonally so that when the case is turned right way there is no excess fabric at inside corners so you’ll have a flatter finish.
-
 Step 12
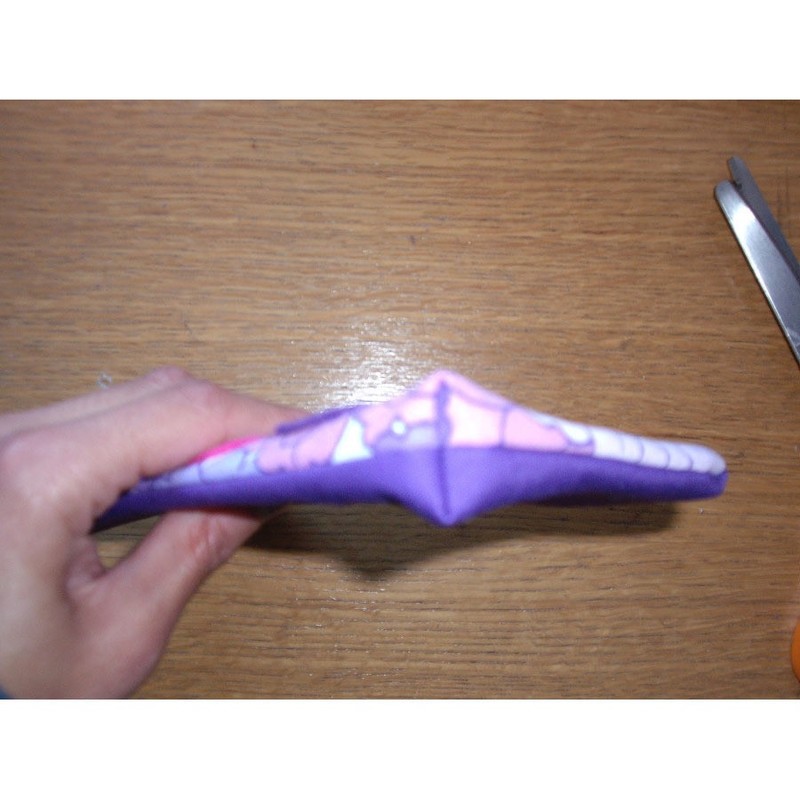
Now you’re almost done but to make your case more 3 dimensional and to give a little bit more space inside your case, we’re going to square the bottom corners.
Flatten the corner of 1 side of your case so it forms a triangle at corner and when you look inside the side and bottom seam matches up as shown in photo. -
 Step 13
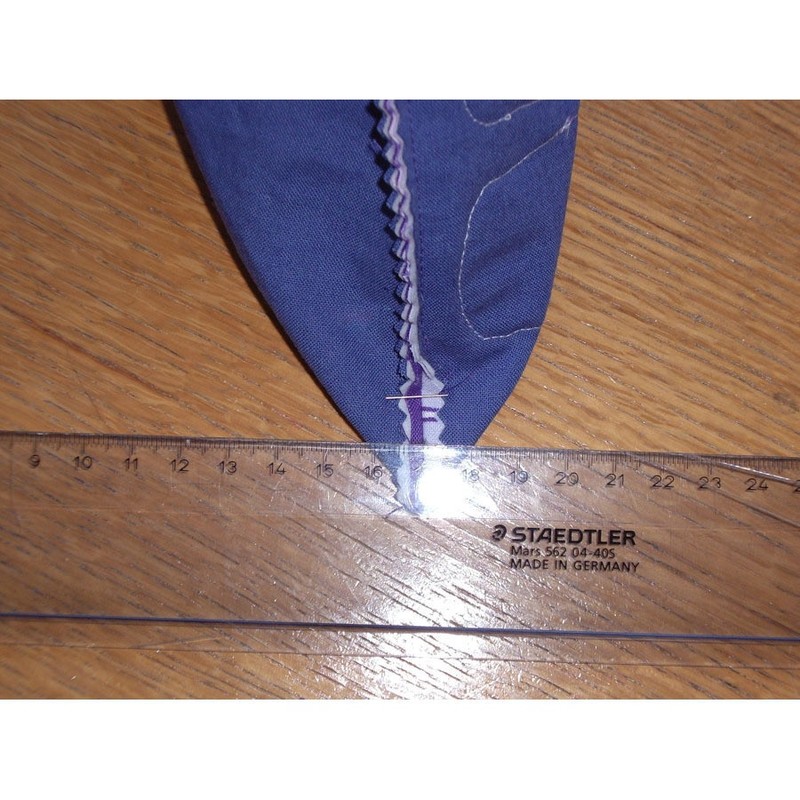
Once you have checked these match pin together so it holds in place. Take a ruler and mark 1.5cm from the very point of corner, then draw a line across the mark using ruler so you have a small marked off triangle at corner, see photo 16 for reference.
Do the same on other side of case. -
 Step 14
Machine sew along your penciled line mark on both sides as shown in photo.
Clip the edges using pinking shears if possible.
-
 Step 15
Well all you need to do now is turn inside out. You can see squared corners illustrated in Photo.
-
 Step 16
Remove your temporary sewing and there you have it - you’re finished pencil case.